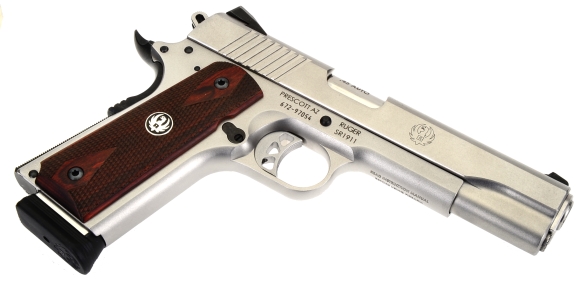
In “A 1911 Trigger Clean Up…. In a Couple of Parts“, the SR1911 factory sear, disconnector, hammer, and sear spring were reworked and the main spring was changed. The result was a pretty spiffy and very crisp 3 3/4 lb pull with no creep and set with no noticeable overtravel. Even better, when the MIM dust settled and the pistol was reassembled, it passed a function and safety check out with flying colors. I could have left well enough alone, but I wanted to improve enhanced trigger function longevity by replacing MIM parts with hardened, tool steel pieces.
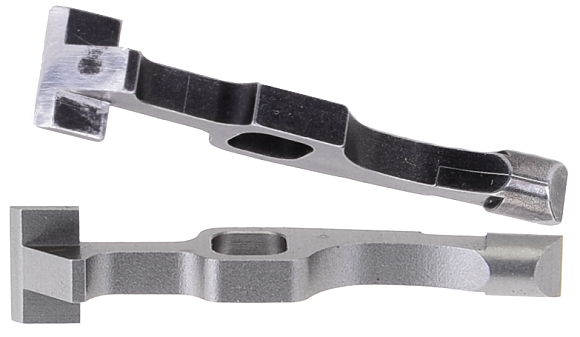
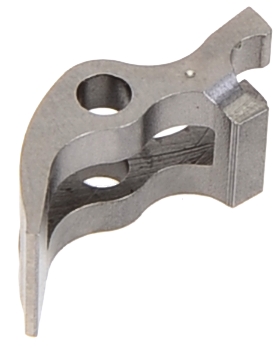
Pictured above – top, a reworked MIM factory disconnector. Even stoned there are voids and parting line. The center hole is not chamfered and the boss surrounding it is squared rather than blended for clearance. Below, the Cylinder & Slide piece is fashioned from tool steel, EDM cut to +/-0.0005″ and hardened to Rc 50-53. The disconnector is part of a five piece trigger enhancement kit.
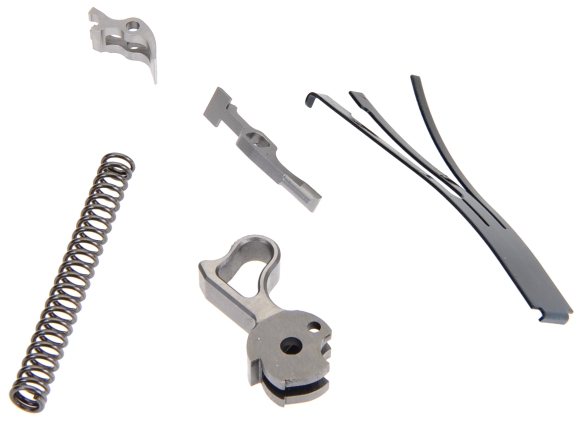
Above, Cylinder & Slide Drop in Trigger Pull Set CS0548 – Match Ledge 5 Piece Set. The kit includes an 18 lb hammer spring to replace the factory 30 lb spring, a sear with all of the clean up that is normally a series of reworks on the bench, a hammer with a non-captive ledge in place of the factory captive half cock hammer notch, and a lighter than factory sear spring. The objective of the kit is to deliver a clean 3.5 lb trigger pull and a more robust surface to catch the hammer in the event it is released before being fully cocked, or jolted out of full cock position.
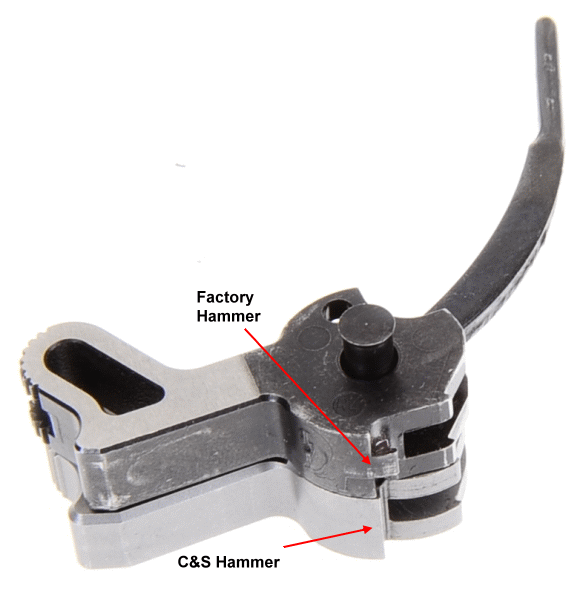 While the kit is listed as a “Drop In”, the drop in means parts do not have to be stoned, filed or otherwise mechanically abused by the purchasing individual. However, gun smith installation is recommended by the manufacturer to do the dropping in. Why? Well… as an example, the included instruction sheet safety check out states the hammer should not drop from the half cock position when the trigger is pulled. However, the kit included a Series 80 type hammer that does not have a hook to retain the sear, so in proper operation, the hammer will always fall from half cock when the trigger is pulled. The generic instructions were incorrect in this case.
 Familiarity with the 1911’s pieces and interdependent functions applies to all fitting and checking. If pieces don’t fit correctly because of a subject pistol’s frame pin hole locations or rough surfaces, the installer must know how to trouble shoot and correct the problem condition. No, that is not the same as hitting social media, presenting a problem and getting advice from happywookie237 whose advice consistently begins with “Grab a Dremel….”
The Cylinder & Slide’s sear primary and secondary angles were correct as received with neutral sear/hammer engagement. The surfaces were clean, no burrs to rub on the sear pin or interior of the pistols frame. There was enough padding on the back of the sear legs to remove a small amount of material to assure the sear was not preloaded against the trigger stirrup. The Ruger trigger does not pretravel adjustment tabs and fabricating them was not at the forefront of my thinking. Of course there was the option of spending $30 for a good lightweight trigger with adjusting tabs, but what fun would that be?
Springy and sprung
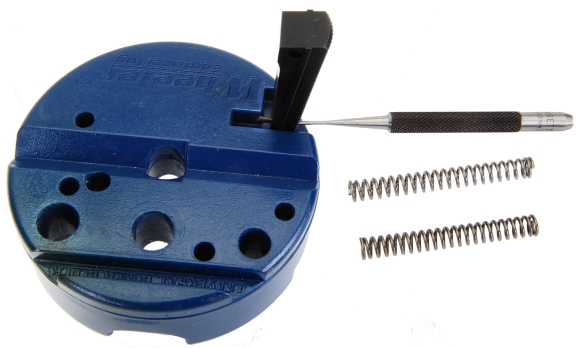
While the form seems different, both mainsprings are rated 18 lbs. I use 18 lb springs in my 1911s and I keep a log sheet in the respective pistols case that tracks any changes to springs or parts. Still, I received the an 18 lb spring in the Cylinder and Slide kit and installed it in place of my own spring. Better to be careful, better to make sure.
The Cylinder and Slide sear spring, below – top, is a lighter than the factory spring. My first clue was all of the material missing from the sear and disconnector fingers which lowers the deflection rate… which is not the same as reshaping the spring to alter part preload. The left finger loads the sear, the center finger loads the disconnector and the remaining tensions the grip safety.
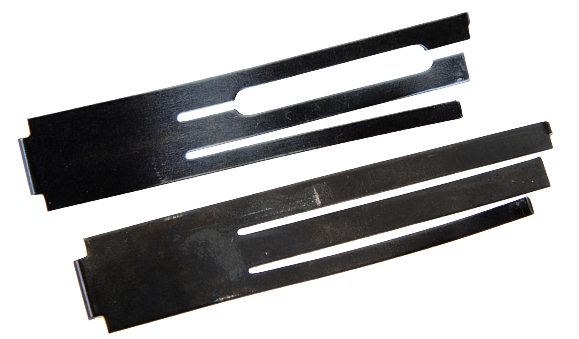
Dropping in the unaltered Cylinder and Slide sear spring yielded a trigger pull of 4 1/2 lbs. Bending the center finger back very slightly, doing the same with the left finger yielded a 3 1/2 lb trigger. Checking tension with a trigger pull gauge, with grip safety and hammer removed, resistance moving the disconnector to a degree that the sear was not also contacted measured approximately 17 oz. When the sear was loaded, resistance increased to just about 33 Oz. Ideally, each spring loaded should account for one half of the total resistance. How did I accumulate so much wisdom? Never did, but I am familiar with Jack Weigand’s article addressing the same.
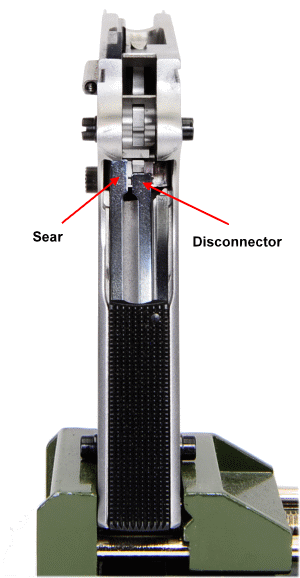
In order to get the trigger pull down to 3 1/2 lbs, the sear spring needs to be adjusted at the respective sear and disconnector fingers. The easiest approach is to assemble the pistol without the thumb safety, hammer or grip safety, but with the disconnector, sear, sear spring, and assembled main spring housing in place. An accurate trigger pull gauge is used to measure spring resistance at the disconnector finger; the trigger is pulled with the gauge only to the point that the disconnector finger is under load, but the sear finger is not. Then the trigger is pulled back and resistance measured until both the disconnector finger and sear finger are under load. As noted, when I was done tweaking, the disconnector load was 17 oz and the combined was 33 oz. The hammer, grip and thumb safeties were installed and trigger pull measures 3 1/2 lbs consistently. Ideal would be a 50-50 split in residence between the disconnector and sear fingers, and a 3 1/2 lb pull overall. So approximately 16 oz for the disconnector finger resistence, then 16 more for the sear finger resistance for a total gauge reading of 32 oz.
Taking down to make kits parts changes, hit reverse for reassembly
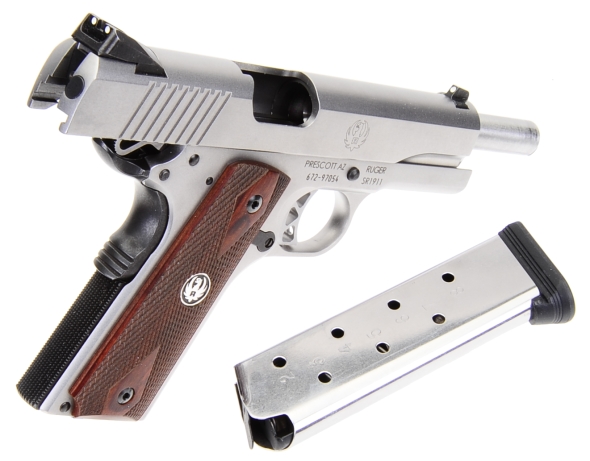
Always make sure the magazine is removed and chamber has been checked for empty before doing anything else. Firearms are an inanimate object and will do no harm unless mishandled or engaged to do so. Release the slide and allow it to move forward to a closed breech position, leave the hammer cocked.
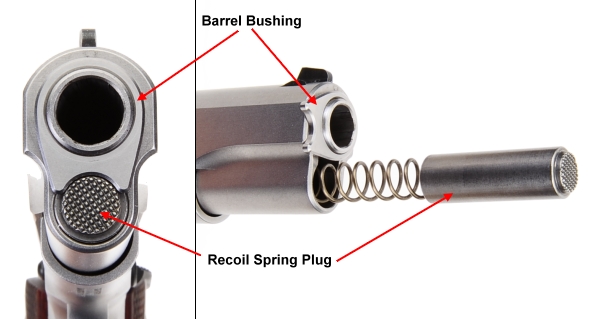
Flip, swipe or cajole the thumb safety into the “safe” position, which will lock the slide in position.Pointing the pistols muzzle away from self, depress and hold the recoil spring plug… tell it how your morning is going, while rotating the barrel bushing clockwise until it us clear of the plug. Ease, EASE, the plug forward and out, guiding it with your hand until it is no longer under pressure. Remove the plug, rotate counter clockwise while carefully pulling the recoil spring toward you and remove, set both aside. If the recoil spring is reluctant to come out and coil damage is becoming imminent, remove the plug, but wait until the slide is removed before removing the recoil spring.
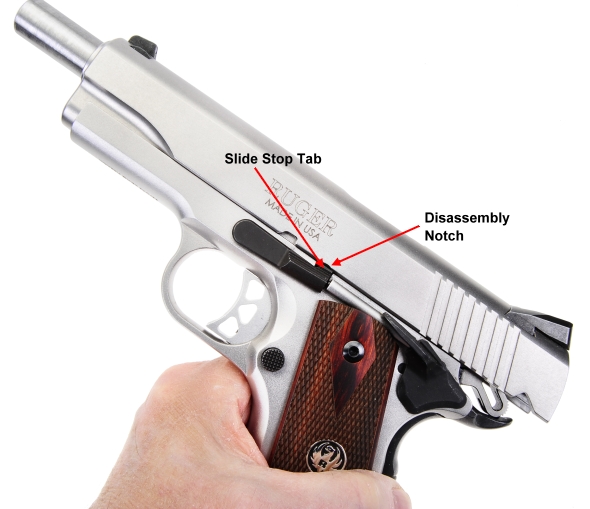
Move the thumb safety to the fire position and move the slide until the slide stop tab is positioned to align with the small disassembly notch.
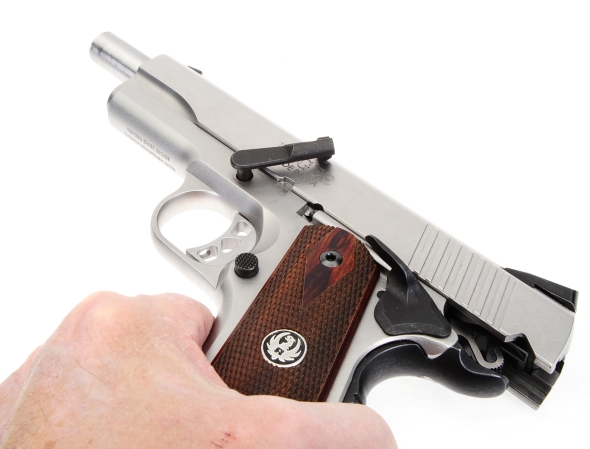
From the right side of the pistol, pressing on the slide stop pin should result in the slide stop popping out of the frame. In this case the stop was rotated up for a clearer view of the radiused disassembly notch. If the pin does not come out easily from a factory stock pistol, don’t go looking for a hammer, just work the slide fore and aft minuscule amounts while applying pressure to the stop pin and you’ll find a spot where the pin easily pushes out.
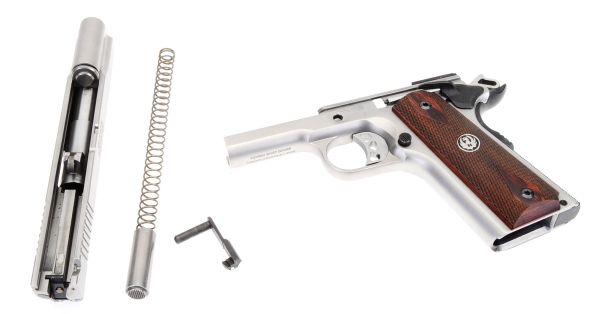 With the slide stop removed, the slide can be moved forward and off the frame. Because the frame assembly is of prime interest to me at the moment, the slide assembly was left intact for a bit, while frame disassembly continued.
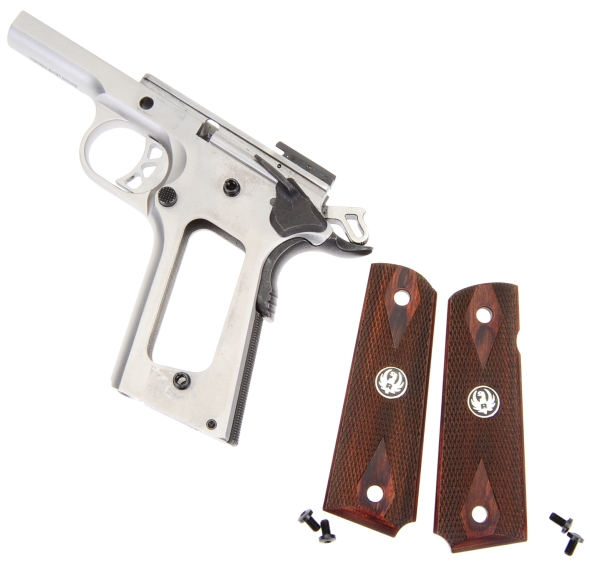
Grips could have been removed any time after empty chamber check and mag removal. They are removed so you can see… stuff inside the frame as the work progresses and so that you don’t kick yourself at a future date when you put the grips down on a protuberance and squash, mar, chip, or otherwise damage the checkering.
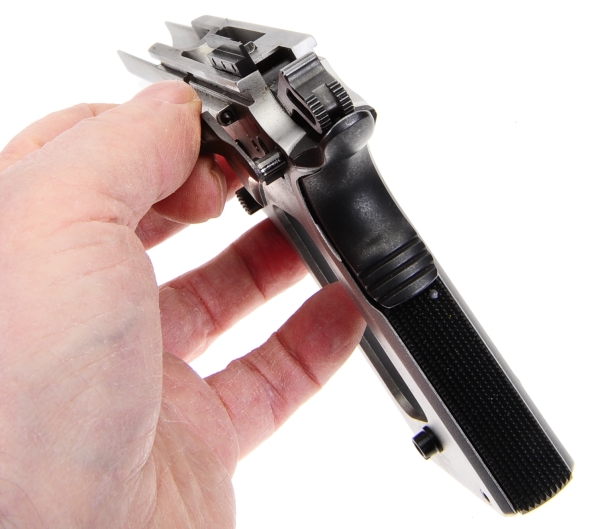
The thumb safety is easy to remove. Hammer back, you move the safety near the mid point of fire and safe position and wiggle it while pulling to the left until it pulls out as seen above.
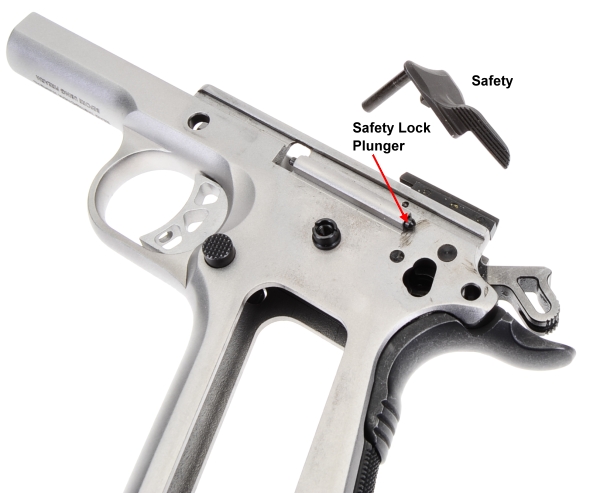
Some 1911 type pistols use thumb safety removal as an excuse to release their slide stop plunger, plunger spring and safety lock plunger like so much aircraft disbursed radar foiling chaff, to be later retrieved only with a floor crawl around the shop bench. Ruger uses the kinked spring coil method to prevent this from happening and, in fact, has made the plunger tube as a part of the frame.
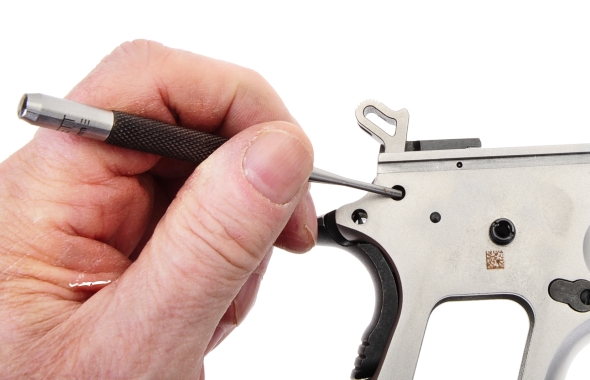
Next up is hammer removal. The hammer must be lowered in a controlled fashion so as not to damage the frame. The hammer pin is started out, right to left, with a punch. The right size would be one that is small enough to fit through hole in the frame but large enough to not scratch the finish off the pin.
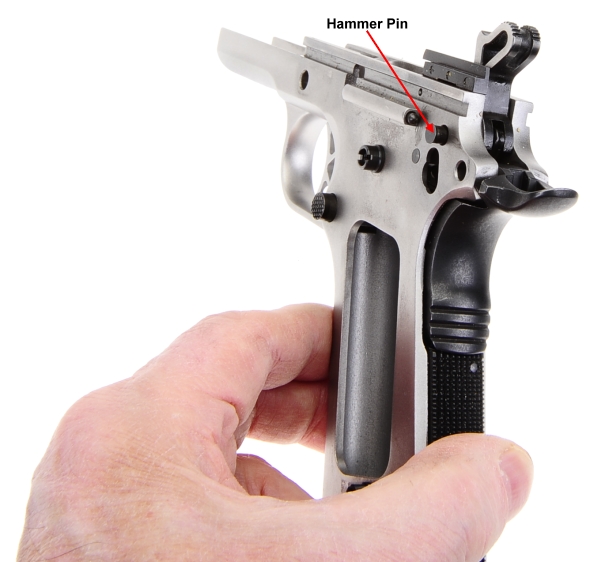
Once the pin is started out, it can be pulled free with finger pressure. The pin is flanged, removed right to left and installed left to right.
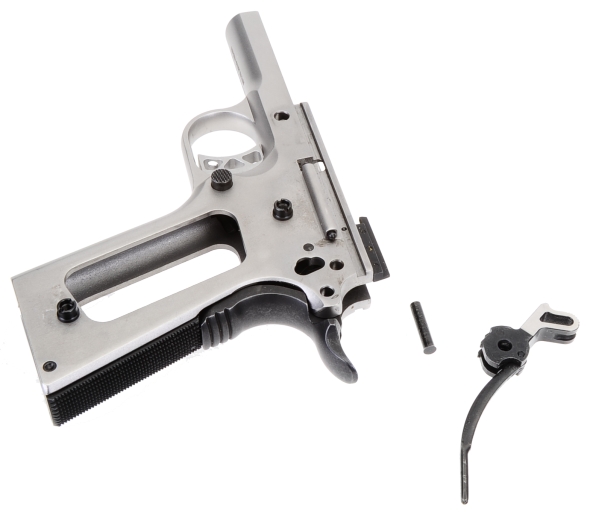
Pulling up and back frees the hammer and hammer strut. It pays to take care that the hammer strut pin that holds the two pieces together does not fall out and join the safety plunger parts on the floor.
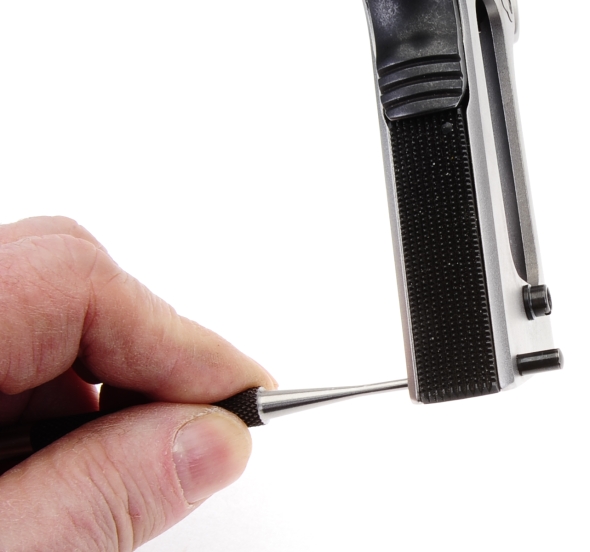
About now, the mainspring housing pin is pushed out, left to right, dimple side versus convex, and the mainspring housing is removed by sliding down and out of the holding grooves in the frame.
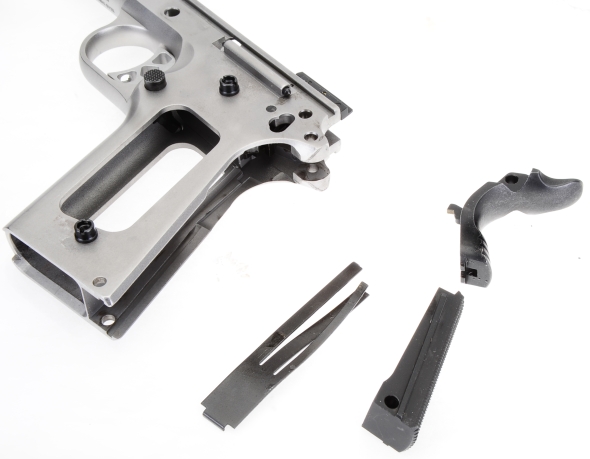
When the mainspring housing is removed the sear spring will probably pop out the grip safety. If not, remove the grip safety and sear spring. Be careful when removing the sear spring to not bend its fingers. The bottom of the spring has a tab that holds it in position in the frame and this is where the spring and frame are separated.
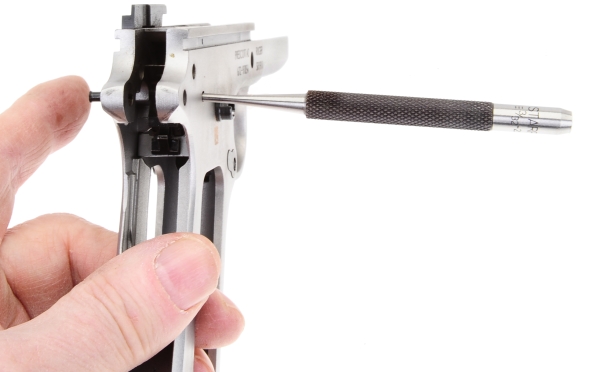
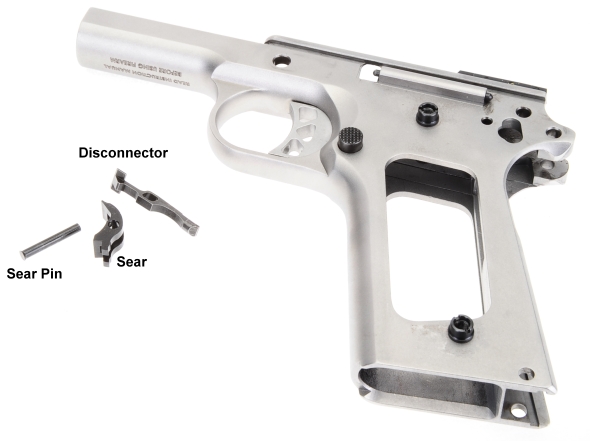
The sear pin, like other flanged pivot pins, is pushed out right to left. When the pin is out the sear and disconnector should fall free.
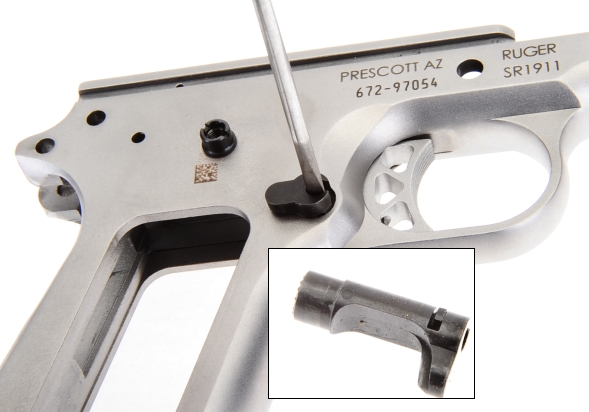
The magazine catch, below, is secured with a magazine catch lock with a slotted head. A screw driver that fits inside the lock diameter is necessary, so that the side of the screw driver does not engage the break in the wall of the catch, which would prevent the screwdriver from turning. Other than assuring the screw driver blade is clear, pressing in and turning counterclockwise a 1/8 turn should unlock the catch and free the magazine catch from the frame.
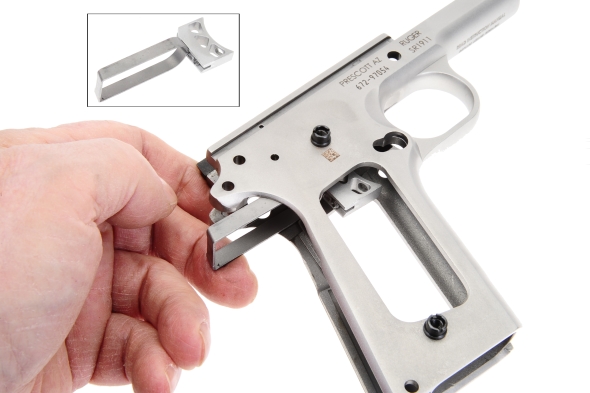
Finally, the trigger is depressed and pulled out by the bow from the rear of the frame.
Was the gain worth the effort? You bet
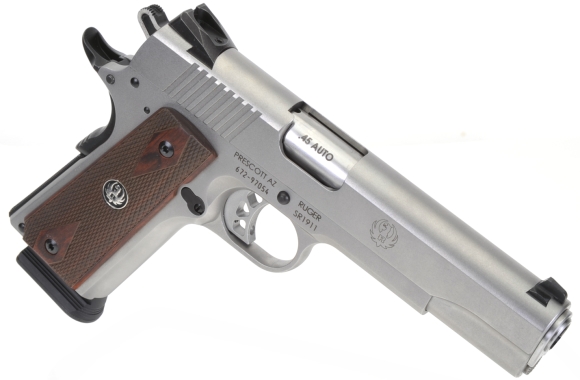
The Ruger SR1911 is a very sound auto loader that will stand up to a lot of use and deliver accuracy and reliability. The Cylinder & Slide trigger kit enhances the pistol’s performance with parts of exceptional quality and precision. No creep, no over travel and a very consistent release.

Email Notification