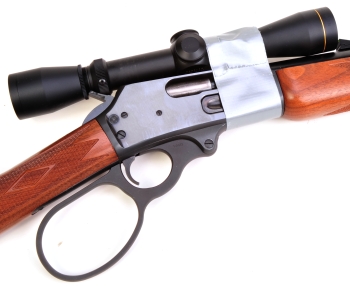
 If you spend any time at all around AR-15 enthusiasts you learn at least one thing; these guys like to hang all sorts of things on their firearms. Equipped with multiple Picatinny and/or Weaver rails, their rifles sprout everything from computer enhanced tactical night sighting systems to big screen home entertainment centers.
OK, so I’m making light of innovative design but, fortunately, the practical aspects of rail mounting systems have made their way over to more traditional sporting arms. Case in point is the XS LeverRail system that brings a flexible mounting system to the Marlin centerfire lever action rifle.
The XS LeverRail for Marlin Models 1895 and 336
I ran across the XS LeverRail system when I was looking for a way to set up a redundant and quick change sighting system for my Marlin 1895 Guide Gun. I wanted one that would not permanently alter the firearm. The gun was to be used with both conventional and scout scope mounting as well as with various types of metallic sights. The LeverRail is basically the same piece Marlin elected to install on their own Marlin 1895SBL and is listed on Brownells as Item # 006-000-151 for the Model 1895 and # 006-000-165 for Models 336 and308X.
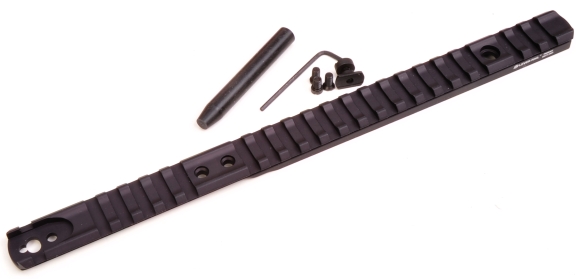
The rail is black anodized with a matte finish. Steel mounting hardware, a plastic punch, hex wrench, Sur-Lok 1242 thread locker, and installation instructions are included in the package. Retail price is approximately $60. Installation is easy.
Even easier to install than the instructions…
Before any work was performed on the rifle it was checked and double checked for empty. Not a minor point. My contribution to gun owners everywhere by not becoming the subject idiot in an article regarding accidental firearm discharge. I may overdo safety rule, but I didn’t get this old by being careless.
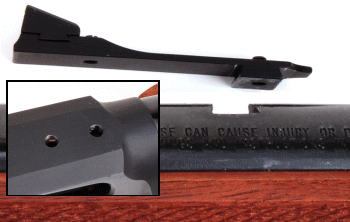
The black plastic punch included with the kit is used to knock out the Marlin’s rear sight ramp. A block of wood or plastic under the flat of the receiver and one under the barrel near the forearm cap provides solid support and the sight taps out easily.
The two front scope mount plugs are removed from the receiver and the forward aft mount location screw. The farthest aft remains in place. A Q Tip with degreased can be used to clean the surfaces and prep for thread lock.
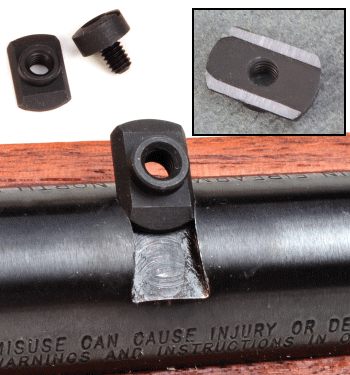 The mounting pillar is actually comprised of three parts; the pillar (dovetail), the hex headed small jackscrew and a larger ring nut around the jackscrew. The jackscrew and ring nut are removed before attempting to fit the mounting pillar to the barrel’s dovetail slot.
More than likely, the mounting pillar won’t fit in the slot and material will need to be removed from the mounting pillar’s bottom side as shown in the photo inset. The easiest way to remove small amounts, with control, is to work the lower side of the mounting pillar over a fine oil stone. Remove very little at each pass, and trial fit the part until it taps into the rifle’s dovetail slot with a slight interference fit. Insertion can be accomplished with the punch included with the kit. When the fit is correct, the mounting pillar and dovetail are then degreased and the mount is centered in the barrel dovetail.
Assembly philosophy…It’s thread locker, not a glue stick

With the pillar mount installed and centered, the rail is laid in place to assure it will seat completely and threaded holes at the pillar mount and receiver mounting points are centered and accessible. In some cases the pillar mount and rail will have a very slight interference fit and the rail will require a minor “heel of hand” tap over the mount to seat completely. If the receiver holes universally don’t align, it may be necessary to lightly file the pillar mount hole in the rail to bring these into alignment. In any installations I’ve done, the rail just drops into place.
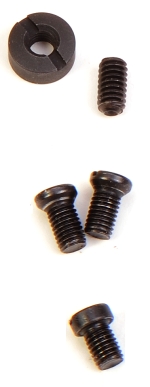 I mentioned the kit includes thread lock, the blue type that is made to hold but won’t prevent fasteners from being removed without excessive effort. The instructions advise to place some of this material on the underside of the rail at all clamping or screw through hole points. I used the thread locker on all fastener threads sparingly, so it would not seep into the rifle, but none was used on the ramp or rifle surfaces. Proper torque should hold fasteners. A little thread lock is OK to resist loosening under vibration or shock, but I can’t bring myself to use thread locker as glue to hold parts together.
The rail is laid in place and checked for clear fastener locations. Then, top to bottom as pictured, the hardware is started but not tightened. The top jack screw is turned about 4 threads into the mount pillar using the included hex wrench, then the ring is started. Next the two 8-40 screws were started then the Fillister head 8-40 screw. All fasteners are fully tightened. For torque wrench wielders the value for all is 15 – 20 in.lbs. with thread lock compound on threads.
The thread lock compound will set up in four to five hours. Final cure will take approximately twenty-four hours. At that time, accessories can be mounted to the rail. During the initial four to fie hour period, the rifle should be inverted so the thread lock compound will not run down into the rifle’s action. Clean up should be done as fasteners are secured, however thread blocker will not dry where not compressed.

Finished
The use of a rail mounting system on the Marlin opens the door to many sight options. In installed medium height Warne steel quick detach rings because I like to get the lowest mount and keep the optics as close to bore centerline as possible. If I had opted for high mounts, both the peep and ghost sight pictures in the inset could have remained in place with the scope mounted. Since the scope is quick detach, I didn’t mind swapping metallic sights for the scope as required.
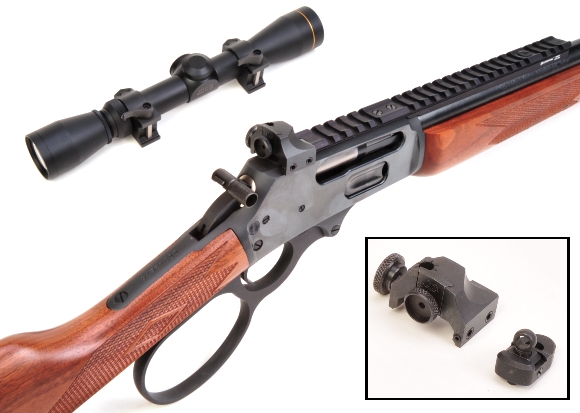
The peep sight, inset and installed, is made by NEGG, Brownells # 661-000-035. It is a rugged steel sight with lots of clamping locations and a large knurled lock screw that makes for easy field installation. The sight comes with two aperture discs, 0.093″ and 0.125″, plus two elevation slides to accommodate deep and shallow Weaver or Picatinny bases. I set mine up with a laser bore sight so it would be properly zeroed when swapped on and it is used in conjunction with a Williams front FireSight.
The ghost sight pictured above in the inset is made by XS Sight Systems, Brownells # 006-000-162, and is for use with their LeverRail base product. It is compact, comes with a 0.230″ and 0.191″ ghost aperture and mounts by keying into the light rail, secured with one Fillister head screw. This site came with a replacement ramp and front sight that is 0.410″ high, however, I have mine set up to work with the same Williams’ FireSight.

The last element in this set up is a Michaels of Oregon hammer extension, Brownells # 593-245-008. It is steel, locks firmly in place and the round checkered surface clears the scope sufficiently to assure a good grip. Seems like a small thing but it helps to make the rifle function more intuitively and with less groping at a critical moment.

Email Notification