 The Ruger Mini Thirty has grown on me… No, not like a fungus, but rather more like my old hooded sweatshirt that has already given most of its useful life to the washer and dryer. Subsequently, I like to shoot it and tinker with it… the Mini Thirty, not the sweatshirt. A higher rate hammer spring was installed, which made the rifle 100% reliable even with the worst $10 a bucket, Berdan primed ammo. The rifle’s trigger was worked over by Accuracy Systems, Inc. until it became a crisp and light with virtually no overtravel. And the beat goes on…
Some gun forum discussion suggests that the Ruger Mini Thirty ejects brass so far, and with so much force, that shooting ranges often hire interns to run around and field empties. Furthermore, some ranges now require any shooter in the vicinity of a discharging Mini-Thirty to wear a pith helmet and sign a standard incidental concussion waiver. Personal experience suggests it is no big deal; a 10 – 15 feet toss at best and most ranges have catch netting. Besides, I live in the boonies so there are no other people to pummel with “brass gone wild”.
There are valid reasons to soften ejection. Excess cycling force beats metal parts unnecessarily, degrading reliability and longevity. Excess pounding can jar stock to barreled action mounting, shifting pressure points and causing shifts in point of impact. Changes in cycling force can create the appearance of inaccuracy with different types of ammunition. It is for these reasons many AR type shooters install adjustable gas blocks on their firearms or opt for firearms that incorporate this feature. It is for the same reasons we chose to install an adjustable gas block on this project Ruger Mini Thirty.
Accuracy Systems Gen 6 Adjustable Gas Block
The Accuracy Systems Generation 6 adjustable gas block, in comparison to the factory piece, has an gas bleed adjustment screw inset at the bottom. Additionally, the block is notched square on the face to facilitate installation of a barrel stabilizing bar and drilled to accept a sling swivel. Priced at $119.99, it is available in Matte Black or Nickel finish for stainless steel firearms. As delivered, the assembly includes the adjustable gas block, a more restrictive gas pipe and hex wrenches required for installation and adjustment. Only the rifle’s original gas port bushing is carried over to the new piece.
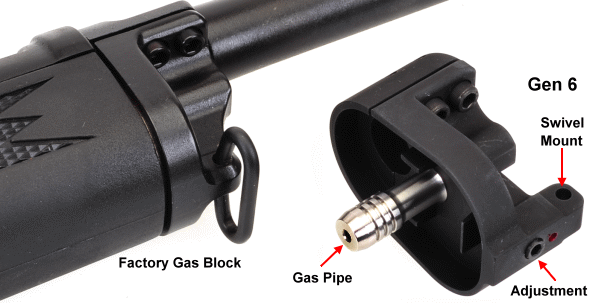
I’ve read lurid tales of gas block installation gone awry in gun forums that include stripped fasteners, misaligned gas blocks, unseated and leaking gas port bushings and crushed gas pipes. I am not sure how that could happen, other then as the result of someone not following the simple instructions included with the assembly or someone lacking in basic mechanical skills attempting the task. For all intent and purposes, the associated pieces interlock with a close fit, so it would take a huge effort to get it wrong. I would suggest that while all required hex wrenches are included with the gas block kit, alternative tools might lead to a better result.
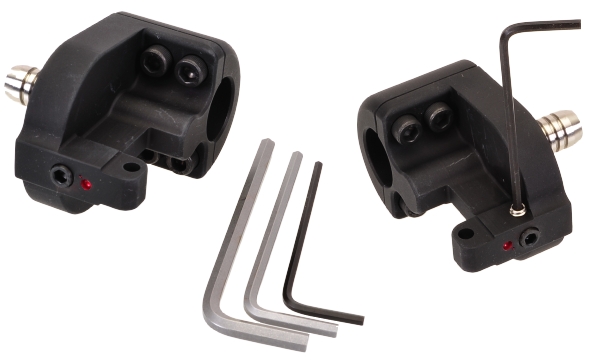
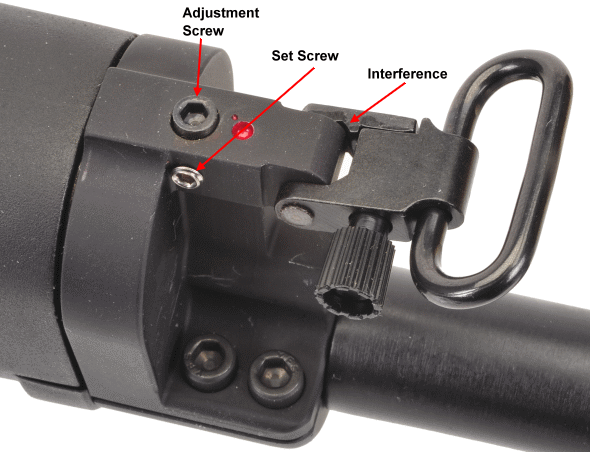
The gas block is supplied with the adjusting screw set full open and the side set screw tightened. Before any adjustments are attempted, the set screw should be backed out half a turn to avoid damaging the threads on the adjustment screw. The instruction advises that the adjustment screw is set to full open before the assembly ships from the factory and goes on to advise against turning the adjustment screw until after the unit is installed and ready for live fire calibration. However, later instructions explain how to calibrate from full open or full closed in the event the adjustment screw setting had been changed out of proper sequence.
The factory gas block fasteners are tight, torqued to 70 in/lbs at the factory, not staked in current production as I’ve seen suggested. It is tough to work an hex wrench around the sling swivel and get it lined up squarely in the heads of the fasteners.
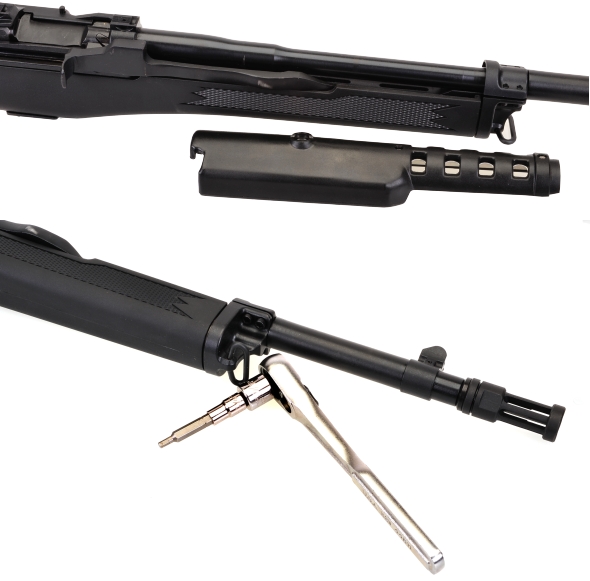
I pulled only the handguard and left the stock in place, then flipped the rifle over in a maintenance vise and secured it, then loosened the gas block fastener with a hex bit and a 3/8″ ratchet wrench. The bit aligned correctly in the fasteners and there was enough mechanical advantage for a even pressure to be applied.
Once the fasteners were broken loose, but left in place, the bolt was cycled, the safety was engaged, the trigger group was pulled, and the stock was removed.
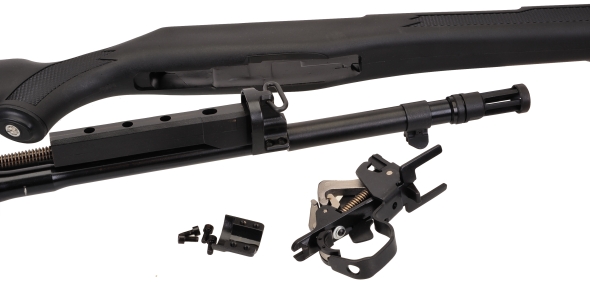
At this point the four gas block fasteners were removed. The lower gas block remained in position on the barrel, retained by slide spring pressure, sandwiched between the slide assembly aft and the barrel shoulder forward.
Pulling back on the slide released the lower gas block and gas port bushing; good to carry out over a work bench or the bushing might end up in the Twilight Zone with the single socks that disappear in the clothes dryer.
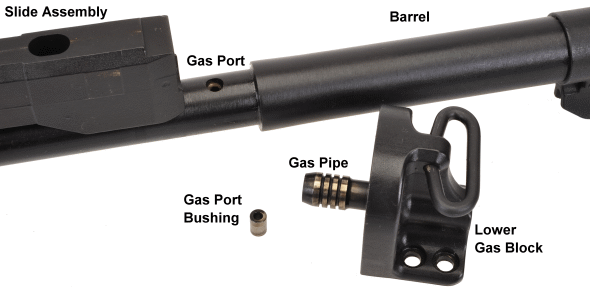
The only piece carried over from the old fixed to new adjustable gas block is the gas port bushing. Seen below within the context of its location in the factory gas block.
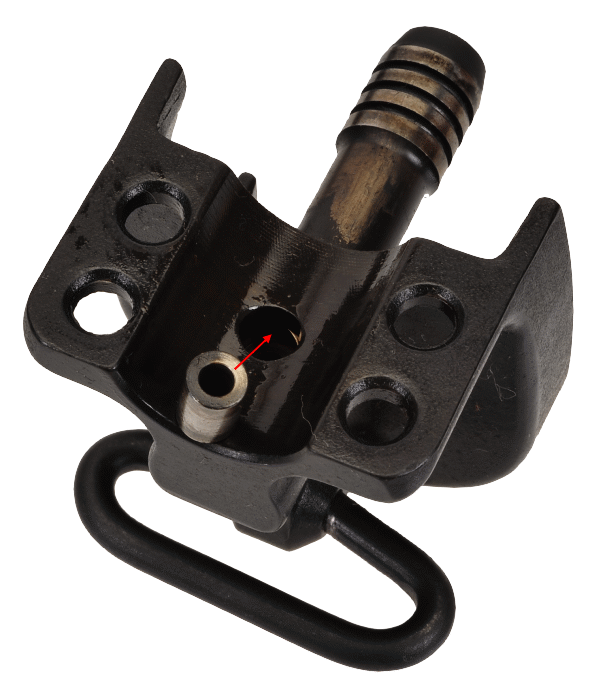
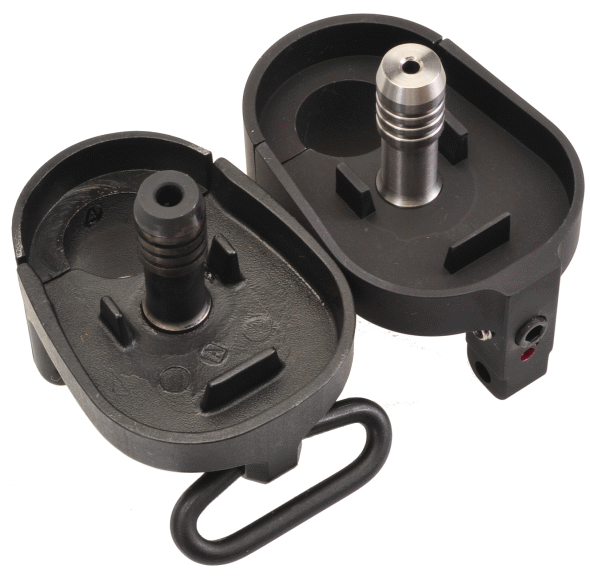
While the gas bushing remains the same in both factory and aftermarket pieces, the gas pipe is considerably different. The Accuracy Systems piece has a more restrictive center hole, something on the order of 0.137″ for the stock piece and 0.80″ for the new piece. The root diameter of the gas pipe on the new assembly is also considerably smaller. These changes alone reduce cycling force.
To install the new assembly, essentially, the gas pipe is inserted in the lower gas block body with the gas port hole/bushing recess rotated upward into alignment with the port in the gas block. The gas port bushing is dropped into the gas block port until seated in the gas pipe. At that point, the gas port bushing should prevent the gas pipe from rotating with casual effort.
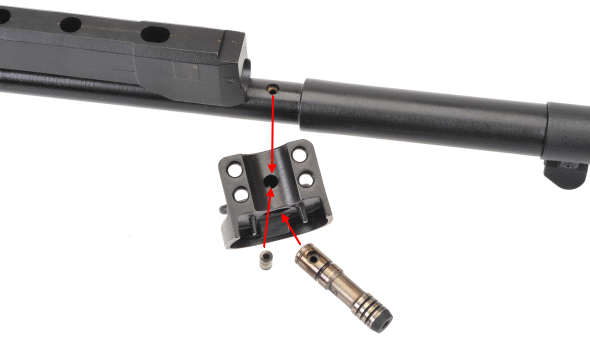
I found that putting a light swipe of heavy viscous oil on the gas pipe and gas port bushing will hold them in place as an assembly, even if the gas block is inverted to put into position on the barrel.
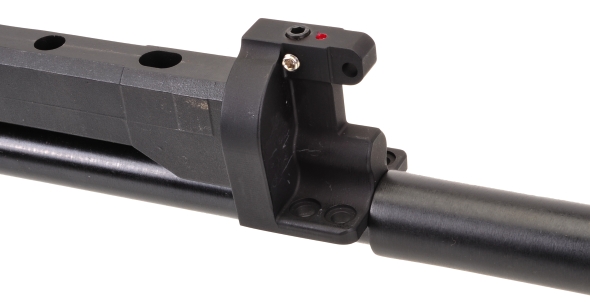
Pulling the slide back a bit, the gas block and gas pipe bushing are positioned on the barrel and then the slide is eased against the gas block to hold it in place under slide spring pressure. Not only does it hold it in place, but it also holds the gas block square to the barrel so that the top half of the gas block and its fasteners can be placed.
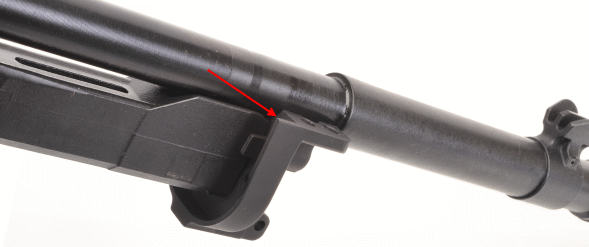
The lower block actually kind of pops into position. It is easy to feel the gas port bushing slip into the barrel port recess and it is easy to see the matching contour of the gas block against the rifle’s barrel. If all is well, the slide should be over the gas pipe, the tabs on the gas clock should be on either side and the bottom of the slide, aligning one to the other.
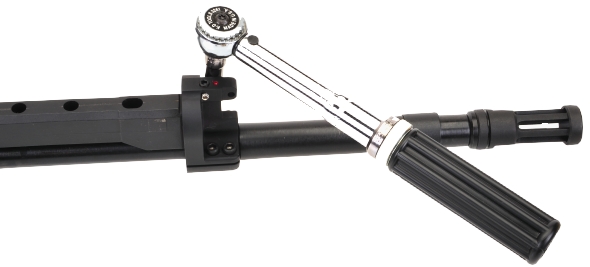
The clamping half of the gas block is slipped into place, fasteners are started evenly to insure an even gap between the top and bottom gas block halves and then cross torqued into place. Ruger torques these fasteners on the factory block to a hefty 70 in/lbs, however, accuracy Systems recommends 35 in/lbs. for their assembly.
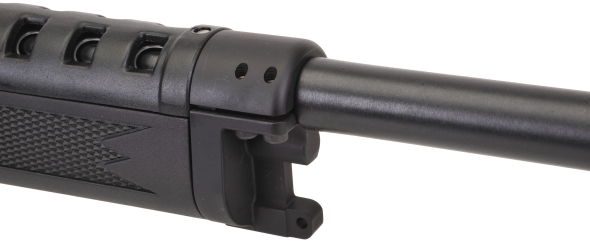
The barreled action is placed back in the stock, the trigger group is reinstalled and the handguard is secured. The result is a nice install that looks at lest as clean as the factory piece. The only head scratcher is the sling swivel hole. Every swivel I tried hit the sides of the gas block boss so the swivel wouldn’t mount straight down and the boss would be damaged if the swivel was mounted straight out.
Final adjustment
As noted at the beginning of this piece, the gas block is shipped with the adjustment screw fully opened. The procedure for adjustment is to crank in the screw a 1/16 of a turn at a time as the adjustment is defined as sensitive. Good approach if you happen to have a case of ammo handy. At full open the Mini Thirty chucked brass approximately 15′. A quarter turn clockwise brought that down to about 10′, another half turn made the shucking distance approx 3′ – 4”, which is where I left the setting. At this setting, cycling was reliable, ejection was… meager. The gas block allows three full turns of adjustment from full open. When I turned the adjustment in further, the ejection distance remained about the same until it would not eject at all and remained that way through full closed.
Where the adjustment screw setting had been disturbed prior to live fire, and specifically how much it was moved is not known, the instruction suggest carefully turning the screw to the full closed position, then incrementing out 1/16 turn at a time until the desired ejection and cycling results are achieved. Handloaders may find it useful to shoot with the port closed and the rifle shooting single shot to more easily isolate handload versus rifle performance.
On a preliminary basis, the Mini Thirty shot softer and more accurately with group size tightened. It will take a few hundred rounds fired under more controlled conditions and a variety of ammunition types to better quantify the actual degree of improvement. We’ll get there shortly
Ruger’s Mighty Mini Thirty… ish Part I
Ruger’s Mighty Mini Thirty… ish Part 1½
Ruger’s Mighty Mini Thirty… ish Part 2
Ruger’s Mighty Mini Thirty… ish Part 3
Ruger’s Mighty Mini Thirty… ish Part 4

Email Notification