
You may have noticed our slow drift from firearm reviews to DIY projects. There a reasons for that… While I love to peek and poke at firearms, and burn up as much ammunition as possible, there is nothing like the smell of Tru-Oil in the air, walnut dust up the nose and being able to use the word “bastard” in the absence of anger that clarifies, for me, why I like firearms.
Pictured Left – It was in this spirit I decided to go retro and make a more nostalgic Ruger Mini Thirty by installing a walnut stock, a smaller less conspicuous handguard and burying that ineffectual black plastic modern stock in the backyard… out near the leach field… way back there.
Get all of the pieces
Ruger produces a walnut stock for the Mini 14 Ranch rifle. To utilize this stock the following pieces are required:
MS10401 Stock with recoil pad and pad screws
MS00700 Stock reinforcement internal frame
MS08000 2 – Stock Reinforcement Lock Washers
MS06900 2 – Stock Reinforcement Screws
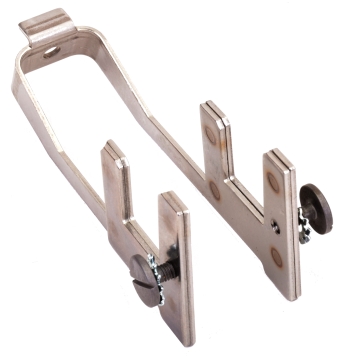
The least costly place to buy these pieces is Numrich Arms, which are all genuine Ruger parts. The walnut stock, at this moment is listed at $103, the frame $9 – $12 depending of blued or stainless and screws and washers $9 for a set. There are a number of aftermarket suppliers for the walnut stock, but the price will be approximately twice the noted amount.
If your tastes run more to laminated products or more colorful solutions, there are a number of companies making these for the Ruger Mini. A good central place to begin looking is Stocky’s with prices falling in the range of $130 to $200, depending on type.
The key to not being unhappy or frustrated with the installation of a drop-in stock is to accept the cold hard truth that there is no such animal. You can stuff one on, but the magazine will probably bind and the action will be preloaded at odd pressure points causing accuracy problems. Proper stock fitting is minor for anyone who can complete do it yourself projects around the house without angering the wife or girlfriend, or who has a wife or girlfriend with decent carpentry skills.
It goes something like this… sort of…
By pinching the frame slightly and lightly at the back, it slips into place in the stock’s mag well. the frame is located at the front by a large tab and at the sides with the large screws passed through the countersunk holes on both sides of the stock. Unfortunately in this example, when an attempt was made to insert a magazine inside the… inserted frame for a fit check, the magazine would not pass through the side rails, bottom picture.
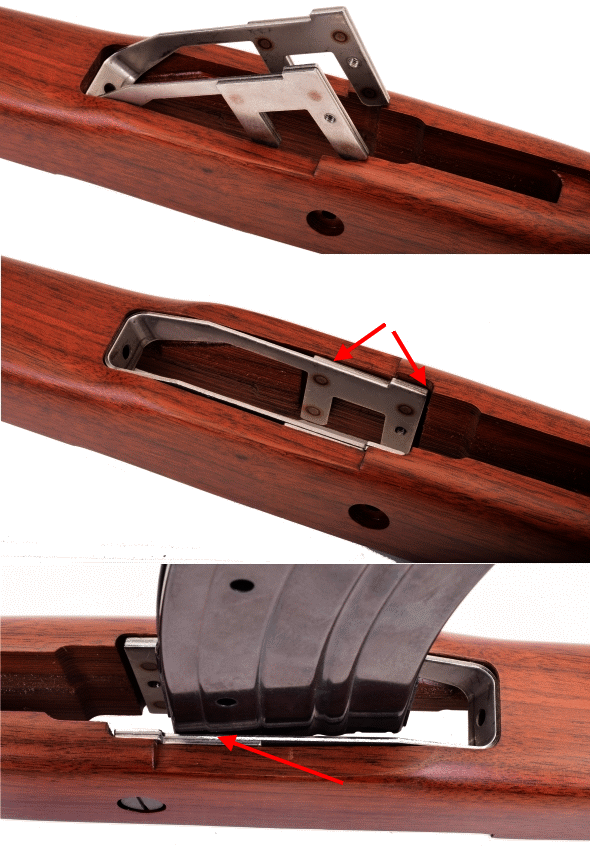
A quick check with the frame secured in place showed an inside rail width of 0.898″ and a mag width at the aft widest point of 0.916. It was not necessary to call in Steven Hawking for a consultation. The center panel arrows note the points of interference. The sides of the stock’s frame well was too narrow and the edge of frame was lifted on the radiused cut in the stock. This is not a problem, it is typical when fitting any prefinished stock and not difficult at all to correct if thought precedes actions.
Put your hands up and step away from the Dremel…
Because there were two types of surfaces to rework; flat, smaller flat and tight radius, three files were helpful: a double cut flat bastard for fast material removal, a single cut mill bastard for finishing work and a 6″ round. Actually, a cylindrical round file like those used to sharpen chains saws can make life easier when finishing a tight radius.
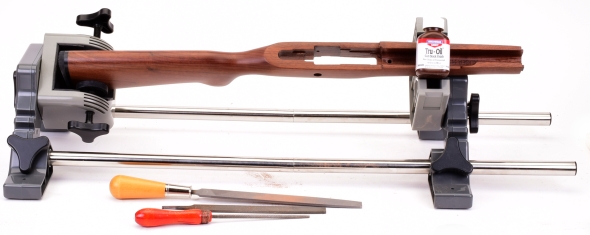
I used a rifle maintenance cradle to hold the stock because it offered a better work angle than a bench vise. Working straight down gives me a stiff neck. That little bottle in the picture is Tru-Oil, used to weather seal all of the reworked surfaces.
The approach was to file a little, insert the frame, insert its screws, try a magazine, then file a little more until the magazine fit without resistance or slop; just enough is just enough. The original surfaces were not flat as indicated by the darker low spots in the rework areas. This was caused by misaligned CNC cuts made from opposite sides of the mag well.
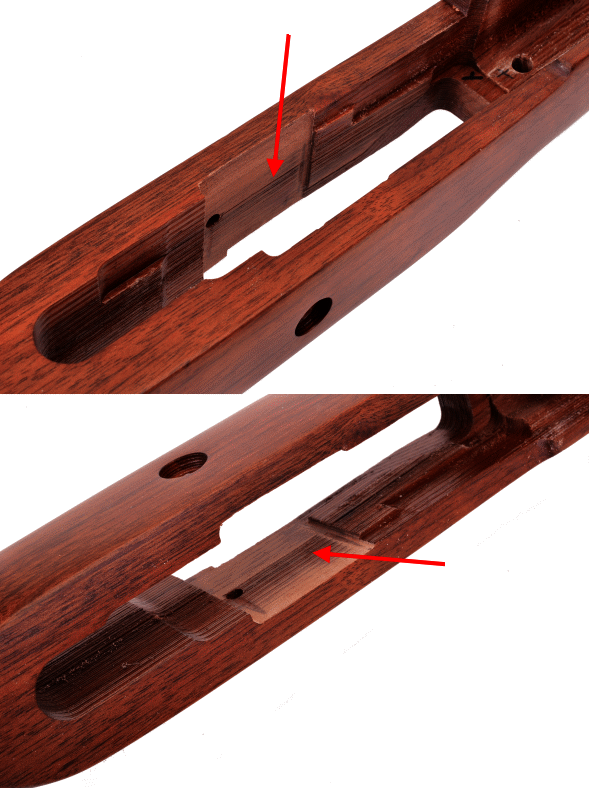
File work required care. The file needed to remain flat on the work surface, not rocked, or the top and bottom of the stock would look like a funnel. Frequent frame checking helped to pin point exactly where the frame was meeting resistance. Not needed for this project but where eyeballing isn’t enough, inletting black from Brownells or MidwayUSA makes quick work of identifying contact / no contact areas.
Interim progress looked a little rough so was important to be patient and remove only small amounts between checks.

#1 shows contact between the edge of the frame and the inletted radius in the stock. The air gap between the frame sides and stock are clearly visible and this needs to be cleaned up. #2 this radius had been clearanced, however the radius needed to be cleaned up and reformed. #3 Starting to remove material from the flats, longer side strokes with the mill file removed the slight steps that were formed when roughing out.
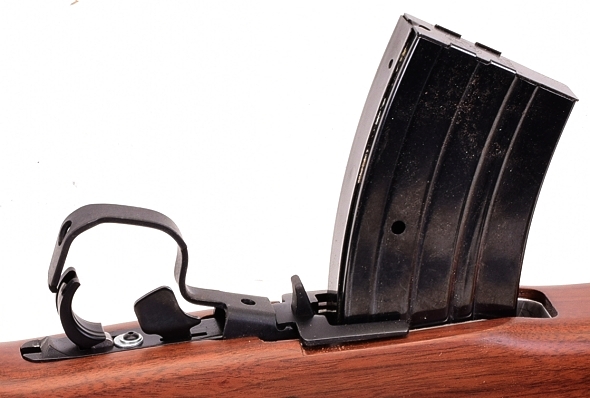
When proper fit seemed close, the trigger group was set into place without being locked down. This insured that the mag was positioned correctly fore and aft when checking clearance. Yes, the trigger assembly was thoroughly cleaned of walnut dust filings.
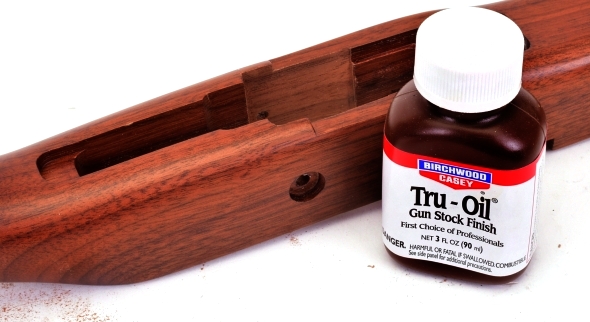
When the cuts were all cleaned up and the little dangling rough edges were wiped away with a piece of steel wool, Tru-Oil was brushed on to seal the wood and to match the finish. Three hours after application the rifle was reassembled and ops checked.
Forend Liner And Stock Cap Assembly
I originally left this out of the overview as a necessary, but incidental part of the assembly process, but it really isn’t. Installed incorrectly, the liner will prevent the action from fitting closely in the stock, which will negatively influence accuracy.. and look pretty terrible.
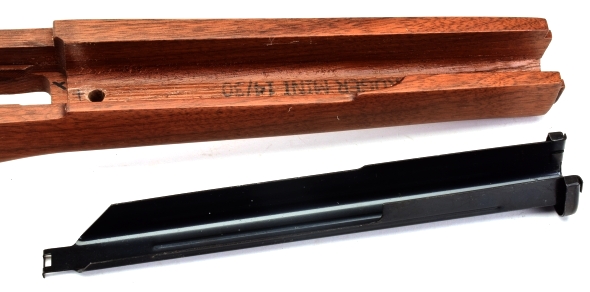
The first place checked was the stock/cap fit. Until there was a proper fit here, the liner would not be correctly positioned at the receiver end. None of the rework was major as indicated by the arrows.
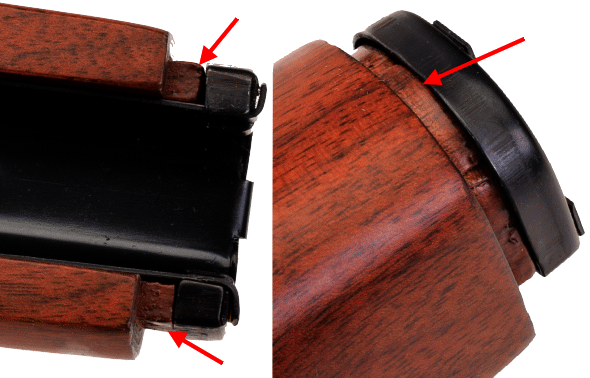
The easiest way to locate the high spots was to tap the cap at the front of the stock with the heel of my hand, which put small contact scrape marks in the tenon finish. Then a safe side file was used to remove minor bits of material until the cap fit flush and tightly over the tenon.
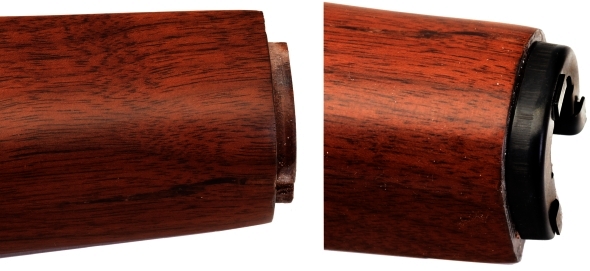
Very small amounts of material were removed and a little Tru-Oil will provide a perfect finish match.
The forend liner has a locating tab at the receiver end that works with a synthetic stock where no internal frame is utilized. I kept the original liner with the synthetic stock so I could always return the rifle to factory form and picked up a second liner to modify. Liners can be purchased from Brownells, MidwayUSA, Ruger, etc. at a cost of about a $6 piece in blued steel or stainless.
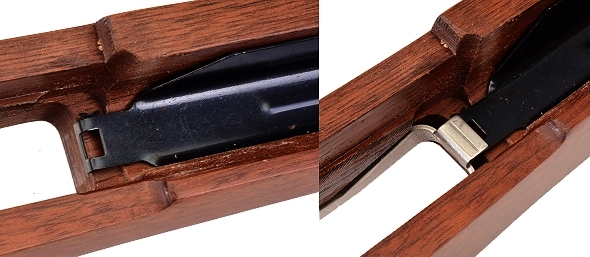
The end of the forend liner tabbed over the inside of the magazine, which raised the internal frame and prevented it from locating correctly. The front of the frame rotated upward and hit the front of the magazine well and the frame tab hit the bottom of the receiver. Subtle clues were the receiver sitting half an inch above the stock and/or the need to use a crow bar and tongs to close the trigger guard when reinstalling the trigger group.
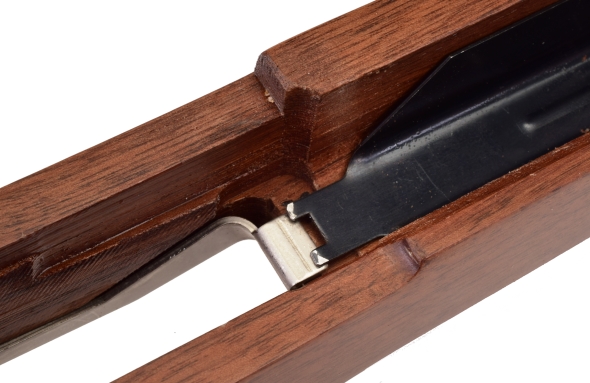
Above, a quick snip with aircraft shears removed the liner tab and the interference. A little dressing with a file prevented future and significant blood spill.
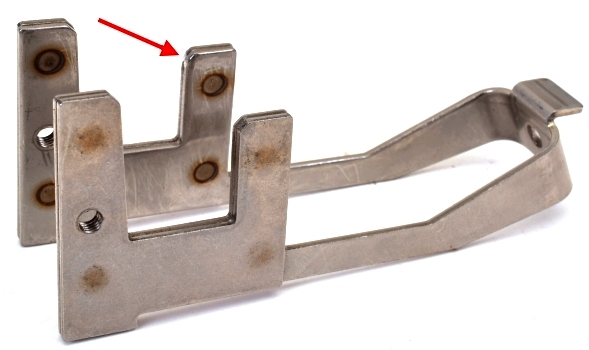
One last thing… not a big deal, but breaking the angle indicated on the frame made it a lot easier to close up the rifle when stock and hardware are kept as a tight fit. The rework does not loosen lock up.
Two different looks for the Mini – Thirty

In addition to the stock, a more compact handguard was installed that leaves the slide exposed and gets rid of the overhang of the factory piece. The synthetic stock can be reinstalled in a few moments if the rifle is to be dragged through the woods while hunting.
Ruger’s Mighty Mini Thirty… ish Part I
Ruger’s Mighty Mini Thirty… ish Part 1½
Ruger’s Mighty Mini Thirty… ish Part 2
Ruger’s Mighty Mini Thirty… ish Part 3
Ruger’s Mighty Mini Thirty… ish Part 4

Email Notification