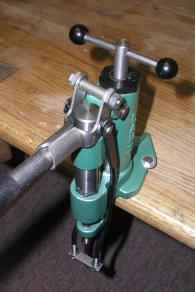
Casting can produce a bullet very close to bore size but, generally, bullets must be run through a sizing die that will swage them to more consistent, uniform and appropriate dimensions. Internal to the casting process, variations in dimensions are primarily caused by: temperature swings of material and tools when casting, and variations in alloy composition and post casting shrinkage – harder alloys shrink less. This shrinkage isn’t random, there are reference tables that predict the change in cast bullet dimension based upon alloy mixture. The spread in dimension for the .458″ bore is .002″ between pure lead and linotype; larger bores increase in spread, smaller bores decrease. These process driven dimensional changes dictate the need for: a press of some type, a sizing die and top punch, or an equivalent alternative piece of equipment. I’m not sure what language I was just speaking, but what I meant to say is raw bullets are dimensionally imprecise and a sizer will make them uniform.
For serious accuracy work, and in support of older firearms with variations in bore size, bullet are typically sized to different diameters, based upon sizing die selection. The .458″ bore sizing dies run .457″ ~ .459″. The .358″ bore dies run .357″ ~ .359″. It is reasonable to experiment with bullet size, beginning at the actual slugged rifle bore diameter, and working smaller within the noted range. Is there any part of handloading that doesn’t require mad scientist like experimentation ?
Bullet velocity, gas checks and bullet lube
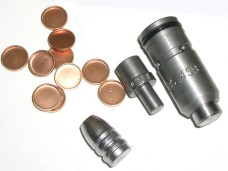
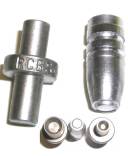
Pictured to the left are gas checks, copper colored, and below the gas checks is a cast .458″ bullet. Moving to the right, a top punch and a sizing die. Bullets designed to utilize gas checks are cast in moulds that are stepped at the heel to accommodate this part, a small cup that presses or crimps onto the bullet.
Virtually all cast bullets rely on bullet lube to decrease bore friction and leading. Gas checks are frequently added to bullets slated for application where velocities run at the high end of the cast bullet useful range, up to 2,500 fps. Gas checks are used to prevent gas cutting of the bullet’s surface by chamber pressure. This cutting can displace tin from the bullet’s surface and transfer it to porous bore surfaces. Accumulated tin will quickly become a collecting point for lead, which could result in bore leading and deterioration of accuracy. Opposing theory regarding this issue centers around thermal transfer from the burning charge to the lead; some suggest the gas check blocks high temp melting of the alloy and gas cutting, others suggest the cutting is a function only of pressure, as neither the alloy or the powder are candidates for heat transfer of the year awards.
This whole tin lead thing is a little confusing, but I would assume that tin migrates to the outside of the lead, just like it forms a skin on the top of the melting pot, which would put tin deposits on the bullet’s surface. So cutting gas could dislodge tin before lead even without thermal assistance. For the fans of the thermal meltdown theory, tin does melt at a much lower temp, 449ºF which could contribute to lead deposits. On the Brinell hardness scale, the lead alloy runs from 9 to 25 BHN, the gas check approximately 100 BHN. I don’t know if that is important at this point, but it greatly helps me to bring this paragraph to a close.
Presses and other tools
Sizing is typically done in a press designed for this purpose, and there are number of pieces of equipment on the market to select from. The better pieces of equipment employ compact sturdy castings with a reservoir for lube, and a single station for a sizing die. Some utilize top plugs to support the bullet nose under pressure, some seat gas checks; both Lyman slip on, and Hornady/RCBS crimp on types. There are lot of conditional and alternative theory areas in bullet casting, but then process has been around since the 14th century so more than a handful of people have has an opportunity to work with the process. Today’s some of those contradictions in approaches manifest themselves in equipment design.
The Lee Bullet Lubricating and Sizing Kit, is essentially a sizer die made for use in a standard reloading press, and comes complete with a container of Alox bullet lube and a couple of translucent red plastic containers. The lube part of the kit is accomplished by dumping the bullets into a plastic bowl, blobbing them with Lee Alox lube, and shaking the bowl to coat the bullets. Most instructions for cast bullet lubrication from other sources, suggest putting this sticky glop only where necessary, not all over the bullet. The sizing die mounts in any 7/8×14 threaded hole, a punch mounts to the press ram and a red plastic hopper mounts at the top of the sizing die. A pre-lubed bullet is placed nose up on the punch, the bullet is guided into the sizing die, and the press operating lever is pulled down, driving the bullet through the die and into the plastic hopper above the die. Lee recommends re-lubing after sizing. Lube & Sizing Kits go for about $12 and the kit is reported to also install gas check within the same process. I don’t know how the Lee press works in practice, but the notion of driving the bullet through the die from the base’s larger surface area seems like a good idea.
 Lyman offers the 450 Lube Sizer, left, with separate press-on gas check seater for $98 and $10 respectively. It is very similar to the RCBS and SAECO presses in configuration; a die holder, a piggybacked lube chamber, fed base down, and used with a top punch. In fact, Lyman and RCBS top punches are interchangeable. The 450 is a solid piece of equipment, and some assemblies interchange with the original RCBS Lube-A-Matic. One of these interchangeable tools is the gas check seater, a step that is done on this press as a secondary operation.
 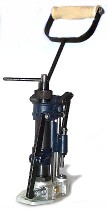 Gas checks for Lyman products are press fit and designed to separate from the heel of the bullet after leaving the muzzle. A sizing die runs about $19, a top punch runs about $7.50. Lyman also offers a lube heater for use with high temp, high viscosity lubes.
Magma Engineering is probably best know as producers of commercial or high volume cast bullet production equipment. They also make a manual sizer press, right, originally known as the Star Lube-Sizer. Magma also make an automatic system to support their volume casting customers, that can crank out 8,000 bullets per hour. I can’t shoot that fast. The base Lube-Sizer retails for $175, dies list for $32. Delivery lead time at the time of this writing was three weeks, direct from Magma. The price of the automated equipment ? That’s more information than I need at the moment.
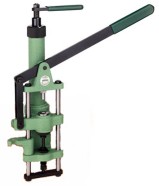 The SAECO Lubri-Sizer, Redding’s sizing system, is of high quality, and sharing much in common with Lyman and RCBS. Gas check seating is done as a secondary step, and may be accomplished without sizing the bullet. Two top punch styles are available – including one that is interchangeable with
  RCBS and Lyman equipment. The Redding unit can be found in retail for approximately $115. Sizer dies go for about $22 each, top punches another $8.
The RCBS Lube-A-Matic 2 sizes, lubes and crimp seats gas checks in one shot. It is a relatively compact, but very sturdy piece of equipment, and holds enough lube in the manually pressurized storage compartment to do a run of about 100 bullets without refilling. The cost for the press is approximately $120 through most Internet ad mail order distributors, and are generally available to ship from stock. I picked this model because of the one step gas check seating, and it’s ability to fill grooves with lube at room temperature without the aid of a heater, or specially formulated lube. I also have come to appreciate the RCBS grouping system where moulds relate to sizer dies, dies relate to top plugs and everything works well together. Sizing dies cost between $17 and $25 depending on part number, and a top punch is another $8.
Putting the equipment to use – first bullets
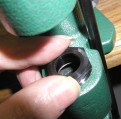
The press is a very simple assembly, packaged with a sample stick of general purpose bullet lube which is not rated for use with high velocity rifle loads. Rifle lube, because of increased smoke and odor, is suggested for outdoor applications only. Unlike most RCBS equipment, the Lube-A-Matic 2 doesn’t seem to share a foot print, or mount bolt pattern, with any other RCBS equipment, so mount hole drilling was required. Preparation for initial use begins with a clean up and removal of the die locking cap from the die cavity to make way for the sizer die.
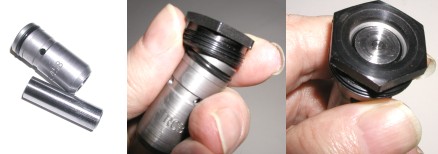
The sizer die is made up of two parts, the outside cylindrical forming tool with lube recesses, and a central lower punch. The punch supports and properly positions the base of the bullet while it is being cycled through the die, and it ejects the bullet from the die at the top of the press stroke. The two sizer die parts are assembled, pin chamfered end to die chamfered end, then the die is pressed into the locking cap, including the rubber O ring, until the top of the sizer die is seated flush against the inside recess of the locking cap.
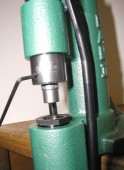
The sizer die and die locking cap assembly is returned to the die cavity and tightened. The locking Allen head set screw in the press upper ram is backed out, and the top punch is installed. The straight pin faces up, the tapered recess down, and the lettering should be right side up – this orientation will place the top punch in full contact around the nose of the cast bullet.
The .458″ bullets took a #600 top punch, the .358″ bullets took a #565. Some bullets of the same caliber and profile utilize the same punch. The punch fit is important because it is used to drive the bullet downward into the sizer die and should not deform the soft lead tip.
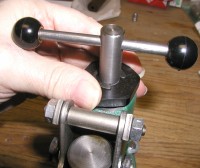
After the sizer die and top punch have been installed, the press handle is rotated down, the reservoir cap is unscrewed and the lube pressure assembly is extracted from the press. 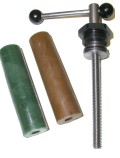 The pressurizing assembly works like an old grease gun where a piston is screwed down into a chamber full of lube which is, in turn, forced through a small passage that connects the reservoir to holes drilled through to the sizer die cavity, and out through holes in the sizer die. The lube is metered to the cast bullet, by a recessed area in the sizer die, with each actuation of the press handle. As lube is depleted from the chamber, the lube pressure handle is further tightened to maintain this flow.
Above left, the hollow green stick (labeled Bullet Lube) is for pistol and low velocity indoor use, the brown stuff (labeled Rifle Bullet Lube) is for high velocity and outdoor use. RCBS rifle lube is made to an NRA approved specification of Alox and beeswax. Both are non-toxic, but the standard lube for indoor use smokes less. Alox, not Allox, is a non-petrol based lube and, when added to beeswax, will not melt in warm ambient temperatures, in the upper range of 130º F, while being soft enough to feed through the press without the use of a heater. Allox in an aluminum based abrasive, probably not good to mix the two.
I don’t understand much about bullet lube, other than most are based on a combination of Alox, paraffin and beeswax, or some form of synthetic lube – one component is to provide lubrication, another is to provide viscosity and temperature stability. Besides the many commercial product options, there are also many home made recipes with ingredients ranging from old motor oil and windshield wiper fluid to peanut butter and sharp cheddar cheese – I’m not sure why the effort to find an improved lube, other than smoke and odor reduction unless, of course, I need to put another stick in the reservoir before I finish 100 bullets. At the going price per stick $3.50 – $5.00, the 3.5 ¢ – 5 ¢ cost per bullet would be greater than the cost of lead. Hmm…no wonder these guys are selling “Vern’s old bullet lube elixir” from their home bullet lube stills. Perhaps this is like the billion dollar multinational companies that use names like “Mrs. Smith’s Pies” for a public persona?
Lube adjustments
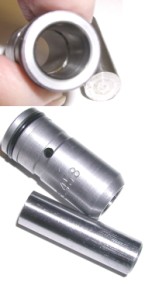 Some simple adjustments need to be made each time a die set is installed, the objective of that adjustment is predominately to insure proper application of bullet lube. Proper application typically means filling all of radial grooves of the bullet, except for the one that will be used for case mouth crimping,.
The sizer die on at the lower left has a groove, located midway down the side of the die, that runs around it’s circumference. There are several holes drilled through the groove and the wall of the die. In the top picture you can see a groove present on the inside of the die body that is inline with the same holes. When the press reservoir is pressurized, lube is forced through a passage that passes through the press die cavity and the sizer die, into the groove on the side of the sizer die, through the holes in the groove, and into the sizer dies inner groove; a lot of words for a very short trip.
The cast bullet, base down on the sizer die’s lower punch, is forced down into the die by the top punch. As the bullet passes across the groove inside the die body, lube fills the groove(s) in the bullet. This sounds like the sex life of a trout. Anyway, the farther down into the die the bullet passes, the more grooves will be filled. The interference fit of the sizer die and bullet prevent lube from getting onto other bullet surfaces. Excessive reservoir pressure can force lube under the base of the bullet as it passes by on the down stroke, while too little pressure will cause incomplete filling of the grooves.
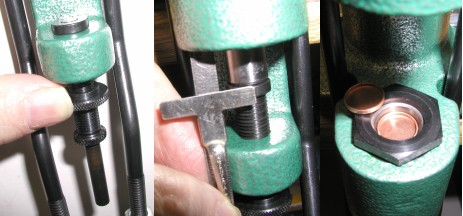
The ram stroke adjustment is pretty straight forward. You back off on the bullet ejector rod lock ring (under thumb), and crank up the ejector rod screw that runs through the center of the lock ring, until the sizer die’s lower punch protrudes downward about 1/2″. At this setting, the grooves in the .458″ cast bullet were filled as the bullet was sized, and the upstroke of the press carried the bullet to the top of the sizer die for easy removal. To install a gas check, I only needed to drop it into the die ahead of the bullet, then place the heel of the bullet on top of the gas check and cycle the press. Neat!
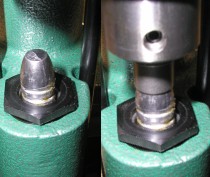
On the far left is a bullet set into the sizer die. It has a light coating of lube that was put on manually because it was the first bullet through the dry die surface. Lead grips well, and a dry die and bullet is an opportunity for another project. With the bullet in place, I cranked down the pressure handle on the reservoir until I felt solid resistance, which meant I had filled the lube die and passageways.
At the near left, the bullet is being held in alignment by the top punch. It takes little effort to cycle the press, swage the bullet, seat the gas check, and lube. It is a good idea to pause for a second at the bottom of the stoke to give the lube a chance to flow into the bullet grooves. For the first few bullets, it seemed as though I had to fiddle with the pressure handle quite a bit to get rid of partially filled bullet grooves, but after that the process ran smoothly.
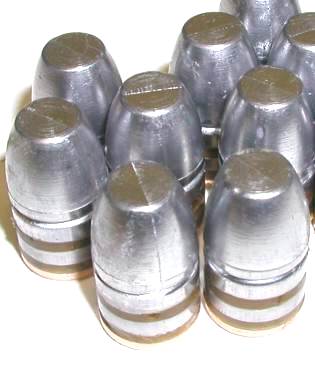 The finished product is on the right. I honestly can’t tell if they are good or bad; casting is one of those deals that takes 15 minutes to learn how to make lead look like a bullet, then another 15 years to make bullets that shoot straight and hold together. But I’d be lying if I said I didn’t feel good about the results and the whole idea of making my own bullets. I’m not crazy about the parting lines, but the finished diameters were uniform.
The .458″ bore bullet production was relatively uneventful. I expect to weigh them all again, now that they are completely assembled, and see if there is some sorting I need to do based on weight. Other than that, I boxed them up and put them aside for reloading I expect to accomplish, as soon as I’m caught up on some other projects. And then there were the .358″ parts….
“Is he ever going to shut up?”
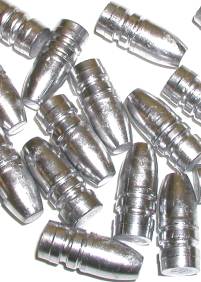
Casting gets better, or maybe it just gets easier. A little experience makes for more careful confidence, and process steps become familiar and routine. Just getting comfortable with handling molten lead makes for a lot more relaxation. Casting never got boring, in fact, with experience comes grand ideas for future efforts.
The .358″ bullet casting, the third casting session, went much better. Temperature of the lead was more closely controlled, the alloy was a lot cleaner, and the mould was kept up to a decent operating temperature. There were no voids and the surface was uniform and shiny, not over temp frosted like the .458″ bullets and early .358″ product.
The RCBS mould was to produce a 200 grain bullet with #2 alloy, the wheel weight material came in at about 208 prior to gas check or lube.
I didn’t spend much time analyzing the .458″ pre sized bullets. Afterward they mostly measured .4575″ at the bore contact point, but I am not sure where they started out individually. I thought it would help to more closely monitor the .358″ bullets for future reference. For those of you who ask the question, “What happens when you jam a piece of soft lead through a precision steel sizer die….
|
Post – Pre Size Dimensions .358″ |
|||||
| Bullet # | Heel* | Ring 1 | Ring 2 | Ring 3 | |
| 1 | Post | .3585 | .3585 | .3580 | .3580 |
| Pre | .3425 | .3595 | .3605 | .3575 | |
| 2 | Post | .3585 | .3580 | .3585 | .3580 |
| Pre | .3424 | .3595 | .3575 | .3575 | |
| 3 | Post | .3585 | .3585 | .3580 | .3585 |
| Pre | .3425 | .3590 | .3585 | .3590 | |
| 4 | Post | .3575 | .3575 | .3575 | .3580 |
| Pre | .3420 | .3614 | .3525 | .3585 | |
| 5 | Post | .3585 | .3585 | .3575 | .3575 |
| Pre | .3428 | .3595 | .3600 | .3580 | |
| 6 | Post | .3585 | .3575 | .3575 | .3575 |
| Pre | .3415 | .3580 | .3590 | .3575 | |
| 7 | Post | .3580 | .3575 | .3575 | .3580 |
| Pre | .3425 | .3585 | .3600 | .3565 | |
| 8 | Post | .3585 | .3580 | .3580 | .3580 |
| Pre | .3415 | .3580 | .3575 | .3615 | |
| 9 | Post | .3585 | .3580 | .3580 | .3580 |
| Pre | .3435 | .3595 | .3590 | .3580 | |
| 10 | Post | .3585 | .3580 | .3580 | .3580 |
| Pre | .3435 | .3585 | .3580 | .3580 | |
| 11 | Post | .3585 | .3585 | .3585 | .3580 |
| Pre | .3435 | .3585 | .3580 | .3580 | |
| 12 | Post | .3590 | .3590 | .3600 | .3580 |
| Pre | .3415 | .3605 | ,3575 | .3580 | |
| 13 | Post | .3585 | .3585 | .3580 | .3580 |
| Pre | .3400 | .3610 | .3600 | .3585 | |
| 14 | Post | .3585 | .3580 | .3580 | .3585 |
| Pre | .3415 | .3595 | .3570 | .3590 | |
| 15 | Post | .3585 | .3595 | .3585 | .3575 |
| Pre | .3455 | .3570 | .3595 | .3575 | |
|
*Post heel measurement with gas check |
|||||
The disparity between pre and post heel readings is reflective of gas check installation. Initially, I wasn’t going to collect that dimension, but I thought it might show something regarding gas check fit and how the press handled crimping and swaging a much harder gas check while swaging relatively soft lead. I did come away from this with a few conclusion I will draw upon in future casting efforts.
I have acquired some 50/50 lead tin bars, and I am going to run some bullets with a harder composition. I want to see if the tin helps the mould filling and if the harder alloy shrinks less when cooled. I noticed that some bullets seemingly grew in diameter with swaging, but I think this is more symptomatic of incomplete mould filling and where I took my measurements; the circumference of the bands are cast plus or minus some diameter to the bullet centerline, and swaging forces a correct geometry and shifts excess material to areas of lesser material. I am not sure what the variance means in practical terms. With the exception of one bullet, if I use .3585″ as nominal, the others are all within .0015″ of the range, and I’ve seen mixed assessments of how much of a reduction can be accommodated with a sizer die. I doubt if I will know until I can build some controlled lots, and spend some time at the range with a chronograph and targets to analyze.
Still stranger things that happen
 A page from the book of “Don’t take anything for granted” I locked in my #565 top punch, took a swipe at a .358″ bullet and realized I had invented a new double concentric rebated tip. Huh? I double checked the top punch and realized I had pulled a #515 top punch out of a sealed blister pack labeled #565. I didn’t mind the RCBS error so much, as the fact I was unable to order a replacement from a retail dealer who had one in stock; they all had $35 – $45 minimum orders, or they were charging $15 for UPS ground to deliver the $7 part – Gee, yesterday I was a good customer spending lots of money, today I’m apparently not worth the effort. One day you purchase a $300 press, the next day you can’t get an inexpensive part to keep the press in service.
RCBS who sells the part at a lower MSRP than the price most of these Internet services charge even when they will take an order, listened to my sad RCBS mislabeled parts story and sent a replacement top punch free of charge. They didn’t have one in inventory, but the customer service agent took the time to track one down and send it the same day I called. This is the third time they have stepped up to help out when I’ve run into a problem in the dealer channel. The RCBS people don’t know me, don’t know why I’m looking for the part, they just are out supporting their product and customers – very nice.
Bullets for shooting around corners

Earlier on, in the section related to bullet travel adjustment, I was going to suggest that you can’t over pressurize the lube reservoir, but I leaned very quickly that isn’t the case. This bullet to the left is leaning because lube collected on the surface of the sizer die’s lower punch, formed a wedge under the gas check, and caused it to crimp to the bullet heel at an angle. So, too much pressure can force lube between the sizer die lower punch and the gas check or heel of a bullet, causing a parts misalignment. It is relatively easy to become competent at casting simple bullets for general use, however, there are many nuances to each of the related tasks and excellence of bullet performance, I am sure, is tied to developing a set of excellent bullet casting skills. No, I don’t know how long it takes but, based on the continual stream of new info, I know it will take awhile.
I think the equipment I purchased is more than okay, however, I would replace the Lee equipment, and look around for items that are a bit more substantial, that might take less juggling and attention to get consistent results. As an example, a better quality furnace with a higher wattage rating, more and heavier duty heating elements, may have the ability to maintain a narrow temperature range and offer thermostatic control. I’m not sure I necessarily want a melter with a larger solder pot. Larger diameter means more surface area, more surface area means greater surface heat loss, rapid heat loss means a greater demand on heating elements and thermostatic control. I would need to conduct another investigation with different criteria for furnace selection.
Items such as ladles, ingot moulds and lead pots from Lee are functional and, even in retrospect, I would have started this project with the same shopping list. Still, if I continue on with this activity I will look for something that will fit in with the quality I like to see in shop tools and equipment. I would also dedicate shop area to this work; casting equipment doesn’t put away well and it’s a pain to set up from scratch.
Casting as an art form
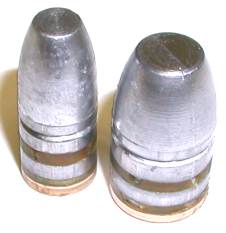
I thought I’d close this series with a display of some of my latest art, like the masterpiece on the right. I call it “The World’s Two Most Expensive Bullets”. I promised I would summarize the cost of getting into the amateur cast bullet game.
Please keep in mind that this is my attempt at casting and I am sure there are many different and, no doubt, better approaches. Secondly, much of the cost is like any other equipment purchase, it’s done for the long haul and the more it is used the lower the cost per unit of output. Now if I can figure out why gas checks are packed 1,000 to the box….
| Casting Project Cost Summary | |||
| Product | Cost | One time Charge |
Comments |
| Lee Production Pot IV | 42.00 | Y | Small pot diameter, poor temp control |
| RCBS Lead Thermometer | 32.00 | Y | I could not cast without a thermometer |
| Lee ingot mould | 9.75 | Y | Works, but aluminum and small |
| Lee ladle | 2.75 | Y | Small and stamped steel – functional |
| Lee lead pot | 2.95 | Y | Small and stamped steel – functional |
| RCBS 45–300-FN mould | 49.50 | Y | Iron, worked well, good alignment |
| RCBS 35-200-FN mould | 49.50 | Y | |
| RCBS mould handles | 25.25 | Y | Only one require for all mould sets |
| RCBS Lube-A-Matic 2 | 119.50 | Y | Painless to set up and use, small footprint |
| Marvelux flux | 8.95 | N | Odorless dry powder, no smoke or fumes |
| RCBS 358 sizer die | 16.50 | Y | |
| RCBS 458 sizer die | 16.50 | Y | |
| RCBS #565 top punch | 6.50 | Y | Verify contents of package |
| RCBS #600 top punch | 6.50 | Y | |
| Hornady gas checks 35 cal | 11.20 | N | Cost per 1,000 or a penny each |
| Hornady gas checks 45 cal | 16.11 | N | Cost per 1,000, penny and a half each |
| RCBS rifle bullet lube | 3.25 | N | Undetermined unit cost, maybe 2~4 cents |
| RCBS bullet casting video | 17.95 | Y | Nice for familiarization, but not essential |
| Bullet alloy (100 bullets) | 5.14 | N | $1.20 per pound premix, wheel weights free |
| Total start up cost $442, or $4.42 per bullet to make the first 100 bullets Yikes !! | |||
| Cost to make the next 100 $8.39, or 8 cents per bullet, 3 cents with free wheel weights | |||
I didn’t intend to frighten anyone, I think the truth regarding cost lies somewhere in the middle. I don’t think anyone would purchase this equipment if they didn’t have some intention of casting some volume. Every bullet type cast will incur other costs for a mould, sizer die and top punch (with minor exceptions), but perhaps these costs belong in a separate assessment, when thinking about taking on another bullet to cast. Here are a few other pieces of information you may want to consider, or discard.
Based on the cost itemized above, using your own cast bullets in place of store bought jacketed for the .458″ bore, as an example, would save the difference between 8 cents and 25 cents per bullet, or 17 cents each. This example is assuming the use of purchased bullet alloy and not making bullets from free wheel weights and, still, all equipment costs would be recovered after casting approximately 2500 bullets. I did a price check of quality cast bullets for the same weight and bore, comparable to what could be cast from the listed equipment, and these were typically more expensive than the jacketed bullet I used in the prior example. Of course there are cheap practice bullets that can be purchased in the 12 cents per bullet range, but I don’t think most people would cast to save a penny or so a bullet, but rather to be able to produce quality bullets that would be overly expensive on the open market.
There are certainly less expensive and more expensive ways of approaching this project. Substituting the Lee Lube and Sizing kits would replace a $140 expenditure with a cost of $12. There are $16 two cavity bullet moulds if aluminum works for you and tool longevity isn’t critical. On the other hand, I could have easily gone the other way and spent an extra $200 on a better furnace and a couple of pieces of handling equipment. Actually, I couldn’t as a function of overall budget, but you know what I mean.
As I look through my firearm inventory, I can see lots of applications where a cast bullet is a more natural application than a jacketed bullet; the .45-70, .30-30, .44 mag, .45 LC are all sub 2,500 fps performers with full up loads, and naturals for cast bullets. On the less traditional front, where there is a high potential for more shooting time based on reduced loads, there is the .358-378RG and the .416 Weatherby – deer hunting with bowling balls. The project was a lot of fun, never got boring and I look forward to future related projects.
More “Casting bullets and selecting fire extinguishers”:
Casting bullets and selecting fire extinguishers Part I
Casting bullets and selecting fire extinguishers Part II
Casting bullets and selecting fire extinguishers Part III
Casting bullets and selecting fire extinguishers – Conclusion
Thanks
Joe

Email Notification