| Duration Minutes |
Cumulative Minutes |
Ambient Cooling |
Temp Change |
Cumulative Change |
Assisted Cooling |
Temp Change |
Cumulative Change |
| Start |
– |
144 |
– |
– |
144 |
– |
– |
| 2 | 2 | 135 | -9 | -9 | 128 | -16 | -16 |
| 2 | 4 | 126 | -9 | -18 | 116 | -12 | -28 |
| 2 | 6 | 122 | -4 | -22 | 109 | -7 | -35 |
| 2 | 8 | 117 | -5 | -27 | 104 | -5 | -40 |
| 2 | 10 | 113 | -4 | -31 | 97 | -7 | -47 |
| 2 | 12 | 109 | -4 | -35 | 95 | -2 | -49 |
| 2 | 14 | 107 | -2 | -37 | 90 | -5 | -54 |
| 2 | 16 | 106 | -1 | -38 | 87 | -3 | -57 |
| 2 | 18 | 102 | -4 | -42 | 84 | -3 | -60 |
| 2 | 20 | 101 | -1 | -43 | 82 | -2 | -62 |
| 2 | 22 | 97 | -4 | -47 | 81 | -1 | -63 |
| 2 | 24 | 94 | -3 | -50 | 79 | -2 | -65 |
| 2 | 26 | 93 | -1 | -51 | 77 | -2 | -67 |
| 2 | 28 | 90 | -3 | -54 | 76 | -1 | -68 |
| 2 | 30 | 89 | -1 | -55 | 75 | -1 | -69 |
| 2 | 32 | 86 | -3 | -58 | 74 | -1 | -70 |
| 2 | 34 | 85 | -1 | -59 | 73 | -1 | -71 |
| 2 | 36 | 84 | -1 | -60 | 72 | -1 | -72 |
| 2 | 38 | 82 | -1 | -61 | 71 | -1 | -73 |
| 2 | 40 | 81 | -1 | -62 | 70 | -1 | -74 |
| Ambient 66.1°F – 67.9°F | Green indicates “Cool to touch” condition | |||||||
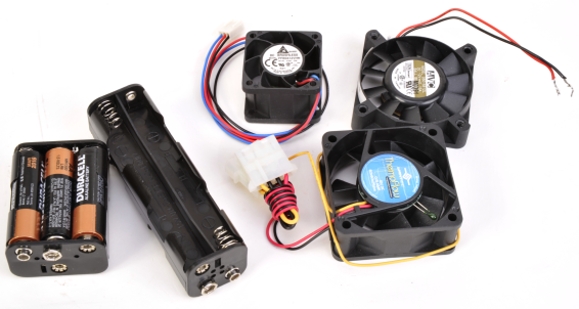
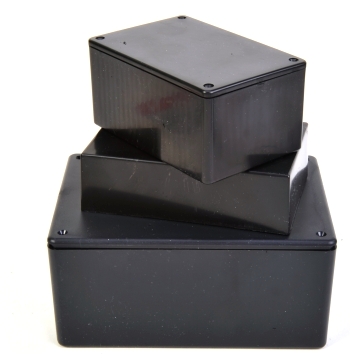
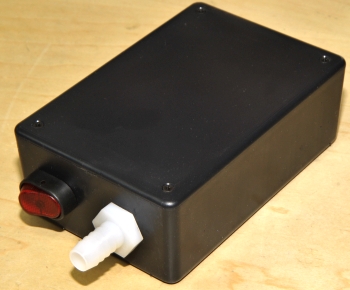
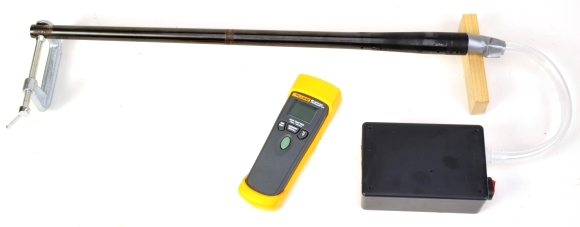
Enclosure selection is pretty much driven by the number and size of internal components selected and user convenience. Essentially, the enclosure becomes a plenum and the fan builds positive pressure that is expelled through a tube and pumped into the firearm’s chamber and bore.
While logic suggests arrangement of fan and tube within the box should not matter, as pressure rather than airflow determines flow through the exit tube, building several models in different configuration suggests locating the fan directly across from the exit tube and reducing the size of the plenum area increases airflow reaching the firearm’s chamber by as much as 20%. These cases are all made of ABS material and so they are easy to modify to whatever configuration desired.
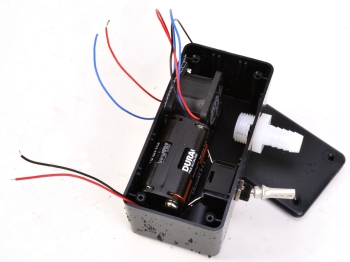 The first prototype was smaller than necessary. This resulted in less than ideal fan placement and an undersized power supply without any real benefit derived from the unit’s small size.
The original prototype also used crimped solderless connectors and shrink tubing that ended up taking up more space than they contributed to ease of assembly and disassembly or isolation of electrical contact surfaces. The final unit has soldered connections, more internal component clearance and it is easier to keep in place on the shooting bench.
Tools required…
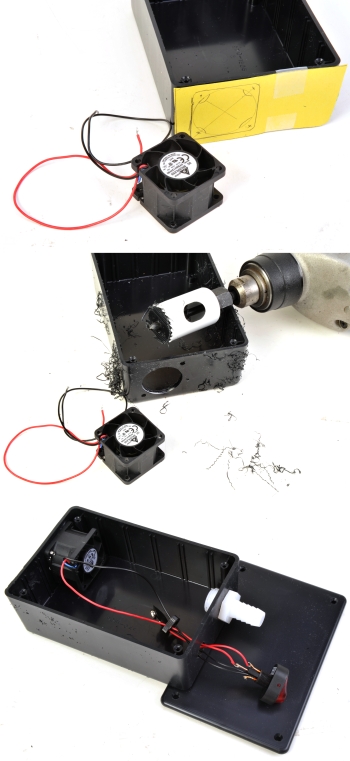
As one of three people left in the universe who still owns drafting tools that work in concert with paper, making small templates and layout guides is pretty easy. No drafting tools? The box is small enough and the parts big enough to eyeball then manually mark up drill out and cut as required.
An undersize hole saw was used to cut the fan intake/exhaust, a Dremel with rotary file was used to cut the hole to full size while leaving ears to provide support to the fan’s mounting fasteners. A little patience went a long ways. An assortment of small files were use to smooth and shape as required.
An X-acto knife with chisel blade was used to remove interior box ribbing for clearance and to assure a flat mounting surface. The Dremel was used to remove portions of screw bosses that had been molded integral to the ABS case.
The front panel holds the hose barb connector and the switch. I laid everything out in approximate location before cutting anything to make sure things general had enough clearance. Because the barb is made of hard Nylon, at least harder than the ABS case, making the mount hole slightly undersize permits self tapping the barb into place securely.
Laying the wires out and pulling them through the switch hole permits soldering outside the box and on a fireproof/melt proof surface. It’s important to made sure the wires pass through the threaded switch mount ring inside the case for obvious reasons. Not that I forgot.
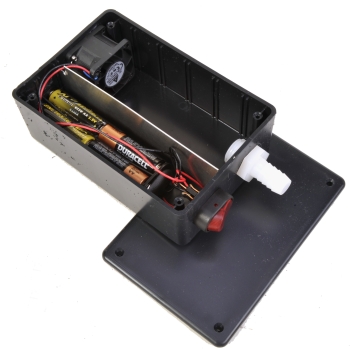
The interior of the box was baffled to cut plenum volume, to direct airflow and to isolate the mass of the batteries. Cases sold by radio shack include a fitted plastic lid and a flat aluminum cover. A piece of the aluminum panel was cut off with aircraft shears to form the central baffle, ends notched to provide wiring clearance and to allow the plastic lid to fit tightly. The baffle is secured with the locating ribs molded into the case. The battery fit was so close inside its compartment, I was able to place a short strip of egg crate foam on top of the batteries and everything just by tightening the plastic box cover.
The use of a lighted switch was self indulgent as there is no mistaking when the unit is switched on and the switch’s light draws on the battery, even if ever so slightly.
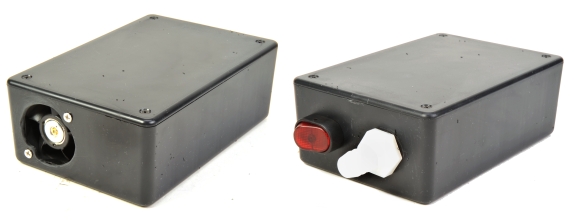
The rear air inlet clearly needs something to guard the fan from finger and small part intrusions. A piece of plastic window screen sandwiched between box and fan would suffice. I might try a larger air outlet, although the 1/2″ fitting with 3/8″ inside diameter opening flows 16 CFM. I calculated flow by measuring air velocity with a knot wind meter, then converted knots to feet per minute, the factored in open flow area and converted to CFM. Seems pretty close. In any event, it is a lot of air flow through a heated barrel.
|
Part Description |
Cost $ |
| 6″ L x 4″ W x 2″ H Project Enclosure Radio Shack #: 270-1806 | 4.99 |
| 8 AA Cell Battery Holder Radio Shack #: 270-407 | 1.89 |
| 9V Heavy Duty Battery Clip Radio Shack #: 270-324 | 2.69 |
| SPST Illuminated Rocker Switch Radio Shack #: 275-0712 | 3.99 |
| Delta 40mm Fan 16cfm NewEgg #:FFB0412VHN-F00 | 14.98 |
| 1/2″ – 3/8″ Plastic Barb x MIP Adapter Home Depot #:Model # A-387A | 1.68 |
| 3 ft of 1/2″ Clear PVC Tubing | 2.83 |
| 8 Duracell AA Batteries | 2.10 |
| Total | 35.15 |
There are lots of substitute parts that could potentially have a major impact on cost. 50mm fans of comparable airflow are approximately half the price of the high output 40mm and they draw half the amps which extends battery life. The next size down case would shave $1. The regular battery clip is half the indicated cost, etc. What is listed represents what went into my prototype, some of which would be revised in building a more permanent piece of equipment. My guess is a better box could be assembled for under $20.
Conclusions?
A worthwhile exercise and a finished result that is adequate for my needs. I used a 3′ length of PVC clear tube for the connection to the firearm and, without a second barb sitting on hand, I cut one out of Nylon 66 on the lathe. Yup. I think this one was worth the investment in time and materials. We will now returned to our scheduled programming.

Email Notification