
Part I concluded with the Mossberg Ulti-Mag 835 sporting a 24″ rifles slug barrel with adjustable sights and an extended magazine that added three rounds of magazine capacity. It’s overall length was reduced to 44¼” with weight held at 7½ lbs. In the world of lever action carbines, that is probably a tad long, but in the world of magnum length action shotguns, it is downright tiny.
Tack driver, not tacky driver…
The Mossberg synthetic stock no doubt contributed to the modest cost of the firearm. However, a molded in tab for a swivel mount was fragile, cheese grater sharp checkering was rough on the hands and the shallow radius sweep of the pistol grip made for shotgun point and shoot provided little hand support for aimed fire. There were lots of aftermarket ways to make this better.
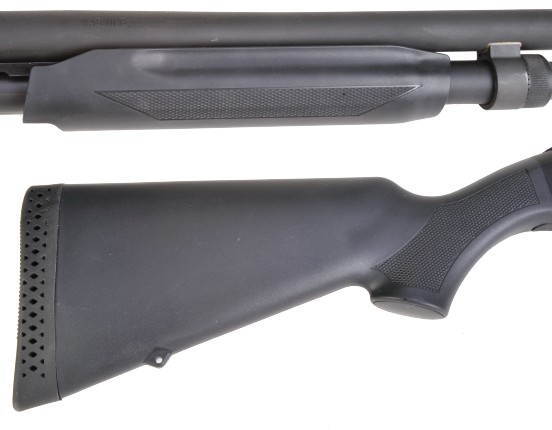
The long and short of replacement stock selection…
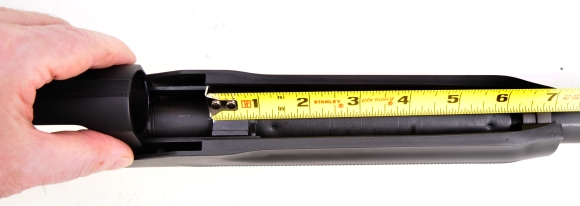
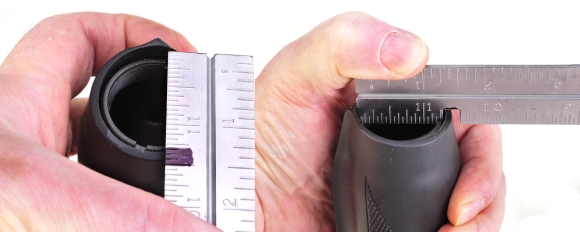
A little caution needs to be exercised in selecting replacement products. For the most part, butt stocks that fit the Model 500 will fit the Model 835. This interchangeability does not carry through to the forearm. The Model 835 is a magnum gun and has a longer length action and Mossberg 500 series and it utilizes two different action slide tube lengths. Early guns have a 7¾” tube, newer guns a 6¾” tube. Subsequently, replacement stocks made for this gun may include, or require the purchase of, a special action tube nut to adapt the forend to the shorter action slide tube. The easiest thing to do is pull the barrel, a five minute task, and measure the as shown below. With the action tube nut in place the assembly may measure a bit longer than 6¾”, but not by much.
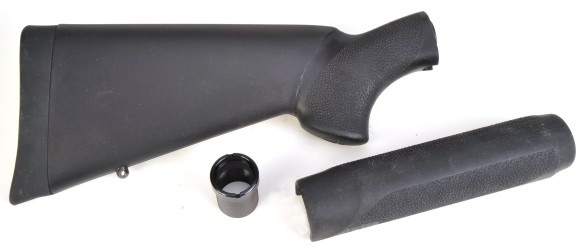
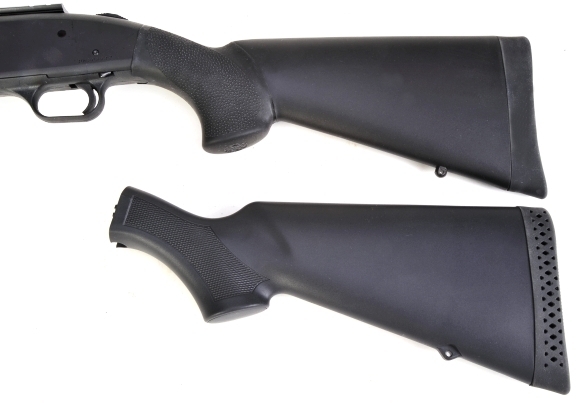
My gun has a short action slide tube, so the selection was Brownells #408-000-059, $69.95, Hogue Overmolded Model 500/835 stock and forend and #408-000-069, $9.99 forend adapter nut. Stock enhancements over the factory stock are a slightly higher comb, a good resilient recoil pad, a tighter pistol grip radius and a stippled soft overmolded treatment at the grip area. A steel sling swivel stud replaces the molded in mount. The forearm is overmolded with a little bit more of a rounded cross section and the stippling is comfortable in use. So the improvements are both functional and aesthetic… and inexpensive.
While we are here – double check the gun, magazine and chamber, to ensure it is empty before handling a firearm. To the degree required, disassembly and assembly are covered by the Mossberg Owner’s Manual, pages 7 – 10. If you don’t happen to have a copy of the manual, one can downloaded from the Mossberg web site, free of charge.
When is it a forend and when is it a forearm?
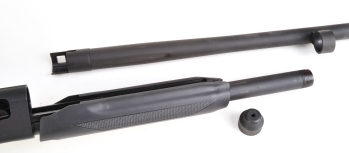 The manual is a little light on concise illustration, but more than enough to get through this project … without having to go to a gunsmith with a story that suggests your dog disassembled the gun while you were at work. Can’t trust those damn beagles.
The photo detail and parts ID were inserted for reference. Sometimes it helps to know where parts were before gravity rearranged them. In any event, our forend story unfolds with the gun’s slide pulled all the way back, then advanced forward until the bolt face is about halfway forward in the ejection port. At this point the magazine cap and barrel are removed from the Model 835 Ulti-Mag.
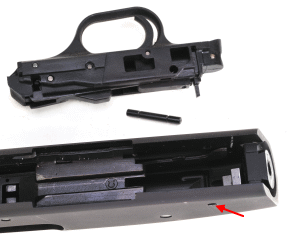
The safety is left in the on position during this process so it will not physically interfere with disassembly/assembly of the elevator. The butt stock was removed while working on the forend installation to make the gun easier to handle on the bench and to prevent the overmolded stock from grabbing the aft edge of the trigger assembly and preventing its removal. Ask me how I know…
With the gun laying belly up on the bench to keep parts from falling out of place during disassembly, a light tap with a 3/16″ punch is all that is required to remove the single pin that retains the trigger assembly in the receiver, see arrow. The released trigger assembly is rotated aft end first out of position for removal.
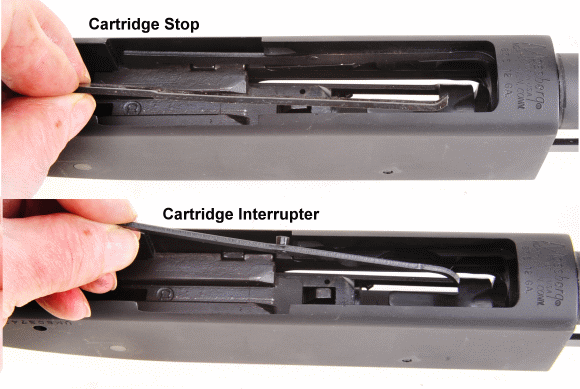
In a gun with a few miles, there is a tendency for these parts to fall out of their respective channels when the trigger assembly is removed. There is only one way for them to go back in. The interrupter is pinned to the receiver and only the right side of the receiver (receiver right side up) has a pin hole and the end hooks curve in on both. If they didn’t fall out on their own, now would be a good time to remove them.
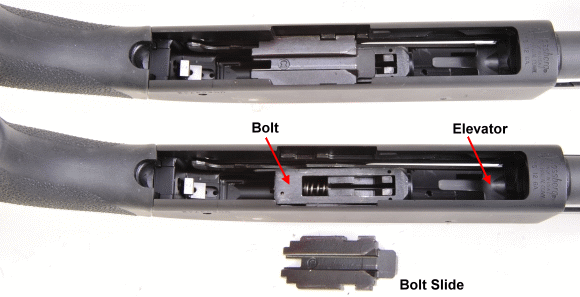
The slide is moved, about three quarters stroke, until the bolt slide tabs line up in the cutouts in the side of the receiver. The bolt slide lifts straight up and out with virtually no resistance. The elevator is raised slightly, then the bolt is then pushed forward and out of the barrel opening of the receiver.

The front of the elevator… Gees, I am old enough to remember when they had elevator operators in department stores. Gees, I’m old enough to remember department stores. Where was I? Oh yeah. The front of the elevator is raised and the elevator legs are pinched together to pull its locating pins out of the sides of the receiver. If the safety had been left in the “Off” position it will get in the way and make clearing the pins difficult. With the elevator out of the way, the forend is freed and can be pulled forward and out of the receiver.
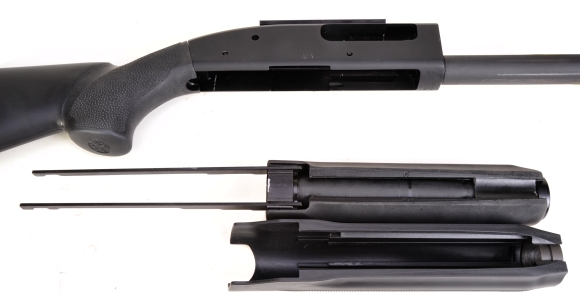
This gets us to a gutted receiver, more or less, and the new slide with adapter ready to be installed. Reassembly is just the reverse sequence of disassembly with no particular problem spots to deal with. Patience helps a lot. As an example, when inserting the new slide assembly the arms on the action slide tube assembly will want to wander off in different directions. Then when you begin to feed the arms into the receiver, the right side will bump first in the receiver channel and will have to be guided. As soon as the arms move another quarter inch, the left side will be the hang up. A little finger pressure and patience, the reassembly task will be easy… except for this –
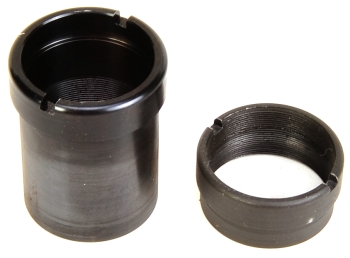
The original action slide tube assembly needs to be carried over to the new forend. The original action tube nut, near right, is replaced with the Hogue adapter nut. Unfortunately, the action tube nut is recessed into the front of the forend, hanging on to the action tube for dear life.
Brownells carries a forend wrench 080-777-004, $50.99 for Mossberg 12 gauge applications. Unfortunately, because shotgun projects are rare, I am poor and always need to find excuses to fabricate parts and tools on the shop equipment, I decided I would make my own wrench.
In a pinch, I am not adverse to making tools from other cheap tools. In this case, a three dollar combination square from Lowes. I laid it across the action tube nut, marked the span as well as enough relief to clear the surrounding forend material, then cut out a notch on the milling machine. Yes, I could have used a hacksaw and file, but it wouldn’t have been as much fun. The tempered scale was left full length as the extension made for a nifty handle with lots of mechanical advantage and I was able to put the rule back into the head and put both back on active duty.
If you laugh when you hear the word “Butt”, you’re immature. Good for you…
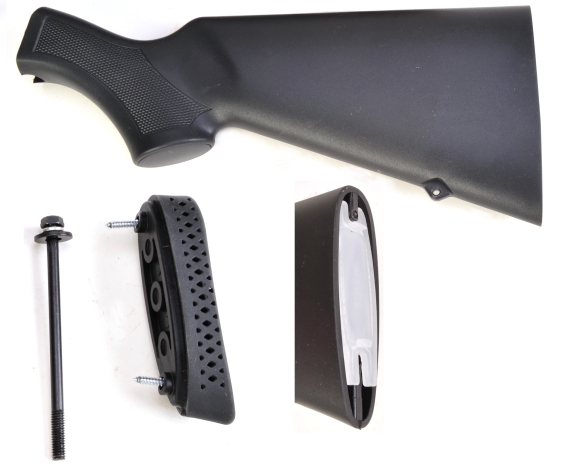
A large common screw driver can be used to pull the stock bolt, but if it is stubborn, a ratchet wrench, extension bar and 1/2″ shallow socket makes removal an easy task. The white plastic insert, bottom right, needs to be carried over to the new stock – it holds the shape of the stock so it can’t compress inward under the recoil pad. The factory bolt passes through a thick steel washer and a lock washer. As Mossberg has used a couple of different length bolts. The new stock comes with a thin washer that can be substituted for the thick washer if enough thread doesn’t protrude far enough. The stock bolt should be tightened, but not to the extent it interfere with trigger assembly removal. Ask me how I know that happens.
Which should end up looking a bit like this, except with a clean recoil pad. Again, great nonslip surface and much better geometry at the pistol grip. Then there us a higher comb for a more natural sighting position, and improved, resilient recoil pad and a real swivel stud.
Conclusion
There are still some needed improvements. At least “needed” to suit my personal preferences, but this is a good start and Part III is already in the works. This shotgun stuff can be a lot of fun.

The Shotgun Chronicles Part I
The Shotgun Chronicles Part II
The Shotgun Chronicles Part III

Email Notification