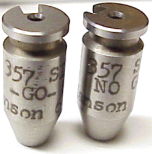
 The “no go” part of the Manson headspace “go” “no go” gauge set showed up from Brownells. I wasn’t sure exactly what information, other than the obvious, it would provide. As a minimum, I knew I would be able to do a quality job of checking out headspace on my own P229, and hopefully gain some insight into a add odd misfire problem I had experienced.
The first thing that became obvious is that it isn’t easy to measure, or draw dimensions from, a headspace gauge. The “go” gauge should fit the gun’s chamber, and the action should close without interference. The “go” gauge represents the minimum chamber size for the applicable cartridge. The “no go” gauge exceeds headspace spec and, as indicated in Part I, should barely prevent the action from closing with the gauge in place.
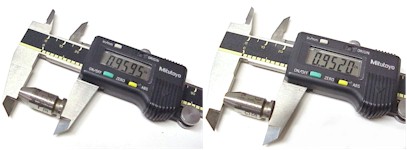 Measuring the overall length of a headspace gauge can be a little confusing, because overall length has little to do with the purpose of the gauges. In fact, in this case the “no-go” which is designed to represent a maximum headspace, is shorter from end to end than the “go” gauge which indicates minimum headspace. The “go” gauge also has a thinner rim and ran smaller in other areas to the point I began to think the gauges were miss-marked. The critical dimension of a headspace gauge is measured from the “case head” to a point on the tapered area of the gauge where there is a diameter of .4025″. This is the point that is large enough to rest at the far end of the chamber and restrict any further movement.
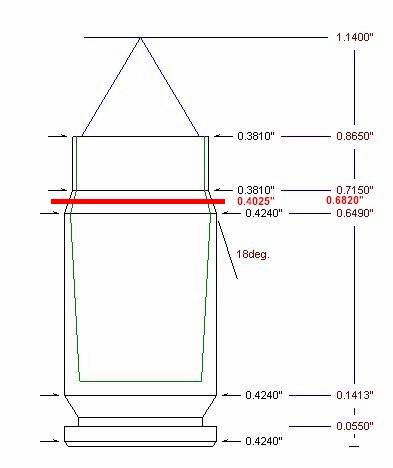 For the sake of illustration, I marked up a drawing of the .357 SIG cartridge, and colored the reference measurements red. Please do not use these for any purpose other than an explanation of how headspace gauges work.
The red line represents the datum line, or reference point on the case that will impede forward travel in the chamber. The measurement for the “go” gauge will be the distance from the datum line to the case head, 0.682″, which represents the minimum headspace for this cartridge. The “no-go” gauge is approximately 0.006″ longer, or 0.688″ from datum line to case head.
Even though the datum line on the gauge is the basis for all headspace measurement, where the gauge is located in relative. The gauge will move forward in the chamber until in encounters a diameter of 0.402″ which will prevent the gauge from moving any farther. From this point diameter, the “go” gauge will project rearward 0.682″, and the “no go” 0.688″. A gun in proper condition will close over the “go” gauge and barely not close over the “no go” gauge.
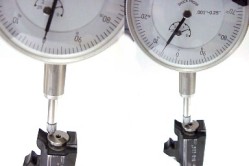 Placing the barrel back into the dial indicator fixture, the “go” gauge resulted in a zero reading, or as being on the exact same plane as the breech end of the barrel tang.
The “no go” gauge read +.006″ higher than the “go” gauge. As I indicated in Part I, the gun would not close on the “no go” gauge. According to the headspace gauges and the dial indicator readings, there was absolutely nothing wrong with the fit of the gun’s parts, nor was there excessive headspace. The gun was working within a .006″ range, which is actually a pretty tight.
Factory ammo measured between -.004″ and -.010″ lower than the “go” gauge, or over 2.5 times the tolerance of the gauges for minimum and maximum headspace, but all ammo fired reliably and primer strike impressions were normal. The firing pin, of course, protrudes much farther than needed to compress a primer, which provides some latitude for variances in ammunition dimensions and the pistol’s parts tolerance stack up. In checking fired cases, they uniformly read +.005″ higher than the “go” gauge, which is about the space remaining between the tang and the breech surface when the gun is locked up, less a little brass spring back.
The questions that comes to mind as I wallow around in this minutiae is, “So what, and who cares ?” Headspace gauges are intended to verify minimum and maximum chamber sizes, not to serve as a point of reference for measuring how ammo will headspace. I ‘m not sure what the various industry tolerances are for cartridge manufacturers, and I’m not so sure I’m interested enough in this information to invest a few bucks in a set of specs from SAMMI. For all I know, manufacturers may operate to a spec that would permit a -.015″ reading. Perhaps negative readings are consistent with increased reliability; better to insure the gun’s action will close and lock up than worry about a few thousandths of decreased headspace and the chance of an action not locking up over a dimensionally too long cartridge. Blow back designs just aren’t as critical to headspace as a bolt action rifle. Maybe it’s the lower chamber pressures, or maybe it’s the cycling slide that absorbs some of these problems.
Still, the interesting factor that stood out while taking all of these readings; premium ammo consistently ran to slight positive measurements, inexpensive practice ammo consistently ran well to the negative side and the less expensive the ammo, the greater the negative measurements. Could this be an exercise in material conservation by manufacturers ? I thought I’d take a peek at the .40 S&W barrel and cartridge and see if this phenomena only applied to the .357 SIG.
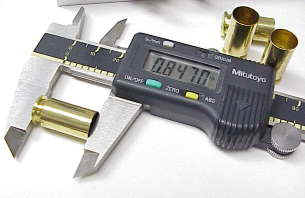 I popped the barrel into the dial indicator fixture and the distance from the surface plate to the barrel tang for the .40 S&W SIG barrel was within .0005″ of the .357 SIG Barrel in overall length. I believe half a thousandth is an incredible repeatability from one barrel to the next.
I went on to measure new .40 S&W cases from Starline, that came in -.003″ under the .850″ spec. Loaded “American Eagle” practice ammo from Federal had a case length of .850″ on the button. The .40 S&W headspaces on the case mouth, so overall length is of much greater importance than on the .357 SIG.
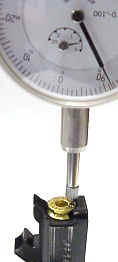 When I dropped the Starline case in, I anticipated a -.003″ reading as a result of the slightly undersized case. In fact, the measurement was -.012″ below the barrel tang. I thought perhaps the case was slightly under diameter without a bullet expanding the case to full diameter. My theory, at that moment, was the case mouth was resting on the far end of the chamber, and the end of the chamber was cut with a relief angle so the ridge was cut farther into the barrel as it moved from outside toward the center of the bore. This would make the slightly smaller diameter empty case locate farther forward than a full case would have. Too bad it took so long to write this, it was a bad theory that lasted about 5 or 6 minutes.
I dropped in a loaded round with a known length of .850″ and I got a reading of -.009, exactly the same difference as there was in case length; empty case versus loaded round.. So much for my terrific, yet convoluted undersize diameter theory. Next, I sat down with a pile of brass in front of me and began measuring all of the cases to see how far this would go. The brass ran from a long of .849″ to a short of .835″. Working my way through several boxes of loaded rounds from Federal and Remington, I actually got very similar results, nothing yielded a plus reading. Because this headspaces on the case mouth, my handloads did no better than the brass they were derived from. You can relocate a shoulder, but it’s tough to stretch straight cases In conclusion, I can only repeat, “So what, and who cares ?”.
There were some accomplishments from all of this motion:
My gun with .357 SIG barrel checked out well within spec regarding headspace, and restored confidence in my P229. I believe I will invest in a set of headspace gauges in .45 auto. I have a few of these pistols and the gauge would come in handy if I decide to start swapping and fitting barrels.
Through use of these gauges and dial indicator setup, I was able to tune my sizing die to get a perfectly placed shoulder for my .357 SIG loads.
I learned that factory ammo can vary in shoulder or mouth location by as much as -.018 for inexpensive target rounds, while premium ammo tends to be consistent to drawing, or even slightly longer. All brass and ammo, regardless dimension, fired reliably with normal primer impressions.
In regards to misfires with early handloads, I did find my Ammo Master shell plate was thinner than the shell holder for my Rock Chucker press. This caused a slightly greater setback at the case shoulder, but after reviewing all of this new brass, and the factory rounds, this shift could have been the cause of misfires. I did find a mistake I made which may have at least contributed to the problem.
The .357 SIG takes a small pistol primer, and I had loaded some rounds with the Ammo Master’s built in primer feed and shuttle system. The press comes with two primer seating pins; to be switched between large and small primers. During one session I apparently left the large pin in when changing over to the .357 SIG. On close inspection, the thin rims on cartridges reloaded from Speer Lawman ammo were cupped concave, and primers were flush to slightly above the case head by a couple of thousandths of an inch.
The large primer pin was pressing the primer in up to the point the pin made contact with the case head. This pin pressure drove the case center upward while bowing the rim down, and didn’t provide the final travel to the primer for proper seating. As a result, the -.004″ low fixture readings weren’t a significant problem, but not fully seated primers were. I was able to duplicate this problem, by recreating the circumstances. The primer was absorbing the firing pin energy as it was driven forward into place.
Thanks
Joe

Email Notification