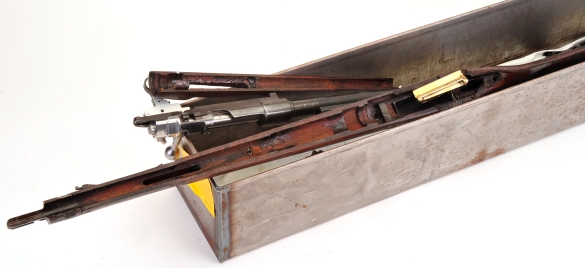
Not many people know that I have one hundred thirty-six Brownells’ bluing tanks in the loft at the shop, just like the one pictured above, filled with the remnants of “pending” projects. Pending not because of a modification that has gone awry, but rather because I am lousy at final finishing. So there I was, part way through an M24/47 Mauser rework, and the metal finish stumbling block was standing in the way of wrapping up the project. I didn’t want to send the Mauser out for bluing because I am too impatient to wait for an outside service and because I am… somewhat frugal. I didn’t want to resort to in-house rust blue, because that method is time consuming and labor intensive and best reserved for a special firearm.
DuraCoat for the masses… That’d be me
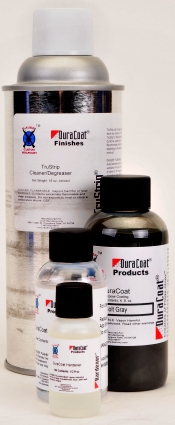 With research, DuraCoat became an option, more so than other two part spray-on products because of its balance of hardness and elasticity, its high resistance to wear and the wide range of available colors. However, I had a couple of minor reservations; I didn’t know how to prep the hardware for its use, I didn’t know how to apply the product and I had no airbrushing artistic or operator talent. Additionally, upon further investigation, it appeared that I may, or may not have access to any of the required prep and application equipment. Hey, who doesn’t like a challenge?
DuraCoat can be purchased through Brownells in both room temperature and oven cure versions. DuraCoat color can be purchased as a stand alone item, in concert with hardener and/or reducer, or as complete pump or airbrush application systems. Paint is sold in 4 ounce and 8 ounce sizes, that can cover 1 – 4 or 4 – 8 firearms respectively.
It isn’t necessary to have an airbrush or other spraying equipment to apply DuraCoat. $29 buys a DuraCoat’s Shake ‘N Spray Finishing Kit, Brownells #100-006-802WB, a self contained system that includes everything required: color, hardener, degreaser and an aerosol sprayer. There is also a four color camo kit priced at $69.00 that provides the same system solution. In our case, we handle a volume if firearms that could benefit from the finish, so it was more economical to invest in some basic equipment and purchase color and ancillary chemicals as required.
After reading the product’s FAQ’s and instructions, and reviewing color charts, the choice was 4 ounces of Colt Gray with hardener as something that would provide a Parkerized look to an old military firearm. An aerosol can of DuraCoat TruStrip Cleaner/Degreaser and a bottle of DuraCoat reducer were also purchased. The TruStrip would be used as required prior to applying DuraCoat and the reducer would be used, if needed, to get the paint to its proper consistency and to clean the airbrush when the process was completed. The total cost was approximately $20 for paint and thinner, TruStrip cost $16, but it is an amount that will cover multiple projects. Brownells TCE in an aerosol container, or quart or gallon bulk, is an alternative that might be less costly.
Where would we be without tools and gadgets?
For years I have put off buying an airbrush, even though I could have used one for wood stock refinishing and for applying any number of finishes on hardware. Plus, it would have been nice to have a small compressor in the shop to blow liquid and dust off of parts, without having to crank up a brain rattling, high output shop compressor, or resorting to canned air.
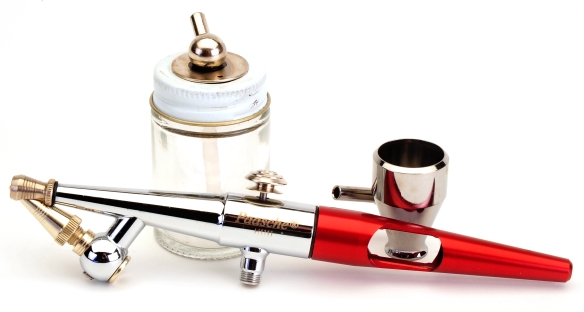
Like any equipment purchase, it is easy to go overboard with an airbrush, especially when you’ve seen the incredible results an experienced, talented artist is able to achieve. For those folks, there are $500+ Iwata brushes that can do great work within specialized applications. The same brush can produce total frustration and less than exciting results for the average guy with a more general application. Based upon DuraCoat literature, and after communication with airbrush suppliers, I purchased an easy to operate Paasche H-202S airbrush set. This is sold by Brownells under # 697-105-000WB for under $100. It is single action, bottom and side feed, external mix brush that comes with bottles, cups, hose, hanger, and related tools. Then located a compressor that would provide at least 1 CFM airflow and 25 – 40 PSI of water and oil free air pressure. Material to be sprayed and application dictate the airbrush type. The airbrush type dictates the type of compressor.

With a little shopping around it was easy to find a $289 Paasche DA400R 1/6 HP, 50 PSI compressor with regulator and moisture trap on sale for $150. It runs only when spraying and operates at a quiet 47db noise level. Twin cylinders make the compressor work less and contribute to the quiet running. A six foot hose was included, but a ten foot hose was purchased for $10 more so the compressor could be parked under the bench.
Accommodating unique circumstances
For most people, a well-ventilated area to spray DuraCoat is all that is required. However, I’m very old, squeak when I walk and wheeze when I breathe so I needed something that would eat overspray and vent exhaust fumes. This collapsible spray booth is 16.5″W x 13.5″H x 19″D opened and only 16.5″W x 6″H x 8″D folded. A 4″ exhaust duct flange is included to facilitate outside venting. As this is called a spray “booth”, I was surprised that no very small workers were included. And, no, I have no other suggestions for a more proper nomenclature…. “paint box”, maybe… “paint exhauster.. er”.
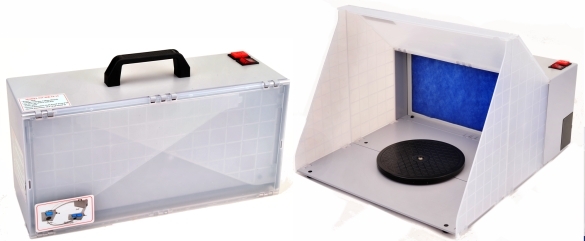
Wide spray booths can get expensive. A hobby grade 30″ unit costs between $400 and $500, however, two of these $125 16″ wide units can be joined together for a 32″ span for just half the cost. The HB-16-13 Paasche booth is not rated for hazardous, explosive paint use, however, as it has a 115v AC brushless fan for the ventilating, I felt it would be OK for this purpose. Again, the manufacturer clearly states it is not approved for this type of use. There are lots of commercial booths out there for volume commercial applications, but prices start on the far side of a thousand dollars and go on to several thousand dollars, dependent upon regulatory compliance.
And then I got nervous…
Buying equipment and supplies is easy, combining them for an expected outcome… not so much. Fortunately every item, including the paint, came with complete instructions and with a lot of overlap in explanation. The need to clean parts was not a minor point.
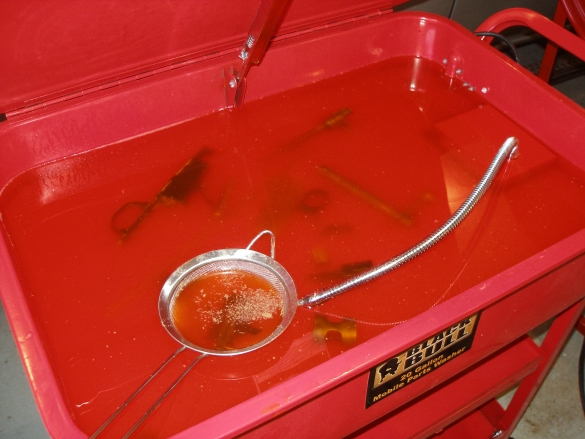
The rifle was disassembled to its smallest parts and degreased in parts washer filled with a concentrated citrus solution. ZEP heavy duty citrus degreaser is inexpensive, it cleans quickly and it doesn’t damage aluminum or brass and hands. Plus the whole garage has an orangey fresh scent. About an hour in the tank, a little nylon brush scrub to get rid of the stubborn stuff and a rinse under hot water. The metal strainer holds small hardware and prevents it from dropping into the abyss in the bottom of the tank.
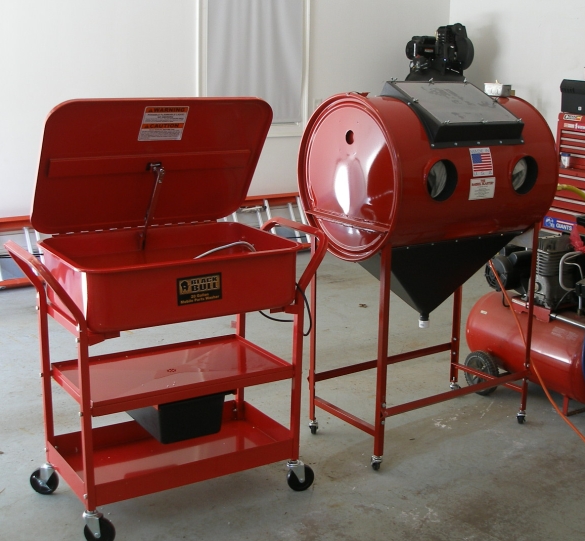
A while back, because of the shop’s requirements and the equipment maintenance that comes with living and working in a rural setting, an inexpensive blasting cabinet was purchased. At a cost of under $300, the cabinet is 33″x23″ and handles large items and barreled actions without a problem. The cabinet has a 12″x16″ view window and a port to connect a shop vac to evacuate dust and particle debris. A compressor that can provide 12 CFM at 80 PSI is required for proper operation and it will get a workout, which is why all of that equipment was moved to the garage area.
Prep goes something like this…
The citrus cleaner cut through and removed the Cosmoline, then the bead blaster removed all of the oxidation, even from pitted and rough surfaces, and left the parts with a “tooth” that would be a good adhering surface for DuraCoat. Parts blasting is listed by DuraCoat as optional, but helpful.

If the blasting option is exercised, DuraCoat instructions recommend blasting with 120 grit aluminum oxide. I used 100 grit glass bead a medium that is typically used on soft metals like aluminum and brass because… it was already loaded into the cabinet. Glass beads leave a slightly smoother surface than aluminum oxide, however, it actually worked well in this particular application. Brownells carries 60 and 270 grit glass beads, 084-063-100WB and 084-063-270WB respectively and a variety of aluminum oxide grits from fine to very coarse.
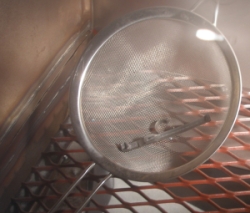 The problem with blasting small parts, bolts, screws, springs, etc. is hanging onto them without blasting off finger tips or having to dive into the medium to recover dropped pieces. A common (cheap) stainless kitchen strainer like the kind found in supermarket aisles works well in containing most of the parts.
Better yet, putting two strainers together, face to face, with all of the small parts inside and the edges duct taped, allowed even the smallest parts to be blasted without losing a single part. Eventually, I just made small pouches out of squares of inexpensive steel window screen, taped at the edges with the parts inside, then blasted through the screen.
If the material to be sprayed isn’t handled after bead blasting, no further cleaning or degreasing is required. If finger prints need to be removed, the parts can be sprayed with DuraCoat TruStrip.
Ah yes, the thrill of irreversible change…
One of DuraCoat’s best selling features is that it doesn’t come off easily. It is a resin, not a paint, and it will not clean up with ordinary paint thinners. That’s why it is handy to have an inexpensive bottle of DuraCoat reducer nearby. DuraCoat can be wiped off within a dozen minutes of application to clean up overspray, runs or contamination but, once it sets up, it can only be removed by sanding or blasting. While painting, DuraCoat can remain in a mixed state in a sealed container for up to eight hours. So clean up time and time spraying isn’t critical, but I wouldn’t suggest leaving for lunch without flushing out the airbrush and capping the DuraCoat bottle.
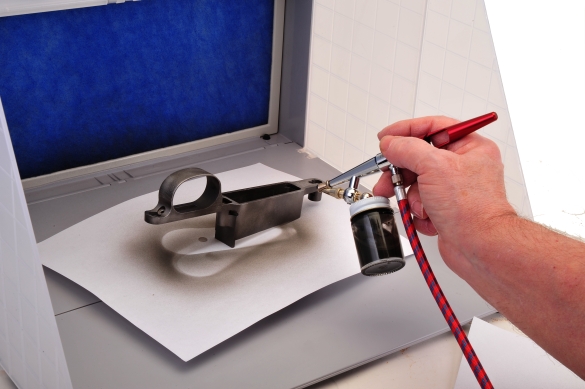
With the exhaust fan running in the spray booth, and a sheet of paper laying over the booth’s turn table, the only necessary clean up was to toss the paper when done. The spray booth’s air flow pulled all of the suspended particles out of the air and the work area inside the booth was a clean as when I first started. The #5 aircap, tip and adjusting part set supplied with the airbrush worked best with DuraCoat. It was easy to adjust the tip to get a pattern and flow that provided good coverage without causing runs or drying before the resin hit the parts’ surfaces.
I did not add reducer to the resin mix as the mixture of three tablespoons of color and slightly less than three quarter of a teaspoon of hardener was light enough in viscosity to go on evenly. The use of slightly less hardener produced a flatter matte finish. Spraying was a build up process. I’d make a pass, let the part sit for 10 – 15 seconds, then used the end of a wooden paint brush handle to reorient the parts until they had multiple coats and were fully covered. As seen below, the pieces look good. For folks who want to cover pitting, scratches and other surface irregularities, there is DuraFil, another two part resin product that can be applied prior to color coat. Brownells # 100-001-005WB. I opted to leave some of the gun’s personality, including reminders of age and handling and did not use the filler product.
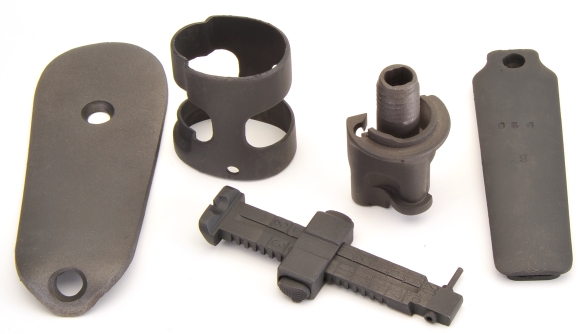
DuraCoat appears to go on heavy, probably because of the solid coverage, but the coating is actually thin. Screw threads and even minor part marking remain as crisp as they were when bare. Experimenting for the sake of energy conservation, I didn’t disassemble the rear sight, but rather tanked it for degreasing, glass bead blasted it as an assembly, then flushed it out with TruStrip and let it evaporate dry. The sight’s slide bar was positioned at the pin end and and all exposed surfaces were sprayed. The assembly was allowed to sit for a minute, then the bar locks were squeezed a couple of times to make sure they weren’t being held by dry resin, and the slide bar was moved to the other end of the sight and any bare metal was sprayed. The next day, the sight was fully functional and movement actually seemed a bit more precise.
The pesky long parts… the barreled action
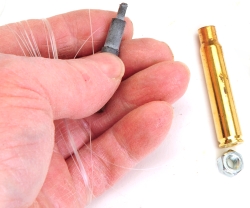
In an effort to keep overspray out of the gun’s chamber and bore, a piece of fishing line… 20 lb test, was tied to a small nut, passed through the flash hole of a cartridge case and fed up through the barrel and out of the gun’s muzzle. The case filled the chamber and a tire plug was inserted in the bore, trapping the line and effectively sealing the bore from overspray.
The barreled action, too long for the single spray booth, was suspended from a hook on the ceiling for painting. The receiver was carefully sprayed inside and out with a surprising level of uniform coverage. Not a sign of overlap or variations after multiple applications.

In case you’ve tuned in late…
DuraCoat has been around for some time, but my lack of experience with the product and air brushing kept me from attempting a related project. I am terrible when it comes to painting, or doing body work for that matter. The fact that even I could apply DuraCoat, and do it well, is a strong indication of how easy it is to apply DuraCoat. There were no runs, no blush, no bloom, no bare corners or thin spots.
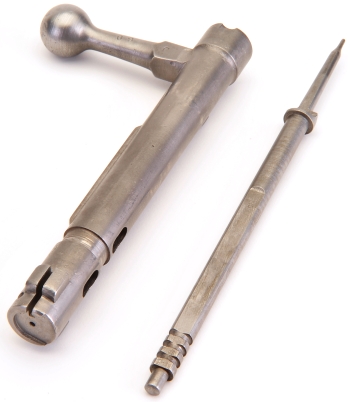
Parts that were not resin coated with DuraCoat were also bead blasted. The process removed all oxidation from surface pitting as seen, left, where the bolt and striker look like new material. These very hard surfaces don’t take on a coarse matte finish with glass bead, but rather they get absolutely clean and take on an even sheen.
Before the Mauser can be reassembled, the Cosmoline and oil soaked stock needs to be brought up to snuff and inletting needs to be reworked to accommodate an aftermarket replacement trigger.
The parts that were completed in this segment will be left wrapped in protective paper to cure. DuraCoat is dry to the touch in twenty minutes, parts can be handled in one hour, the firearm can be used after drying overnight. DuraCoat fully cures in six to eight weeks to its highest resistance to wear and chemicals.
I am glad I was finally able to work with this process as there are numerous firearms in the shop that could benefit from a DuraCoat finish. The resin can be applied on bare or finished steel alloy or stainless steel, hard anodized aluminum and over Parkerized finishes. I will be back with the assembled rifles and some insight into how well the finish holds up under heavy and less than delicate use.

Email Notification