
When we left off on Part 1, the Forward Assist and Ejection Port Cover had been installed and Batman and Robin has been tied to an atomic bomb by the Riddler. Since then, B&R haven’t faired so well, however, we were able to hang some other parts on the project gun.
Decisions, decisions… decisions
Quad rails are very popular for folks who want to hang a multitude of Swiss Army knife like accessories on their ARs. For me, they tend to represent excess overhead in weight and complexity and they tend to be oversize and therefore awkward to handle. An issue of aesthetics, as a person with a Western European bent I tend to appreciate Ferraris more than Porches.
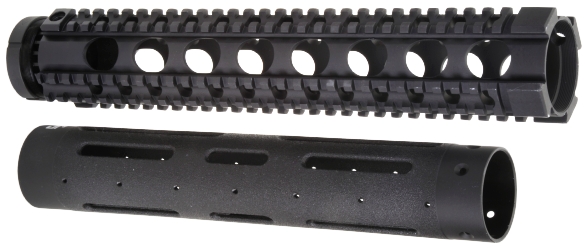
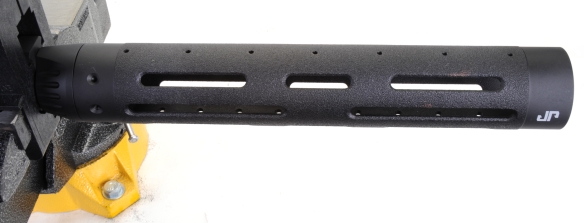
Subsequently, I went with the JP Modular Handguard as an issue of size and weight and positive influence on firearm accuracy. Brownells # 452-000-040WB JPHG-1M Rifle Modular Handguard System $196.99 which includes all necessary mounting hardware: handguard tube, outer receiver nut, barrel retainer nut, quick detach studs and assembly fasteners.
There isn’t a lot to mounting the JP Modular floating hand guard other then following, or in my case almost following the instructions. There is an aluminum outer receiver nut, below left, that screws onto the receiver barrel retention threads.
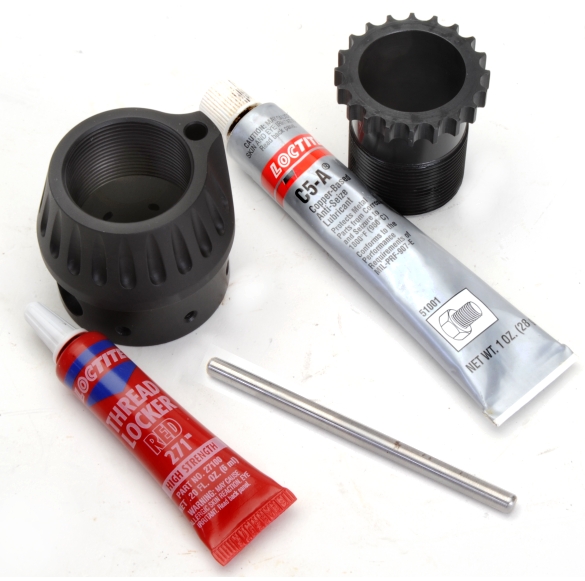
The metal rod in the picture above is a Brownells 080-216-014WB Barrel Nut Alignment Gauge $5.99 aka 0.178″ rod, a tool that can be made with 25 cents worth of material and twice that cost in labor and machine time. The Red Loctite is for the receiver threads and the C5-A copper anti-seize is for the barrel nut.
The instructions advise to degrease threads on all part. Accomplished and necessary. Then the instruction is to remove the finish from the receiver threads with a stainless steel wire bush, but me thinks JP underestimates the quality of the finish they put on their receivers and I was not about to bead blast off the finish.
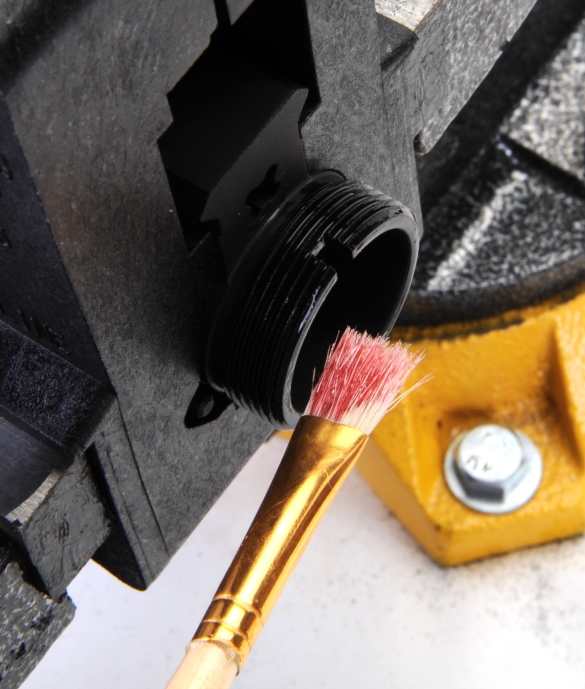
I coated the receiver threads with Red Loctite and then the threads on the back side of the receiver nut to about half that depth. Screwed on until tight and then backed off to level, the Loctite squeezes between the threads for uniform inside/outside coverage and contact without spreading into the remaining threads of the outer receiver nut where it would end up on the barrel nut.
Properly in place, the outer receiver nut will be near tight on the receiver threads, but with a gap between the nut and receiver face as seen below. The gas port between the nut and receiver will be in proper alignment and the top rail mounting surface will be square to the receiver rail.
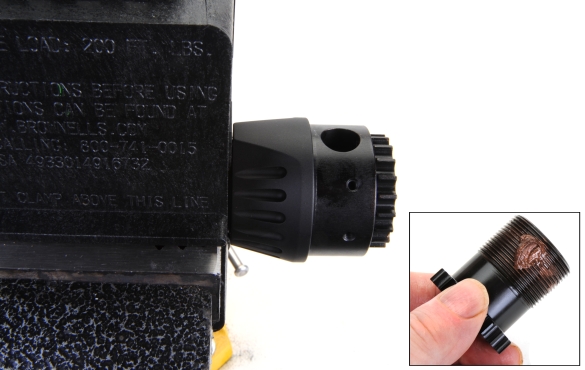
In the receiver fixture, and with the alignment tool still inserted between the outer receiver nut and receiver, the barrel nut is coated with anti-seize compound and screwed into the outer receiver nut hand tight. At this juncture, the red Loctite is still not dry so the outer nut can still be moved a bit. The idea is to tighten the barrel nut so the thread surfaces with be in stressed contact with one another while the Red Loctite dries. A final check of gas tube holes and the assembly is left overnight to dry. The outer receiver nut will be fixed in position, however, the barrel nut will still be free for removal to facilitate barrel installation. This seems as good of a place as any to take a break before continuing on with Part 3, barrel, gas port and final hand guard installation..
Your Perfect Rifle… Some Assembly Required Part 1
Your Perfect Rifle… Some Assembly Required Part 2
Your Perfect Rifle… Some Assembly Required Part 3
Your Perfect Rifle… Some Assembly Required Part 4
Your Perfect Rifle… Some Assembly Required Part 5
Your Perfect Rifle… Some Assembly Required Part 6
Your Perfect Rifle… Some Assembly Required Part 7
Your Perfect Rifle… Some Assembly Required Part 8

Email Notification