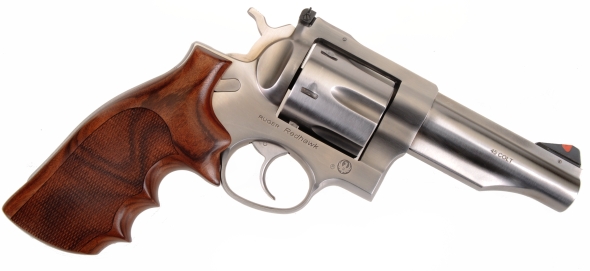
This particular Redhawk shows up on the Real Guns pages with some frequency. It is a personal firearm that I happen to like a lot and shoot well, so I am always tinkering with it to optimize it’s performance. The standard Redhawk sights are excellent; adjustable white framed rear and serrated ramped front with a contrasting red poly insert. Each rear sight tactile click shifts the point of impact 3/4″ at 25 yards and, even when subjected to handloads that can jar fillings loose, the Redhawk’s sights stays put.

My problem with factory sights is that the proportion of front blade width to rear notch size, and dark and muted colors, tend to make them difficult to see against a mottled backdrop. Contributing to this problem are my old guy eyes, as maturing eyes are subject to an ever decreasing low contrast sensitivity, while high contrast sensitivity remains relatively unchanged*.
Just don’t try to change the batteries…
My solution has been to purchase, or fit, my handguns with high contrast, bright fiber optic sights. The resulting sight picture is quick and easy to pick up against virtually any type of backdrop. Made with fluorescent optical fiber, the fiber optic element absorbs short wavelength energy, such as ultraviolet or blue, and emits it in a longer, narrow wavelength band, vivid and bright, typically red, green, amber. or blue in color.
The Williams sight set is made for the GP100, Super Redhawk , Super Blackhawk Hunter, and standard model Redhawks with a barrel length greater than 4″. The two piece set, below left, Brownells# 962-000-093WB, sells for $59.99. The rear sight fits the standard Redhawk, the quick change front sight does not. The rear sight is not available outside of the set.

The 4″ Ruger Redhawk front sight is a bit different as it is held in place on the gun’s barrel with a roll pin. Consequently, the front sight included in the set becomes a spare part and/or an incentive to buy one of the compatible Ruger models as noted… AKA “Sweetie, I only bought the Super Redhawk so WE wouldn’t lose the money on OUR FireSight investment”. Yeah, never works for me, either. A compatible front sight, they of course don’t make a rear sight, is made by HiViz. Pictured above to the right of the perforated factory sight, it is Brownells # 638-000-126WB Ruger Revolver Front Sight, Red, $37.99. The sight is listed as “overmolded” which, in this case, means the sight body is steel and the red fiber optic insert is enclosed in a protective clear resin.
The entertainment never ends
The front sight is listed on its packaging as “gunsmith installation required” and probably for a good reason. I was reading a thread on a message board where the thread’s initiator was telling people to “Just clamp the sight and barrel in a vise to make sure it is fully seated, then chuck a 1/6” bit in a hand drill and drill through the pin hole in the revolver part way on one side, then flip the gun over and drill through on the other. His advice was to squirt some silicone sealer or J-B Weld into the groove in the barrel before installing the sight so that it won’t rattle if it doesn’t have a tight fit. The initial exchange within the group had developed into posted pictures of individual efforts based on the “instructions”. Virtually all sights had large expanses of daylight between the Redhawk’s barrel and the sight’s base. Guys were trying to peen closed oversize pin holes in the revolver, or drilling oversize holes to fit larger roll pins. Sometimes a gunsmith is a good and inexpensive solution. Projects like this aren’t difficult, they just take a little patience and basic skills.
Short story, the prior made me think of the last time I hunted in the state of New Jersey. Circa 1958 or 59, a few of us got together on opening day of deer season and attempted to hunt Stokes State Forest. There was a large group of people leaving a parking lot, shoulder to shoulder, heading for the forest that was inferred in the park’s name, when an out of season pheasant was flushed from between two parked cars. All I heard was “Hey! Tony! Look at the bird!” which caused a guy named Tony to swing the barrel of his 00 Buck loaded shotgun, leading toward pheasant before pulling the trigger. Tony hit the bird, as well as the back window of a parked station wagon, then ran flat out and grabbed the pheasant, only to find… surprise, surprise, it was still alive.
By now, a crowd had gathered to watch the spectacle and Tony, as with current message board protocol, sought group consensus regarding finishing the job. “Shoot it again”, “Strangle it” and “Beat its head on a rock”… the latter seemed to strike a positive cord with Tony and, after all, the crowd had nodded group approval, so beat the bird’s head on a rock is exactly what he did. I do have to admit, the procedure seemed to work effectively. Immediately upon the bird’s expiration, a game warden arrived and arrested Tony and confiscated the bird. While the ranger was walking Tony to detention transport, the owner of the significantly wounded station wagon showed up, jumped on handcuffed Tony an began beating him profusely about the head and ears with enough… enthusiasm that it took five reluctant bystanders to separate the two. We went home. True story. Anyway…
The front sight… pendectomy. Small tools required
Bottom Left, supporting the barrel on the “V” surface of a bench block, with a nylon 6/6 block or hardwood flat supporting the rib on the back side of the strike, the roll pin is driven out. This is a press fit roll pin, not a taper or crowned pin so it can go out from the left or right. Some of the handiest non-marring tools, drifts and supporting, can be made out of Nylon 6/6, a heat resistant version of Nylon 6 as used in the Old Remington Nylon 66 rifles. It is available on Amazon, inexpensively, in extruded round and rectangular forms. The pin punch is a Brownells #827-525-780WB Starrett Pin Punch 1/16″. It is a parallel side punch, rather than a taper, so it will not open the pin hole in the revolver.
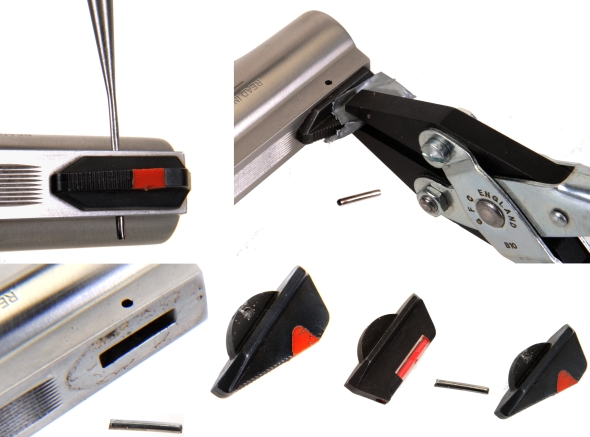
Once the pin is out, all of the metal displaced by the edges of the roll pin, when first installed and when driven out, will try to hang onto the front sight. A piece of duct tape will protect the sights finish and a smooth jawed parallel pliers, Brownells # 348-181-105WB Smooth Parallel Pliers, can be used to wiggle the sight out without damaging the original sight’s finish. No, water pump pliers are not a good substitute. Two sights and pin, above, bottom right, notice – Hole in the tab of the original sight, no hole in the new sight… and there is lies the rub of the 4″ Ruger Redhawk, a hole must be drilled at the proper location to mount the sight down, flush and tight.
Why it always harder to reassemble than to disassemble?
If an attempt is made to insert the new sight without clean up, it will not seat flush, which often leads to an impulsive reaction of removing material from the bottom of the tab. Not necessary, as only a good solvent cleaning of the sight slot in the barrel is needed and deburring the pin holes and flash on the mount tab of the steel sight.
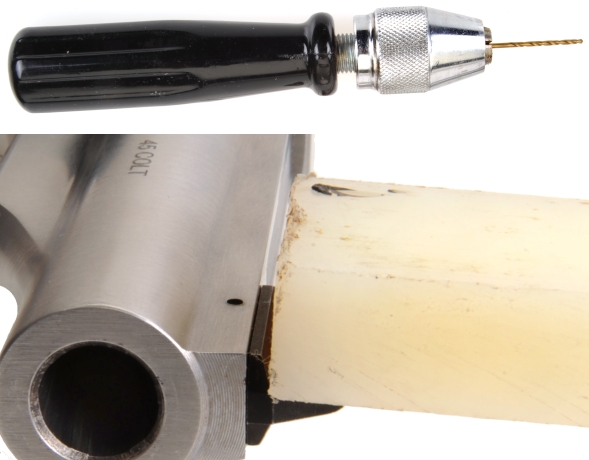
Running a 1/16″ drill mounted in a pin vise twisted gently through the pin holes in the revolver get’s rid of most of the rough material, inside the slot can be cleaned up with a Swiss file or fine emery board. When the sight feels tight, but not obstructed and a visual inspection shows the slot to be clear, a piece of rectangular Nylon can be used to tap the sight fully and flush into place. A dramatic reenactment of won’t fit to clean and ideal fit, below…
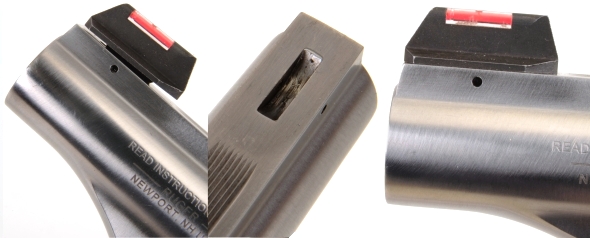
Holy Moly…
The idea is to set the location of the roll pin hole in the new sight. Too low and the sight will be seated up and away from the support of the barrel slot. Too high and a pin won’t pass through. Too forward or aft and the sight will seated on an angle.
Contrary to what has often been written, the Redhawk does not make a good drill guide. Inserting a sight in the slot and then drilling through the barrel pin hole to guide location of the new hole can seriously damage the barrel, or make for a less than clean installation. See J-B Weld and silicone filler references above. Stainless is relatively soft and enlarging the roll pin holes in the revolver will result in a loose front sight.
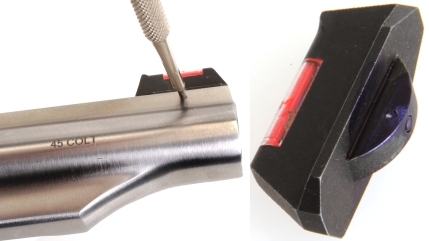
Get a small bottle of DYKEM steel blue layout fluid, Brownells # 262-100-004WB, coat the drill side of the new sight insert and reinstall it in the barrel slot. Make sure the sight is flush against the barrel, then scribe mark the hole as seen, left. Using a scribe with a shaft diameter approximately the same as the roll pin hole, with a short, but sharp tip, will mark the hole position accurately on the side of the sight tab, in the form of the little bright spot on the sight’s mount tab appearing above, right.
The new hole must be parallel to the sight base for a level and tight fit in the revolver, so the piece was held in a machinist’s vise on a drill press table and the 1/16″ drill was held in a small diameter drill chuck to minimize bit warble.
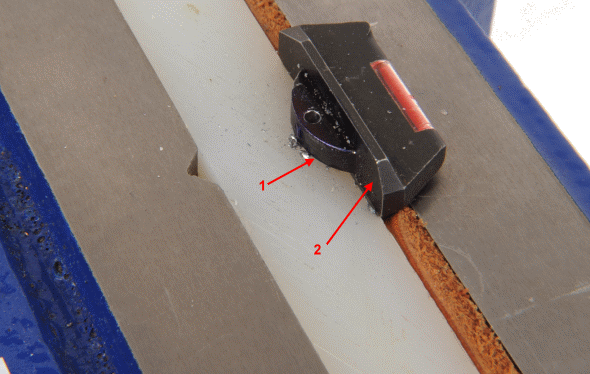
The top side of the sight base angles upward, so a Nylon block was located to support the bottom side of the sight, squared to the mount tab and to allow the drill to pass completely through the hole. The piece of leather was inserted between the top of the sight base and the other vise jaw so that it would compress and yield to the angle of the base, holding the sight tight, but without cocking the sight in the vise.
How does this hole locating approach work?
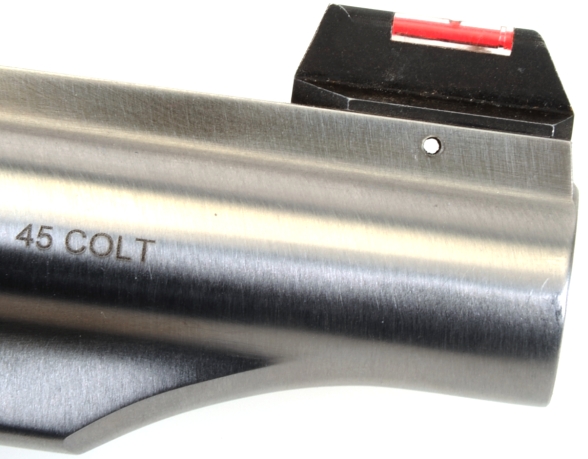
The new sight is flush on the barrel ramp, no daylight, and the hole through the revolver and the new sight are perfectly aligned. All that remains is to install the roll pin.
I don’t always have great aim with a hammer, so I’ve gotten into the habit of using heavy duct tape to cover the associated areas. I just start the pin, then push a strip of tape over it until the tape yields to the pin and the area around it is protected. Minor hammer mishaps scuff the tape and not the underlying revolver.
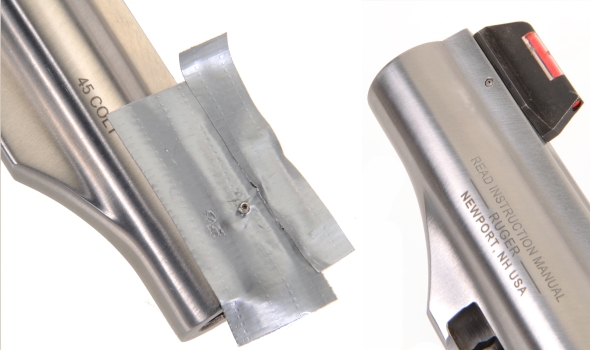
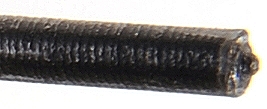 The business end of a 1/16″ roll pin punch Brownells# 230-100-001WB #1 Roll Pin Punch. The little nub at the end of the punch fits into the pin’s center and prevents it from closing inward while the outside of the pin’s face drives the pin into final position.
A roll pin starter punch, like Brownells# 080-685-062WB #1 – 1/16″ (not pictured), can also be a big help, especially with smaller size pins. The pin fits in the hollow nose of the starter punch and guides even very small roll pins to a straight start.
The rear sight is easy
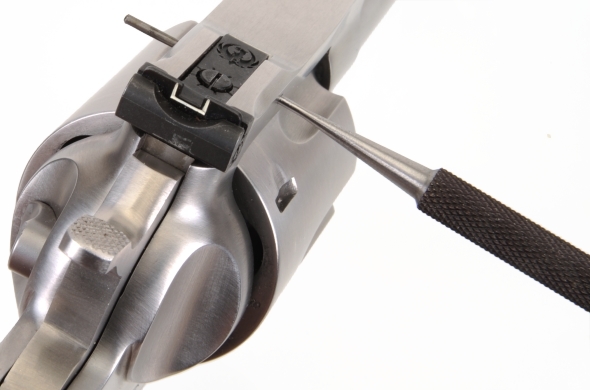
The pin that acts as the rear sight pivot is smooth sided and held in place with the spring loaded body of the rear sight. The same 1/16″ flat punch used earlier is used to push out this solid pin.
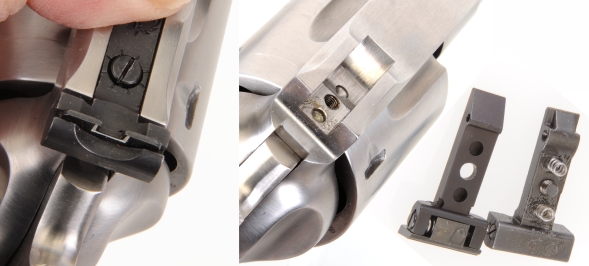
With the sight pivot pin removed, the sight is held in place to contain the sight’s spring preload and the elevation screw is turned out and removed. The rear sight is eased off the Redhawk along with the two elevation springs and adjustment screw. The latter three parts are transferred to the new Williams FireSight and the rear sight is reinstalled the same way the original sight was removed. The result should probably look similar to the Redhawk below.
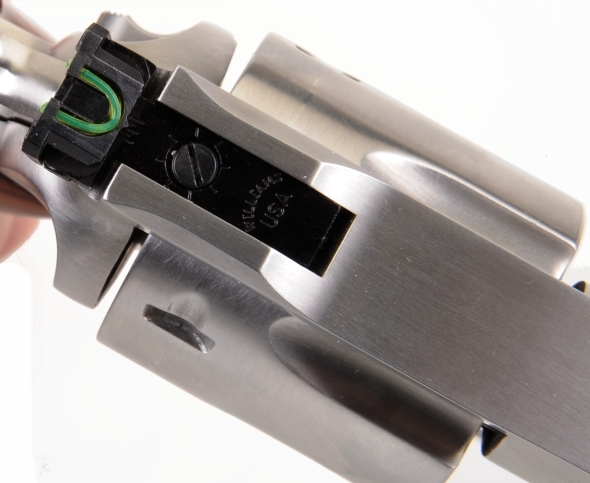
The end result…
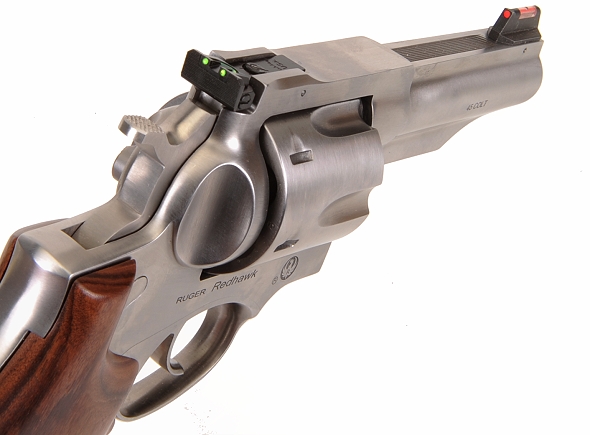
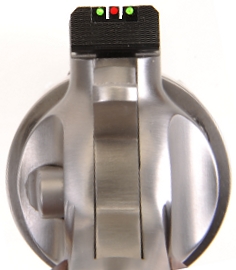
This is the actual sight picture with front and rear installed. It take very little ambient light to generate these vivid colors and they stand out against virtually any background.
Installation required no permanent changes be made to firearm or sights, so the process can be reversed is desired. I’ve mounted these and similar sights on virtually all of my handguns, always red front and green back. The consistency in type and color makes changing from one firearm to another less of an adjustment,
I worked on this one between other projects during the day. Including set up and drilling, this is about a two hour job from disassemble to test fire.

Email Notification