OK… the bolt lugs were lapped for full contact with the receiver’s lug seats. The action was faced square to the bolt-way. Before the barrel is installed and the chamber is cut for proper headspace, the bolt face must be trued perpendicular to the bolt-way and parallel to the face of the action.

Above, the Manson Precision Bolt Face Truing Tool – Brownells 513-000-008WB Tooling Block $100, 513-000-012WB Magnum Facing Burr $84.99. $184.99. Other burrs; .223 Remington, .308 Winchester, Raymond, Aaron, etc. available separately. The magnum cutter works for the Ultra Mag as well as the H&H magnum based cartridges.
Something to consider…

This particular Remington action has a spring type extractor riveted into the inside edge of the bolt face. The instructions for the bolt truing tool indicates that there is no need to remove the extractor when performing the operation and I think this is the case if a little care is exercised. If for some reason the extractor is damaged, replacement parts, rivet and extractor, are available.
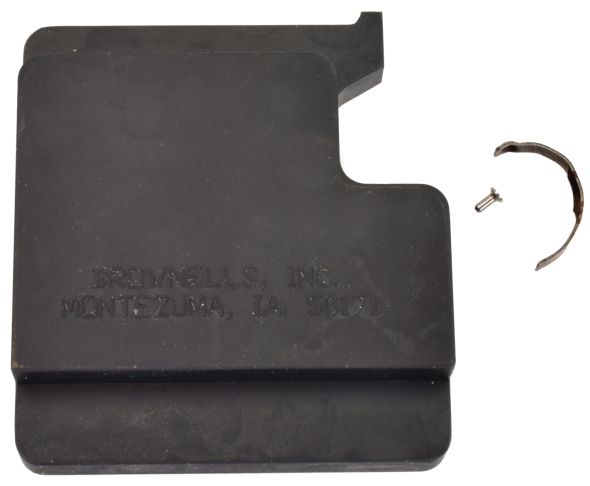
I am not suggesting the extractor cannot be changed without this tool, but it does come in handy if these tasks are being performed routinely. Brownells 080-740-000WB Remington Rifle Extractor Rivet Anvil $89.99. The extractor is 767-157-090WB Extractor, Riveted Type $14.99 fits the Ultra Mag rim, the rivet is 767-273-410WB Extractor Rivet $5.99, which is also case head specific.
Simple process…
The bolt face is painted with Dykem Blue. The burr is inserted in the bolt face, slipped under the extractor… a little jiggling and positioning required. The tooling block is inserted into the face of the receiver and screwed in until tight.
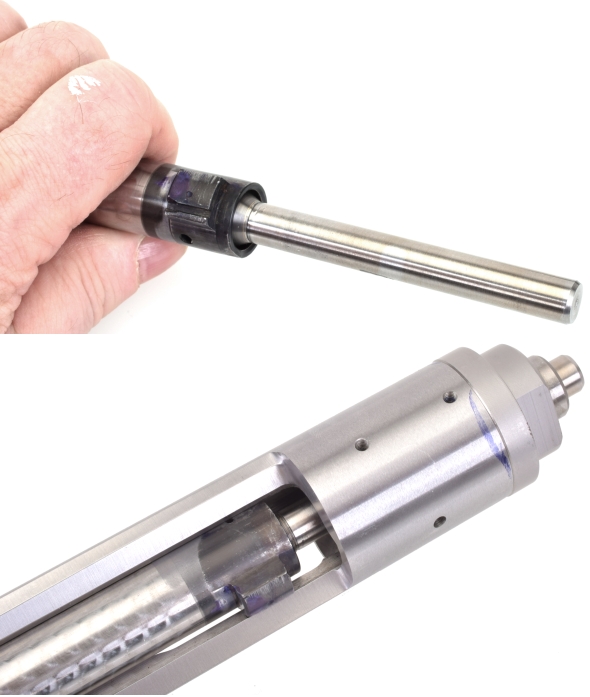
The bolt is inserted normally and fed through the opening in the tool block, then the bolt is closed and locked. The next step is to secure the bolt so that it does not rotate during the operation; the cutter runs clockwise. I actually don’t like this method of locking the bolt in place, even though it follows the instructions. My concern is that the play between the bolt and bolt-way will allow the bolt head to shift when the screw is inserted in the receiver. The last time I did this I used super heavy rubber bands around the bolt handle and back of the receiver with no fastener, however, I have to say there was no measureable difference between the two approaches.
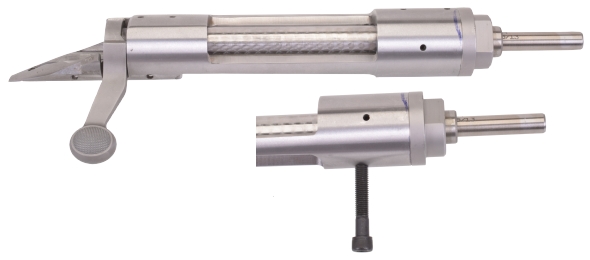
After the bolt is secured, the action is then lightly clamped in a vise, preferably at the tool block end where the receiver is internally supported. A low speed drill or driver is attached and a little squirt of oil goes to the front of the tool block at the burr’s shaft and light pressure is applied as cutting begins.
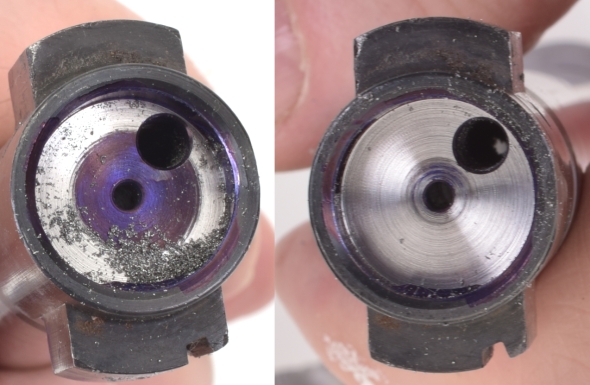
The left picture shows progress with 5 seconds of cutting, the second after another 5 and the cutting is finished. The dark blob at the bottom isn’t the bolt face, it is the extractor lip.
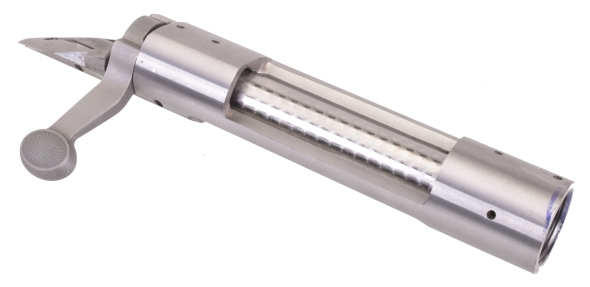
All of the action clean up is done, so we are on to installing the barrel and finishing the chamber work. Next…
Either a 338 Ultra Mag… or a Nifty Paperweight Part 1
Either a 338 Ultra Mag… or a Nifty Paperweight Part 2
Either a 338 Ultra Mag… or a Nifty Paperweight Part 3
Either a 338 Ultra Mag… or a Nifty Paperweight Part 4

Email Notification