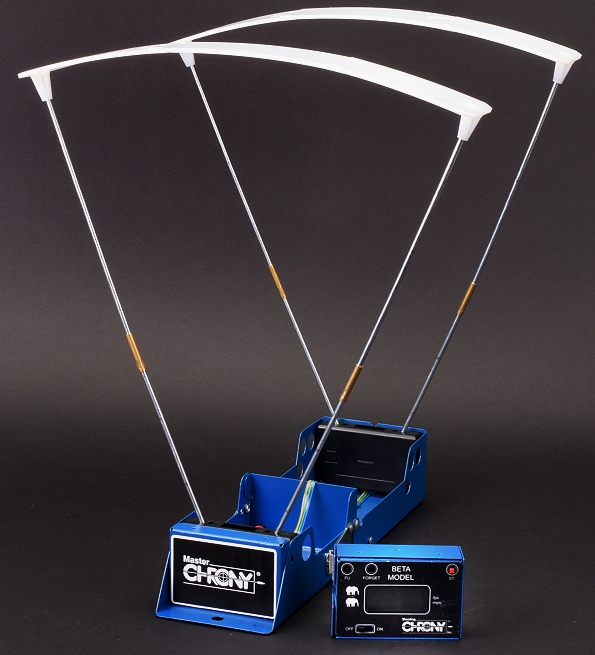
It seems that every time a new chronograph is introduced, we give it a try; high end, low end, light sensors, magnetic sensors, sound sensors. Some had elaborate analytical software, some logged details in a data base, others just spit out fps or meters per second in a path to instant gratification. Some interfaced with portable printers, some to a PC. The ones that gets used the most are the simple and inexpensive Shooting Chronys.
Blue, Green, Red… different colors, but each a Master Chrony with a remote monitor which makes them easier and much less expensive to repair, and they do eventually need repair. Just knocking them over while mounted on a tripod won’t break them, but shooting them will and that does occasionally happen. Not long ago, Chrony sold a repair kit that included the case, sensors, wire struts and diffusers for about $30, but more recently the price has gone up to $72. Fortunately, as Chrony carcasses are amassed, parts like sensors can be cannibalized to make complete units.
Performance wise, the Chrony is very good. One of the main selling points of chronographs is how minimal false or missed readings are for a given unit. I actually solved the problems I was having with Chrony units by… using them as intended. Shots not recorded happen when a bullet travels outside of the sensor field of view, or from shooting too high over the sensors or, sometimes, by attempting to use the unit on heavily overcast days. Erroneous readings are usually the result of a bullet path dramatically out of parallel to the box or shooting subsonic ammunition with the muzzle too close to the first sensor.
In the case of subsonic projectile false readings; while a bullet may be subsonic, powder residue is typically moving super sonic for a brief moment before dissipating and falling away. Positioned too close to the chronograph with subsonic ammunition, there is a chance that the supersonic powder particles will blow through start and stop sensors well ahead of the projectile which will result in erroneously high velocity readings. Alternatively, the fast moving powder particles may trip the start sensor well ahead of the projectile and dissipate leaving the stop sensor waiting for the projectile which will result in an erroneously low velocity reading. The solution is to back up enough so that the powder dissipates before the first sensor, the start senor. The distance before the first sensor is not very critical as bullet velocity does not change much in such a short distance. What happens between sensors is critical because a space of only 12″ is the basis for velocity calculations.
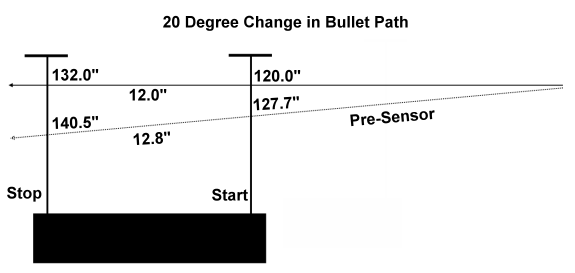
Moving the path of the bullet out of parallel with the chronograph’s sensors increases the distance the bullet travels to cover the space between sensors. In this case a 0.8″ change in that introduces a 6.6% error, or roughly 198 fps understated velocity for a 3,000 fps projectile, rifle, or 79 fps understated for a 1,200 fps projectile, handgun. A 10 degree shift introduces a 1.2% error so the change varies with angle of inclination. The other alignment issue is front to back. It is easy to line up the front, but not much of a shift left or right of the rear sensor can cause a bullet to trip the first sensor, but miss the rear sensor’s field of view and not trigger a stop message to the chronograph.
Making Chrony savers and getting accurate readings… The long version
The Shooting Chrony manual indicates that the unit’s case should be fully opened and that the bullet should pass down the centerline and between 4″ and 6″ above the front and rear photo sensor lenses. When shooting outdoors, it is very easy to get a firearm and the Chrony out of alignment with one another, which results in erroneous readings and the potential for the Chrony to take a hit where scope mounting puts a firearm’s bore centerline considerably lower than line of sight. It is easy to make an alignment target that addresses all of those issues.
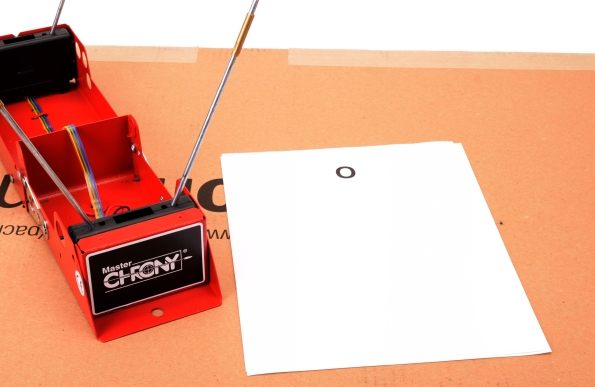
A 48 point capital letter “O” is placed at the top center of a letter size piece of white paper. A pencil mark is placed on the paper 5″ down from the center of the “O” and the paper is folded back under at the pencil mark.
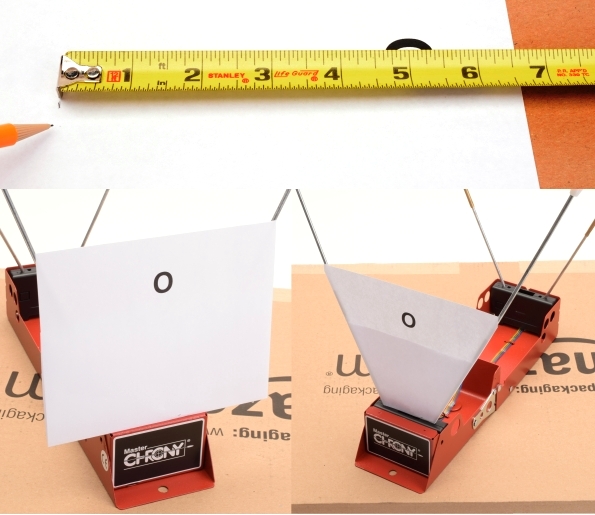
The piece of paper is placed on the front of the chronograph and centered in the wire rods using the top corners, then folded back along the wires to form a quadrilateral with two parallel sides. Really.
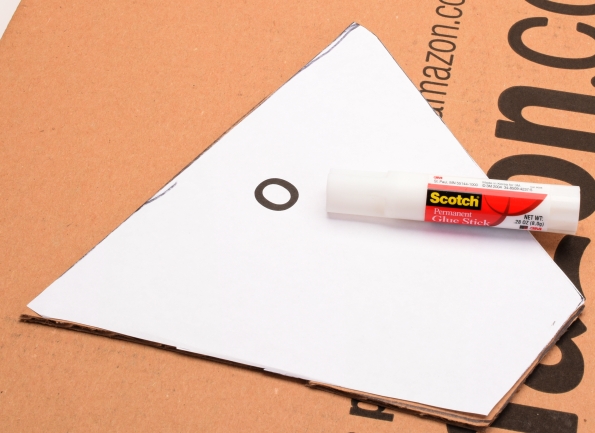
The paper is used for a template to cut out a cardboard backing and then the two are joined with a glue stick. There are lots many ways to make these little targets out of paper or plastic. This construction works fine for me, especially if the face is covered with wide packing tape so it can be wiped clean.
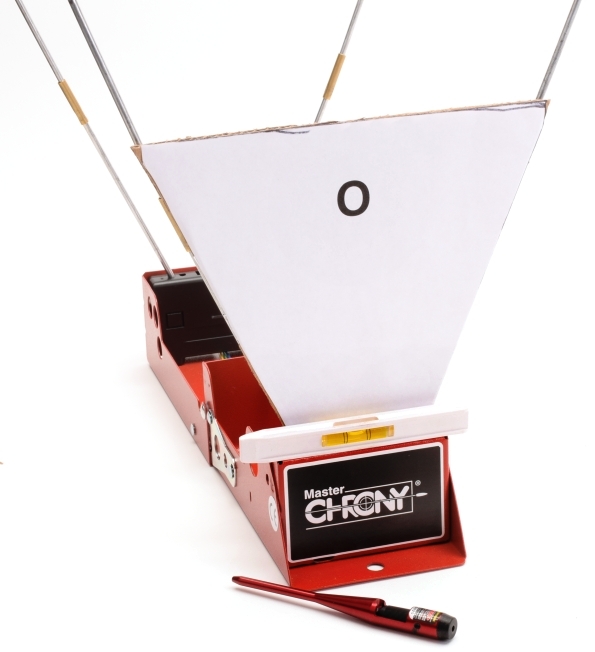
With the rifle checked empty and action opened, it is rested in its intended shooting position, a laser boresight is inserted and the Chrony is placed 10 feet downrange of the muzzle and leveled. The paper alignment target is placed at the front and rear sensor locations as shown until the boresight laser dot is centered in the circle on both. Alternatively, the laser can be skipped and the cross hairs of a scope can be placed on the top edge of the target. The line level can be used to level the box horizontally.
It is probably a good experiment to shoot lined up and then deliberately drop the rear sensor an inch out of alignment and reshoot. The reading difference will be significant.
Extending the Chrony’s usefulness…
The final issue of significance is insufficient light; not enough contrast between the shadow of the bullet crossing the sensor and the sky above it. In Maine, there are a lot of those days or rainy days that are not only overcast, but they wet soak the electronics and the sensor lenses. These are all things that apply to any opto-electrical chronographs. Still, as a group, they are the most reliable type that are sold at consumer like prices. Compared to our Oehler unit with a proof screen, there is no real performance difference, despite a significant price difference. The Chrony is as reliable, is as accurate in readings and the Shooting Chrony fit is a shooting bag, under the seat of a truck, in a backpack and batteries last a long time. Habitually, I make sure the Chrony is parallel to the bullet path and I am shooting down the center of both sensors and I set the first sensor 10′ from the firearm’s muzzle.
The new Shooting Chrony LED light set has probably contributed the most in terms of a useful tool for work. I have a sheltered area to shoot from, but the chronograph has always had to be outside in the weather. I tried the old incandescent light set Chrony offered, but it did not yield reliable results. The newer LED units are as reliable as daylight and they need no other light source. The standard set, $87.95, comes with a 120/220 volt plug in power supply, which is perfect for my application.
An optional, $75.95, rechargeable power supply can provide 18 hours of continuous chronograph operation and can be recharged from a 120/220 volt house outlet or with the included vehicle lighter adapter. For $10 Chrony offers a vehicle lighter adapter without the battery pack. Considering the Chrony is so portable, these are all useful options.
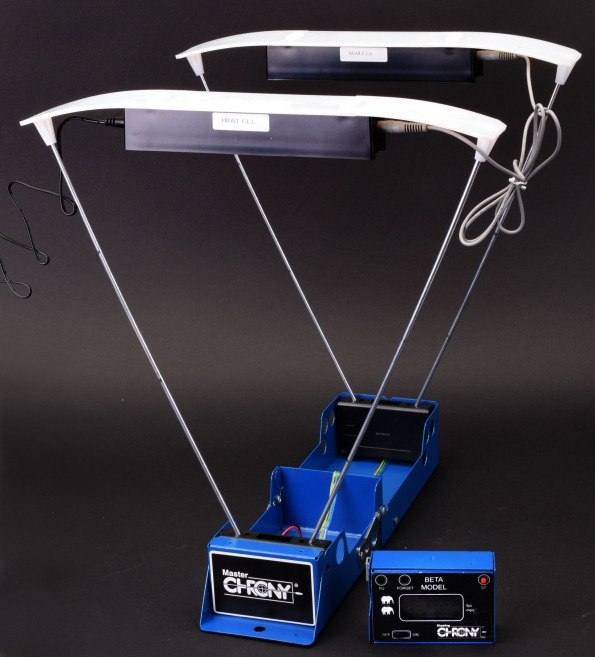
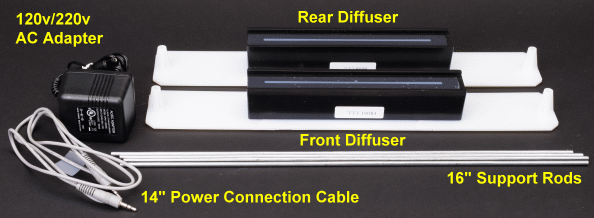
The kit comes with instructions, however, none are really needed. The 16″ solid rods replace the standard two piece sets and the diffuser labeled “front” and “rear” go on just like the standard diffusers. The power connection cable buses the front and rear lights and the AC adapter plugs into the other side. The display cable connects the chronograph to the display normally.
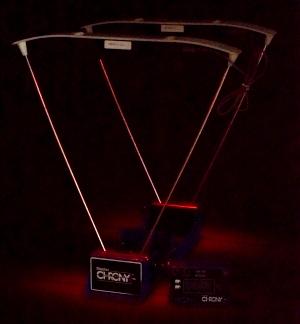
Photographed in darkness, the distinctly red LED output is visible, but it is not visible in typical ambient room light or moderately subdued light. The sensors rely on contrast to discern a bullet moving over a background and red, as is the case with black and white photography, greatly enhances contrast.
How well does it work?
The light kit was tried on three Master Chronys; Alpha, Beta and Gamma. Indoor lighting varied from darkened room to a well lit room with ambient incandescent and florescent lighting without a hiccup. The Chronograph was also moved to sunlit outdoors with the light kit in place where it also worked well.
The chronograph was tested with the 17 HMR, 22 LR high velocity and subsonic, 357 Mag, 45 Auto high velocity and subsonic, 270 WSM, .45-70 in a dark room with the light kit in place and there were no false readings or error messages generated. Distance between muzzle was ten feet, but shooting was also done closer and farther without ill effect. The light kit will enable us to recover many days that would have been otherwise lost to inclement weather, making it well worth the price.

Email Notification