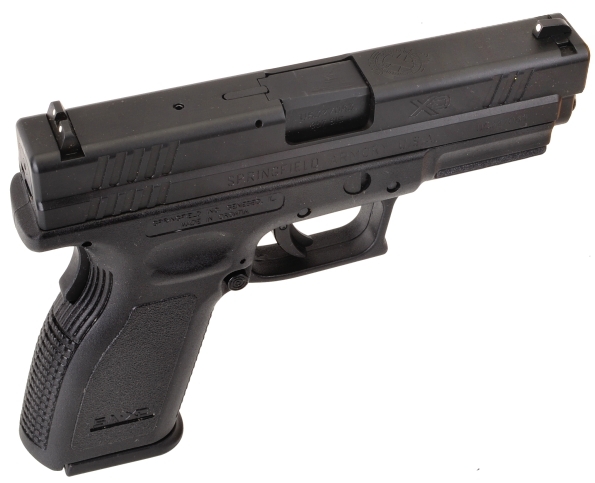
The Springfield XD continues to demonstrate impressive reliability, accuracy and shooting comfort as a component of our ongoing 357 SIG project. The feature that needed to be enhanced was the factory 3 dot sight set to improve sight visibility. There are lots of accessory sights made for the XD including Tritium, fiber optic, a combo of both, adjustable, low profile carry, ghost; made by all of leading sight manufacturers.
The sight set selected for the project Springfield was TruGlo fiber optic #TG131X. This set fits the XD, XDM excluding the 5.25″ Comp series and XDS. They are steel body, front red, rear green and, for as bright as they are to the shooter, the fiber optic elements can not be seen from the muzzle end. The rear sight notch is 0.170″ wide, the front sight is 0.160″ wide. The rear fiber optic element is 0.070″ in diameter, the front element measures 0.090″. List price for the set is $75, $48 as stocked and sold by Amazon, however, they are available through most shooting accessory retailers at a similar price.
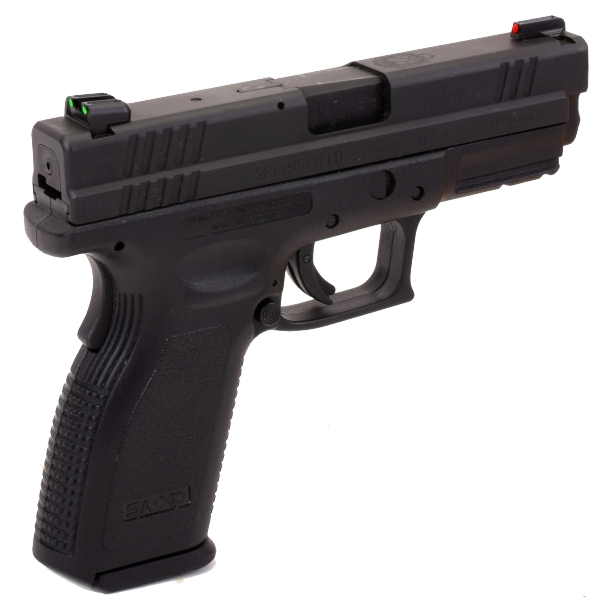
The only obstacle in the way of a sight swap was the difficulty associated with removing the factory sights. There are three prevailing methods for removing and replacing XD factory sights; A) Use an exceptionally sturdy sight pusher, B) Give the problem to a local gunsmith, C) Put the slide is a vise, stand over it, then strike the front and rear sights profusely with a long handled sledgehammer swung like a golf club. The sight pusher approach was first choice, however, the sledgehammer came in a very close second.
A sight pusher designed to remove Springfield XD factory sights is not inexpensive. A consumer grade tool that firmly locates and supports the slide in all directions is a $250 to $300 proposition. A commercial grade tool that will withstand volume use is typically priced twice that amount. Most lower priced tools like the $125 MGW tool listed for the Springfield XD and XDM’s carry the disclaimer, “Tool is not designed to remove extremely tight factory rear sights. Sight tool is intended to install and adjust Tritium Night Sights”, which means the customer needs to use a competitor’s $300 sight pusher to remove the factory sights before using the MGW tool install and adjust the aftermarket set.
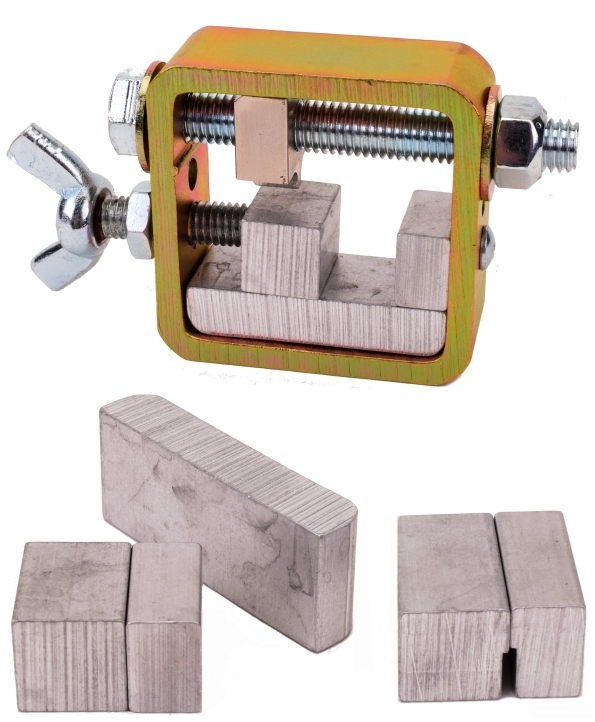
The tool pictured above is manufactured by Fisher Solutions of San Diego, CA and sold under a variety of brand names. This particular model is made specifically for the Springfield XD and comes with XD clamping blocks. It is listed by the manufacturer to also work with SIGs, M&P’s including shields, and HK. One of the resellers, Online Tactical Gear, posts a notice in their Amazon.Com listing as this model is configured for the XD, then follows with a note, “Universal Hand Gun Sight Tool – Grade 8 Bolt – By OTG is recommended for XD/XDM sights, not this one” however, no model with enhanced hardware is listed.
The tool is fitted with relatively coarse threaded grade 5 hardware. The clamping bolt is 7/16″-14 and the pusher driving bolt is a 1/2″-13. Each has a yield strength of 92,000 PSI compared to grade 8 alloy steel bolts with a yield strength of 130,000 PSI. The 13 screw pitch thread for the pushed generates a mechanical advantage of 22:1. Changing to a grade 8 1/2″-20 would add to the tool’s durability, generate a mechanical advantage of 33:1 and provide a finer increment of movement.
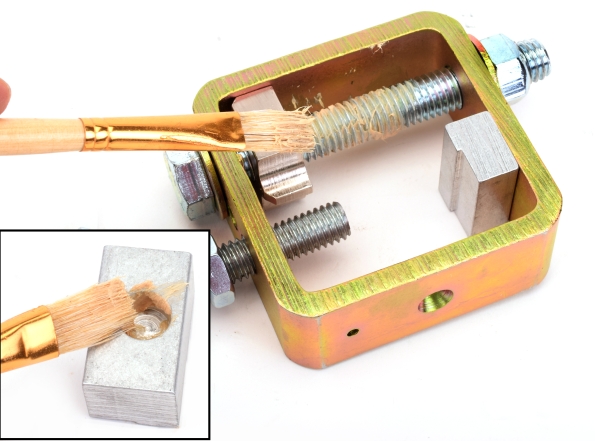
A little high pressure grease was dabbed in the unbushed driven clamping block and on the bolt threads that are heavily loaded when a sight is being removed or installed.
The tool needs to be secured in a vise when in use, at least when it comes to sights that put up a lot of resistance. Otherwise, there is no way to keep everything in place or support the slide to keep it square with the tool.
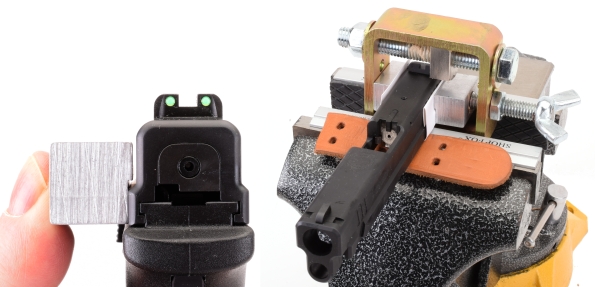
The contour clamping blocks that are specific to the Springfield XD do not fit well as all. You can see the gap between the block and slide in the left image. With nothing holding the slide downward and uneven contact from the clamping blocks, tightening the pusher torque rotates the slide and breaks the alignment between the pusher, the sight base and the slide’s dovetail.
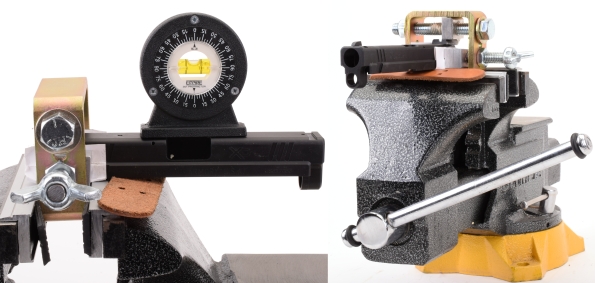
A protractor level got the slide square to the frame and stacking shim stock on the high sides of the slide minimized twist. Periodically, the clamping blocks had to be loosened to get the slide back in alignment to avoid pusher head damage to the dovetails. A pretty good tug on a 3/4″ wrench was required to break the sights free, but, eventually….
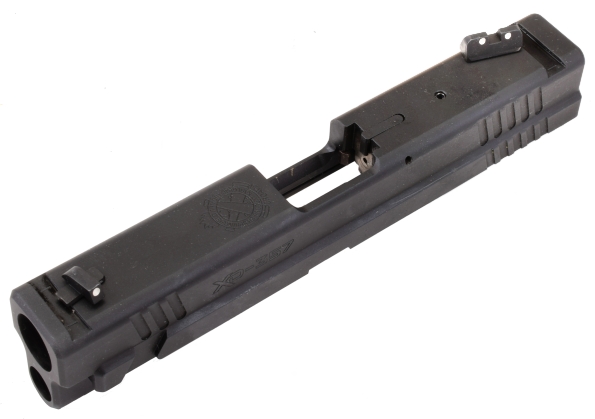
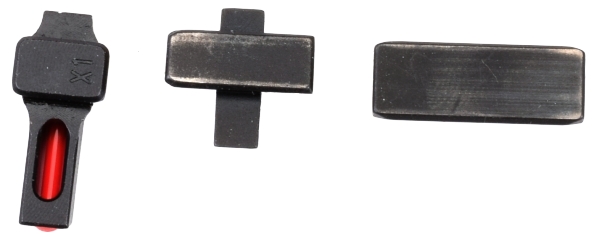
Front and rear sights were out, no marks on either sight or dovetail. Below center and right, the front and rear factory sights. They are driven out left to right, but only the front sight has a tapered and radiused directional lead, but not the rear sight. The factory installs sights left to right, however, the replacement sight dovetail bases are symmetrical and not directional.
At this point, I thought I might quit while I was ahead and resort to a Delrin punch and hammer to install the new sights rather than risk damaging the sights or slide with the Fisher Solutions tool. However, that would hardly constitute a project or a fair assessment of the tool. Additionally, installation effort is more typical for drifted fit sights.
Along with brass, steel and aluminum shim stock, polycarbonate sheet is impact and abrasion resistant and dimensionally stable. In this case it was used as a shim between the sight and pusher because it was tough enough to protect the sight’s finish without breaking and because it is transparent. It was possible to locate the shim and then look through the inspection port in the side of the tool’s frame and check the alignment of parts and tools while working.
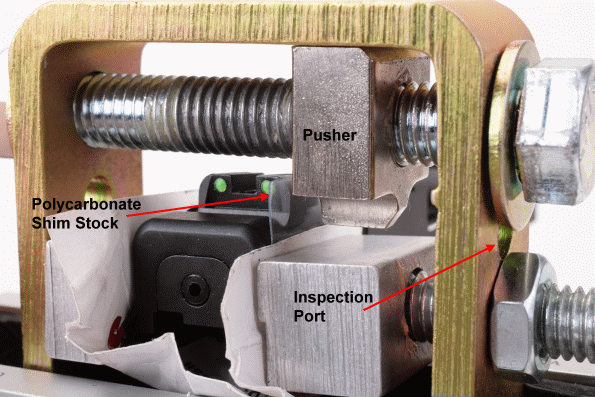
The poorly contoured clamping blocks don’t adequately secure the slide in position within the tool, which allows the slide to move about under load. If care isn’t taken and positions of slide and tool checked continually, it would be easy to bump dovetail edges as the slide drifts fore or aft or for the pusher to dig into the floor of the dovetail as the slide lifts under load. But eventually…
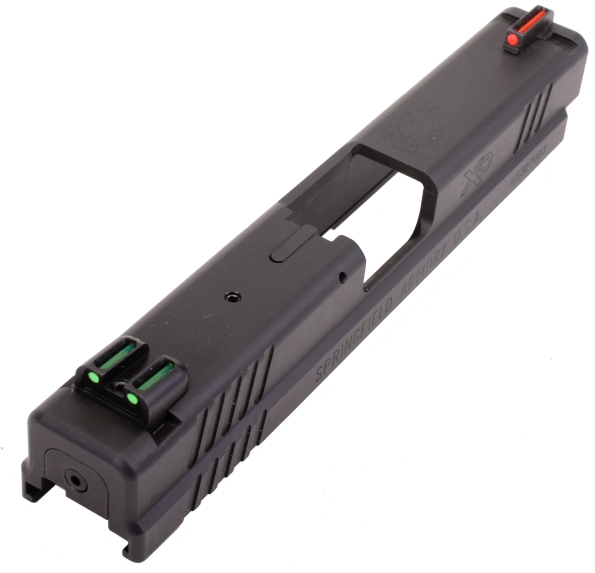
The sights went in, again, no scratches, gouges, marring… slide or sights. A little more care was required installing the front sight because of its very shallow dovetail base. Just eyeballing for center alignment, the rear sight ended up with 0.159″ in on either side of the dovetail slot. The front took a little more work, but measured pencil mark indicating center goes a long ways to making this step easy. Once in place, beyond the sight/slide dovetail interference fit, a set screw locks the sight in position.
Conclusion…
Setting aside the method employed, the sights got changed so the 357 SIG project can move ahead. Will the Fisher Solutions tool be used again to remove XD factory sights? No. It can be made to work, but the tool is poorly designed, the quality is substandard and the risk of damage to a firearm too great. With a selling price of $20 – $30 it might be tolerable and worth some clean up effort. With a price tag near or above $100, depending on model, not so much.

Email Notification