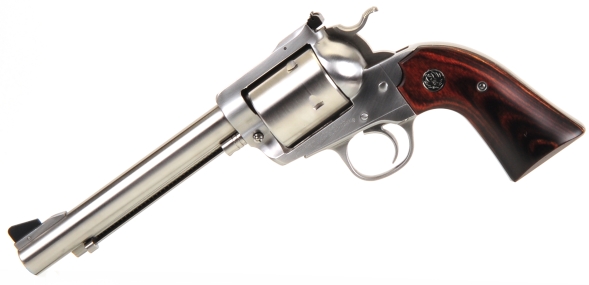
The introduction of the bigger bore five shot version of Ruger Super Blackhawk was received with great enthusiasm, including mine and I am not a natively enthusiastic kind of guy. The only thing missing from this very powerful handgun was a way to mount optical or electronic sights; no drilled and tapped mount locations, no accommodation for Ruger proprietary scope rings. Fortunately, there is a straightforward approach to getting a sighting device mounted.
A time and place for everything…
There was a lot of live fire work leading up to the review of the Ruger 454 Casull and 480 Ruger Bisley Super Blackhawks. A good deal of the data, accuracy and performance, we recorded while the revolvers were mounted in a reinforced Ransom Rest. There is a huge difference between firing a hundred rounds or so casually, and firing thousands of rounds under controlled conditions. Still, these revolvers are meant for medium and big game hunting so, eventually, they need to be reviewed held in hand, aimed by eye and in an outdoor setting.
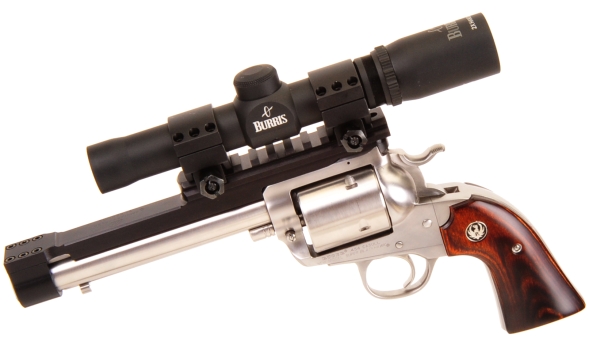
Handgun scopes work for me. They can graduate a 25 yard marksman, 50 yard OK shooter and 100 yard squinter to a competent 100 yard shooter. Walking the woods with a rifle in hand, the Ruger might be worn in a belt holster with open adjustable sights to be drawn in wilderness defense, the same way it left the factory. When the big Ruger becomes the primary firearm on a hunt, its effectiveness can be enhanced with a scope as pictured above, worn low on the chest at the ready.
A drill-less and tap-less Jack Weigand solution
Weigand’s Weig-A-Tinny® mounts are available for a long list of handguns and rifles, in this case, part number SBH454-6 $129.95 for Bisley Super Blackhawk 454 Casull/480 Ruger revolvers with 6″ barrels. The use of this mount accomplished two things; it adds a Picatinny/Weaver compatible rail to the Blackhawk and it does so without permanent modification – no drilling and tapping. In review of the other firearms serviced, 98% either mount in a similar fashion, or utilize factory drilled an tapped mount points. The only exception I noticed on the application list was an over-slide saddle mount for a 1911.
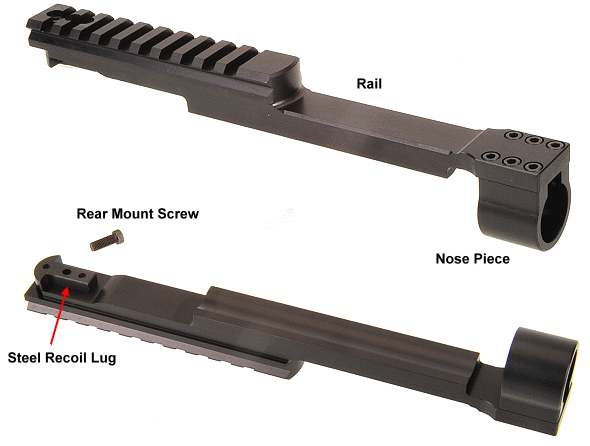
The black anodized body of the rail is fabricated from 6061-T6 billet aluminum. The nose piece is an extrusion from the same material and with the same finish. The recoil lug that takes the brunt of the recoil in locating the rail and rail mounted mass is steel, secured to the rail with 2 6-40×1/2″ socket head fasteners… 7/64″ Allen. The 6 forward socket head fasteners that join the rail to the nose piece are 6-40×5/15″, the hold down rear fastener is a 6-48 socket head to retain compatibility with the Ruger’s factory sight elevation hole.
Brief installation overview…
In preparation, all fasteners need to be removed and degreased. Non-permanent thread locker is required on all fasteners. A good torque inch pound wrench that can read accurately in the low ranges, 5 to 13 inch pounds is required. I have an inexpensive K-D clicker that reads 5 to 50 inch pounds accurately if I don’t heavy hand it. I have a relatively pricey dial Brownells wrench 0 to 75 inch pounds with an instruction booklet that opens with, “This wrench is not accurate at the bottom 20% of its readings”. Additionally: a bench block, parallel nose punches, a 4 ounce steel hammer, a soft face hammer, a pair of parallel pliers or smooth jawed vise, and a bit of duct tape would all provide to be useful. And yes, there are lots of alternatives to that last list of tools.
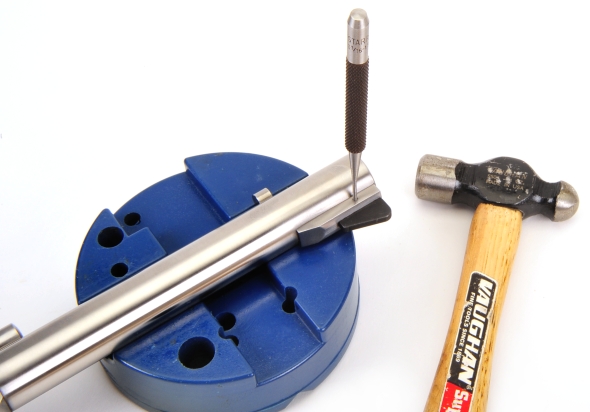
Support the sight ramp and barrel, tape out the roll pin that anchors the front blade with a 1/16″ punch. Tape the sight ramp for protection if you are a shaky puncher. The pin was removed left to right, but I always tap out in the direction of the flattened side of the pin. The sight blade won’t want to come out, as it is usually in the grip of burrs on the cross hole. Best scenario; tape the blade and wiggle it out with smooth jaw parallel pliers. Stubborn cases, tape the blade, flip the revolver over and lightly clamp the blade in a smooth jaw vise; the blade will wiggle right out. Save the removed parts.
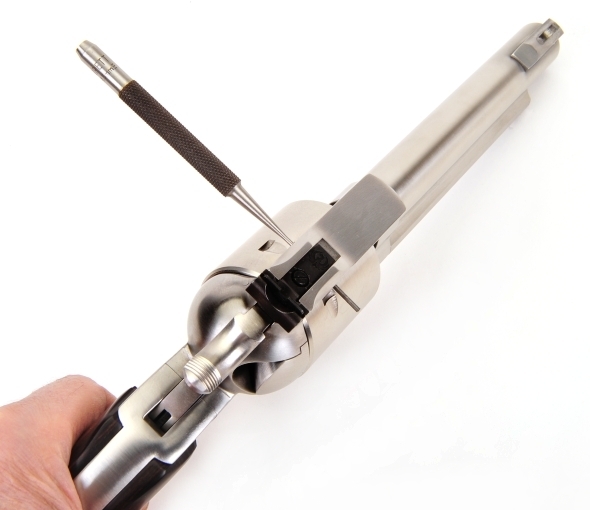
No, at no point in time is it necessary to remove part of the Blackhawk’s barrel, that is just my semi-clever way of getting all of the illustrations into a 590 pixel limit on creativity.
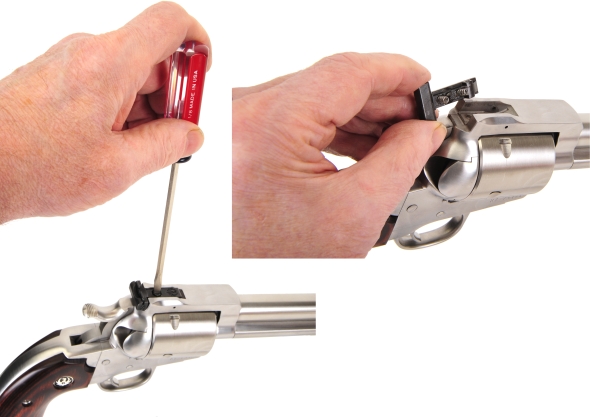
With the cross pin removed, the rear sight elevation screw is removed. The sight is sprung at two locations, so care must be exercised to contain all of the parts before they disappear into some unknown dimension and place. This is a good point to bag and rag all removed parts.
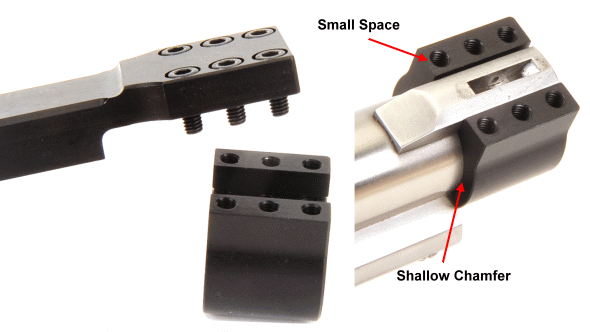
The nosepiece is removed from the rail as received and slipped over the muzzle of the barrel with the narrow gap between nosepiece fastener holes and edge facing toward the revolver’s cylinder. It will not install if flipped around.
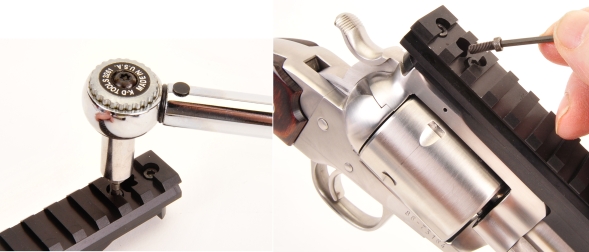
The steel lug is preinstalled on the aluminum rail at the factory, but instructions as vise to verify fasteners tightened to 11 inch pounds of torque. The rail assembly is plopped into position in the rear sight recess and over the nose piece, then the 6-48 fastener is used to secure the rail at the rear sight elevation screw position, but only tightened enough to make contact with the recoil lug.
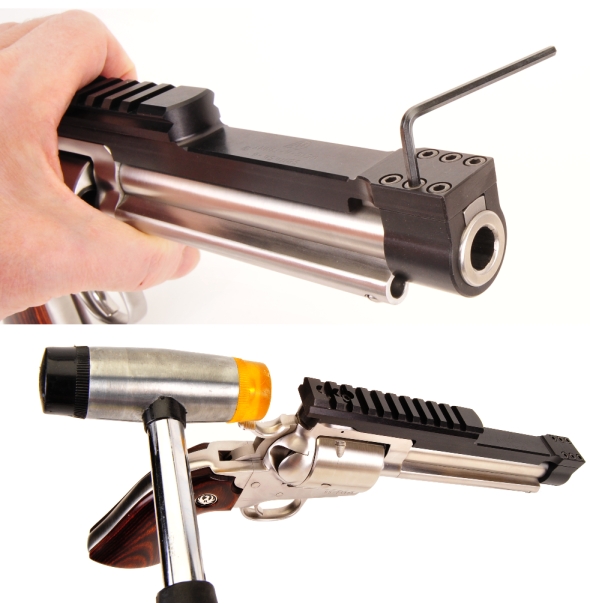
The nose piece fasteners are installed and drawn down until the slack is out of the pieces, then the rear of the rail is tapped with a soft face hammer. The idea is to have slight friction from the front clamping action and then to drive the recoil lug flush up against the frame to prevent further motion under heavy recoil.
Below, there is a very specific torque pattern that is well detailed within the included instructions. Basically it is three progressive cycles; clockwise inward/outward spiral pattern tightening at the nosepiece followed by a pass at the fastener at the elevation screw location; one cycle at 5 inch pounds, one at 11 inch pounds and a final at 13 inch pounds.
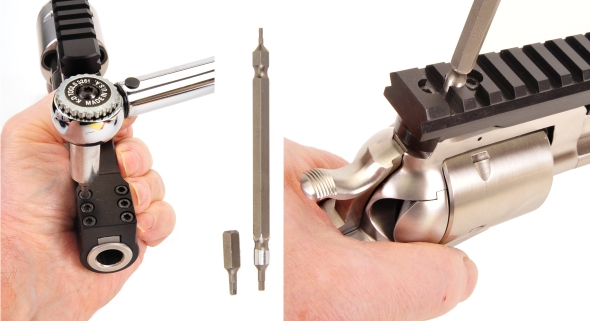
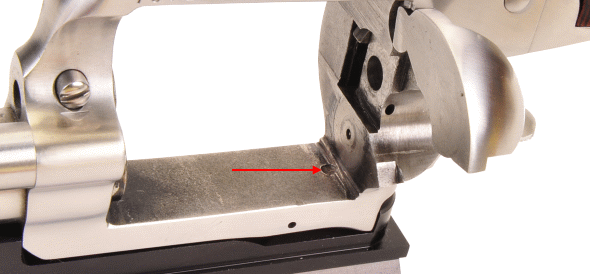
For some reason, I did not have a single short or long hex driver that would fit the torque wrench adapter and clear the opening in the rail at the rear location, so I ended up knocking the edges of the driver on the belt sander. Below, a final check is made to assure that the fastener at the elevation screw location does not project beyond the cylinder side top strap surface.
Be careful with duct tape, if you use it to protect surfaces while working. I got a piece stuck on my index finger, then to my thumb when I tried to remove it from my index finger, then back to my index finger,… then back to my thumb. This went on for the better part of half an hour until my wife pulled it off and stuck it on my forehead so I could find it when needed. What can I say? She loves me.
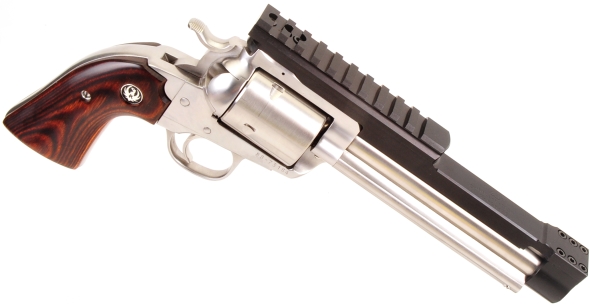
The rail should look as above when installed; clean, close fitting. It is a well done product that enhances rather than diminishes the appearance of the firearm. There is a note in the instructions that the nosepiece is a friction fit and that it may lightly scratch the firearm’s finish. I found the nosepiece to be a snug, but not overly tight fit and it did not mar the finish in any way. Thinking scuffing might result from tightened and under recoil, I checked on disassembly when the project was complete and no scuffing of finish occured.
No free pass for mass…
The 454 Casull’s recoil, when fired from a 50 ounce revolver is quick and… invigorating. The 480 Ruger is similar, but not as much. Under recoil, the firearm will tend to move rearward and upward, while anything attached to the firearm will tend to remain in its original position. The greater the weight of the attached assemblies, the more stubbornly they resist moving and the greater the stress on all attaching points that attempt to drag them along. On firing, the rail, rings and scope will want to separate from the revolver… and who could blame them?
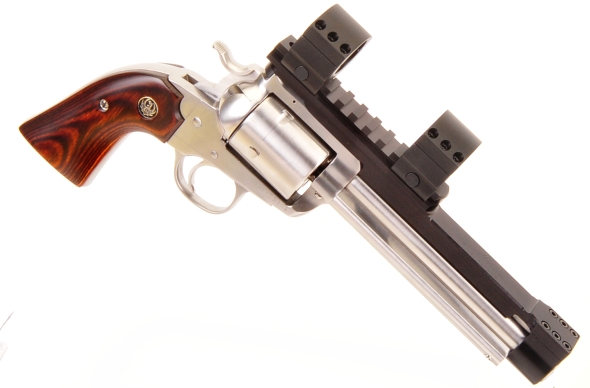
The Weigand rail has a nominal weight of 6.1 ounces, 6.3 actual on our scale. The instruction indicate that the mount was developed with a 12.0 ounce scope and ring combination and recommends that mounting a sighting device over that weight should be approached with extreme caution. Subsequently, I selected a set of Burris Xtreme Tactical wide aluminum rings with steel hardware item #420180 $59.99 at 4.4 ounces scaled, and a Burris 2x20mm handgun scope item #200218 $275 that came in at 7.6 ounces. My variable handgun scopes were 5 to 6 ounces heavier.

The Weigand instruction advised pushing the scope rings cross bolts as far forward as possible within the rail’s cross slots and to place the scope’s adjustment towers up against the back of the forward ring. The first worked; it put the cross bolts against the rail slots and the rails steel recoil lug against the Ruger’s frame. I did not push the scope forward as the rings are deep and they are secured with six fasteners and pushing the scope forward closed up ring spacing severely causing concern for the scope’s lateral stability. Did that work? I don’t know yet. I still have the live fire ring out.
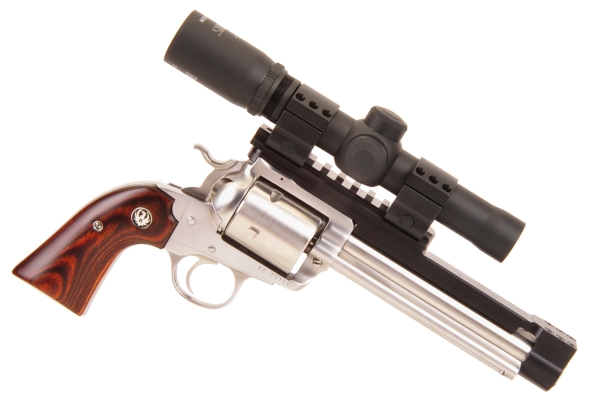
The other Weigand instruction I did not follow was suggested torque values for ring hardware; 11 inch pounds for cross bolts and ring caps. Burris instructions are 65 to 100 inch pounds for the cross bolt nuts and 20 inch pounds for the ring caps and that is what was followed. Weigand cautioned to check all hardware after ten shots and to basically monitor the systems for any hardware that might work loose and that is out intention. We’ll be back with Part 2 and live fire results with the scope in place.
Scoping Ruger’s 454 Casull / 480 Ruger Bisley Super Blackhawk Part 1
Scoping Ruger’s 454 Casull / 480 Ruger Bisley Super Blackhawk Part 2

Email Notification