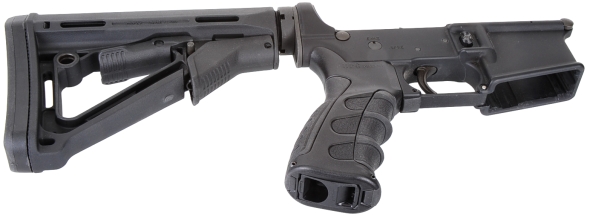
The premise of the AR Rehabilitation project is that we have a test mule AR that has fallen into a state of disrepair and terminal homeliness and it has been buried under some of the most useless accessories available. It is the equivalent of a 1950’s lead sled; nosed and decked, chopped and dropped, bubble skirts, tear drop spot lights, and fuzzy dice swinging from its rear view mirror.

There is no schedule for the project, we are trying to squeeze in a segment whenever there is some spare time. Part 1 swapped the AR’s fixed stock with an adjustable carbine stock and a soft pistol grip with an interchangeable inserts. Both changes suit the intended application as well as my personal shooting comfort. The next step, and the last for the lower for now, is a trigger upgrade. To that end we chose a two stage Ruger Elite 452 trigger. They tend to be clean, have a relatively light pull and fast lock time. In the world of AR upgrade triggers, they are moderate in price and available directly from Ruger for $159 or suppliers like Brownells (780-001-370WB AR-15 Elite 452 MSR) for $139.

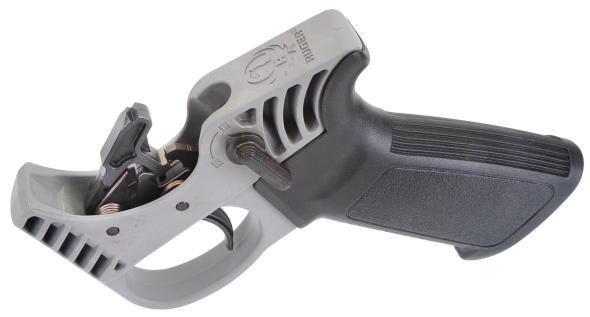
The Ruger Elite 452 trigger assembly; hammer, trigger and selector, is supplied pinned in a plastic fire control housing as seen above. The fixture serves at least a couple of purposes. The first is that it presents the assemblies in their installed orientation, which simplifies installation, as does the comprehensive instructions that are included with the assembly. The fixture’s second purpose is that it allows checking out the trigger before installation, including future triggers, as it works with all other 0.154″ pin hammers and triggers.
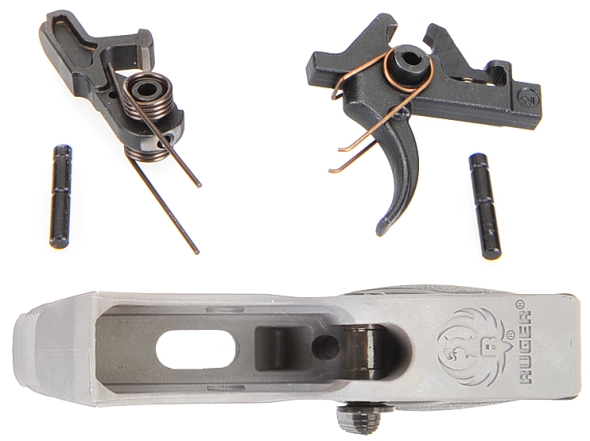
Pieces removed from the fixture, hammer left, trigger right. The unit also includes a new selector if the change in other assemblies renders a firearm’s original selector inoperative or marginal in function. The Ruger instructions includes a passage on selector checkout. The original selector in our AR, which no doubt wasn’t original, worked as so selector change out was not necessary.
Two stage, one stage…
The Ruger is a two stage trigger, the Mil Spec is a single stage. On the single stage side #1, the notch in the hammer is retained by #3, the primary sear on the mil spec trigger. When the trigger is squeezed, the sear is pulled downward and the hammer is released to rotate forward to move the firing pin. If the bolt cycles the hammer before the trigger is reset, the secondary sear #4, engages the #2, the hook at the back of the hammer and prevents it from falling forward.

On the two stage trigger, the latching surface at the rear of the hammer #1, engages the primary sear #3. As the trigger is squeezed, the first part of trigger travel meets a light one pound resistance from the trigger spring and begins moving the sear away from hammer engagement. Then there is an increase in pressure as the backside of the hammer #2 contacts the nose of the secondary sear on the disconnector #4 and compresses the disconnector spring during the second stage of pull. The hammer’s secondary sear contact surface #2 was relocated, but functions the same.
The mil spec trigger checked at 7 lbs 11 oz. The new two stage trigger let off at 4 lbs 6 oz for a major improvement in trigger feel and pull. Moving the hammer-sear contact point further away from the hammer pivot point reduced trigger effort and shifting trigger mass downward and lightening the hammer enhanced its acceleration and reduced lock time by 30% for reduced required time over target for improved shot placement.
They just sort of pop out and then plop into position….
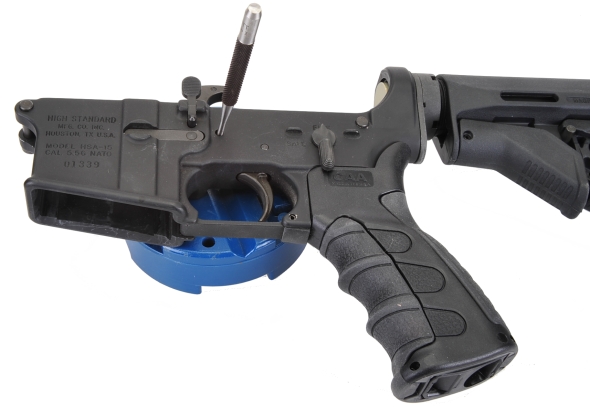
A flat nose punch of appropriate size, that is not to large as to countersink the receiver pin holes and not so small that it bends when you attempt to wiggle the hammer or trigger around while extricating them from the receiver, is used to drive out the pins. The receiver needs to be supported above the bench, hence, the bench block. I drive out left to right and in from right to left because consistency is a good work practice. As a practical matter, the pins are really not directional. They are chamfered on both ends to lift springs when driven, the hammer J spring is in the center and either hammer spring legs can retain the trigger spring.

The springs are installed on both hammer and trigger as received, but if they get separated from their respective assemblies, this is how they reinstall. The arrows are not the beginning of a laminar flow diagram, they just point the direction of spring compression when the assembly is stuffed into the receiver to line up with each respective pin bore. The trigger goes in first, the hammer follows with the hammer spring legs parked atop the trigger pin with one leg locked into the outside trigger pin groove.
Above, a clearer view of spring orientation. Couple of comments… Make sure the disconnector or disconnector spring does not fall out of position when inserting the trigger pin. The pin under pressure on one side, and a punch in the pin bore leveraging alignment on the other, is an easy way to coax pins into position. After insertion, try applying light to moderate pressure to each end of each pin to make sure the appropriate spring is locked into a pin retention groove.
If you like your ARs and not frame damage, a hammer drop block is a cheap piece of insurance. It permits safe hammer/trigger checking and prevents lower receiver damage. The check for selector function is: positive lock into positions, a hammer falling when the trigger is pulled in “fire” position and a hammer not falling when in the “safe” position. When in the “fire” position, the trigger should return without hanging.
The result of the trigger upgrade was terrific, enough so that I am motivated to squeeze in some work on the upper. It took me about an hour, but that includes setting up and taking pictures. For me, I don’t like to rush work. I enjoy firearms and the work so why gobble down a filet mignon just to get to the bottom of an empty plate?


Email Notification