
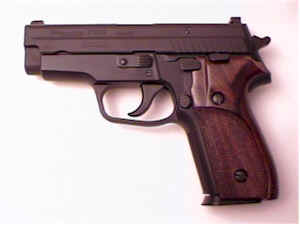
 The SIG P229 is an exceptional pistol. High in quality, reliable and accurate, all in a solid compact package. I shoot mine with both .357 SIG and .40 S&W barrels. In all of the time I’ve used the P229 I’ve never had a jam, and I’ve fed through virtually every type of bullet style and handload you could imagine. There are only a very few areas that I would seek to improve, changes that would be nice, but nothing I would label critical.
The P229 has a really long double action trigger pull. When fired in single action, it’s of course shorter and lighter, but not comparable to clean trigger pull that can be found on a good single action gun. While SIG is a very popular pistol, from a very old and prestigious company, there just does not exist the tremendous after market supply of custom parts that are available for the 1911 auto design. I can’t jump to a catalog, order a bunch of select trigger parts, a couple of stoning fixtures and end up with a great trigger job. So, for the moment, I have no solution to this problem.
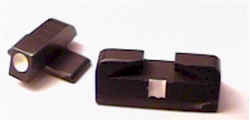 The basic combat sights aren’t bad. The undercut in the ears, above the small white post, cuts glare and helps to darken contrast with the white dot on the front sight. Unfortunately in dim light, when the rear sight blends with a black background, it’s easy for me to lose horizontal alignment.

 You can improve on this setup by converted to a three dot system, retaining the front combat sight and ordering a two dot rear sight fromSIGARMS. You can also order front and rear SIGLITE tritium night sights in a three dot configuration. I don’t particularly care for unlit 3 dot systems. For unlit, it’s easier for me to line up with a white outline and square front and, for lit, I think there are better night sights than those offered by SIG.
I spent some time exploring sight options for the SIG P229, from sources other than the factory. I ended up with a set of Trijicon fixed sights and a set of Pachmayr Accu-Set adjustable rear sights. Unfortunately, Pachmayr seemed to think one sight would fit the S & W Sigma line and the entire line of SIG pistols. Installed, with 3/4″ of unsupported sight hanging over the hammer of the P229, I decided to pass on the Pachmayr and work with the Trijicon’s. And yes I did check the part number with Pachmayr…..
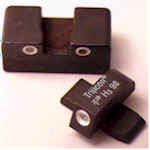 At a weight of 85 grains, about half the weight of a 40 S & W slug, Trijicon’s retail for $115. That’s roughly $9,470 per lb., no batteries required. I assume the cost must be in those little green headlights. Trijicon sights are guaranteed to keep shinning for 12 years. How did they arrive at 12 years ? My guess is that 12.6 years is the half life of the radioactive isotope tritium. Sorry, couldn’t resist and, no, don’t write.
Trijicon sights, look pretty simple and are as easy to use as regular fix sights but, from a manufacturing standpoint, they are really complex little buggers. They are self powered illuminating glass lamps, filled with tritium that glows bright green. The lamps are sealed in aluminum sleeves, capped with polished sapphire windows, and a white ring circles each tube. The white rings sort of give the appearance of a white 3 dot sight in day light.
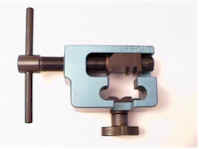 To SIG’s credit, and to all SIG owners’ benefit, they mounted both front and rear sights into dovetails cut into the slide. Because they spent the extra couple of bucks in manufacturing, and don’t cold stake the front sights in place, a simple sight mover / pusher tool can be used to make adjustments, or to change out both front and rear sights.
Sights just aren’t the type of assemblies you want to hammer on or off the slide. Pushers are available at prices from $25 to over $500. The model to the right was $85. It’s a solid tool that allows easy sight changes and adjustments, without deforming slides, or marring finishes, or damaging sights.
 The first step in setting up to change sights, as in any non-shooting handling of any firearm, is to make sure the gun is empty. Release the magazine, rack the slide back and lock it open. Check the chamber.
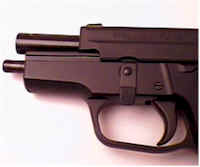 With the slide locked in the open position, the slide release lever is rotated downward. The slide release catch is depressed, then the slide is eased forward until it is released and clear from the frame. Unlike 1911 design autos, the SIG does not have a slide stop to align with a notch, or barrel bushings to rotate, or flying springs to duck.
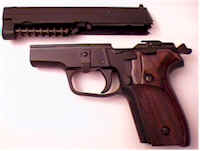
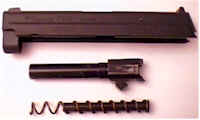 The last step of disassembly is to lift the recoil spring and barrel from the slide. At this point we’re ready to grab our Sight Pusher and go ahead and remove our old sights.
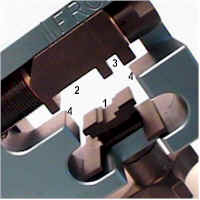 A little closer look at the Sight Pusher and how it works. # 1 is cut just like the guide rails on the SIGs frame. It will locate and hold the slide securely from the inside. #2 & 3 will grab the front or rear sights and move them laterally, parallel to the respective dovetails. #4 will provide support to the side of the slide, opposite the applied pressure, and prevent it from rocking out of parallel.
By using a Sight Pusher, you won’t run the risk of distorting the slide from external clamping, dovetail slots will remain tight, and sights won’t fracture from vertical lifting from mis-directed pressure. Some sights come with instructions that suggest putting the slide in a vice and using a brass drift to hammer out the sight. Great approach, if you want your gun to shoot around corners when you’re all done.
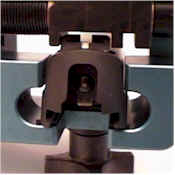
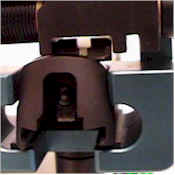
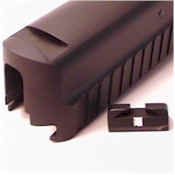
Above, you can see the progression of the sight removal a little more clearly. Very simple process, and you’re left with a slide with a dovetail in perfect shape, and a undamaged rear sight that can be reinstalled at any time. Sights can be removed from either side, although installation is always from left to right, as viewed from a shooters perspective.
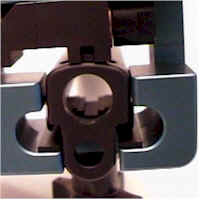 Front sights are basically the same in removal, with the exception that the slide is swung around with the sight pointing toward you, with the narrow notch capturing the front sight blade.
When I was prepping the new sights, I noticed some gunk, preservative, all over the rear sight that looked like rust. Trijicon has a few notes of caution related to cleaning solvents. Hoppe’s #9 was specifically approved, so I broke out a little scrub brush and cleaned them up prior to installation. I also made sure the dovetails were clear and free of any lubricant.
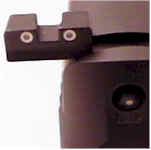
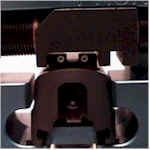 Once again, sights are installed left to right, from the shooters perspective. I started the rear sight squarely into the dove tail with finger pressure, before sliding it into the Sight Pusher fixture.
As the sight is moved across the slide, index marks scribed on the pressure pad indicate when the sight is centered. Sight location can be fine tuned at the range.
The front sight requires a some special handling. The warranty as well as the installation instruction advise only a SIG Sight Pusher should be used. In fact, its use is one of the warranty stipulations. The front sight is mounted on a thin tab and is susceptible to bending, particularly if forced into the slide on an angle, or if the sight is driven upward while being pushed into place. Correct seating with the Sight Pusher is easy.
Below are some shots of a completed slide, and the slide mounted back on the frame. I think it’s a very clean appearance and matches the factory finish on the gun. Trijicon’s are also one of the few tritium type sights that glow at a level of visibility that is easy to pick up in very dim lighting, against a dark background.
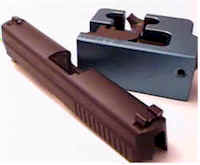
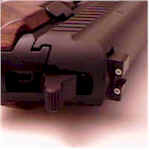
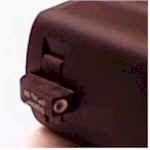
The rear sight has a little more thickness than the standard combat sight, but the width is about the same. The front sight is no larger than the standard sight. Now that I have a SIG that glows in the dark, I assumed that’s is good thing, so I headed for the range to see how the new sights perform.
A Trip to the Range
Indoor ranges in this area are getting a little difficult to use, particularly around lunch time when local companies go on break. There are a lot of new shooters, God bless them, that will help to insure the future of the sport and help educate others, but sometimes it’s difficult to separate a legitimate range from a shooting gallery at a carnival.
If there is anything I like a lot it’s those “splodin'” targets. Little white boxes people stick on their targets, that eventually explode with a loud bang, blowing up the rest of the target, a target which had amazingly remained projectile hole free, at 7 yards out, even though the shooter was armed with a 12 gauge loaded with bird shot. Anyway…
I liked the Trijicon sights. They offer a clear horizontal reference compared to the standard combat sights, and they seem easier to hold on target, and get back on target for follow up shots. It did take a while to feel comfortable looking at the tiny rings rather than a solid set of dots, but that gets to look like a good sight picture very quickly.
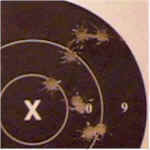
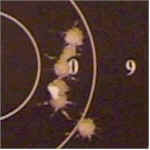
The .357 SIG targets were all shot with 115 grain Gold Dot handloads. These are more for speed than for accuracy, but it’s a round I practice with a lot. The group of 8 shots at the lower left is about 2.20″ inches, and were shot with factory combat sights. The group on the right is another 8 shot group, that is less than 1.50″, shot after a change over to Trijicon sights, and a better sight picture. The Sight Pusher also allowed me to adjust point of impact over to center.
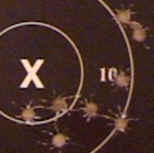

The .40 S & W targets were all 155 grain handloads. They are similar to the .357 SIG loads in that they are better at speed than accuracy. The group on the left was shot with standard combat sights. The ones on the right were shot with Trijicon sights. The .40 S & W barrel still shoots a little to the right of the .357 SIG barrel, but the shots lined up a lot closer and grouping closed down from over 2.50″ to about 1.50″.
Is it worth the time and effort to change sights ? I’m not that familiar with the type of improvements a competition shop can make to improve accuracy of a SIG, outside of the standards that apply to most firearms. There are generally three areas to address that will improve accuracy as a function of shooter control: better sights, better ammo, better trigger action. If a gun is isn’t in need of repair, most mechanical improvements directed toward accuracy are small in impact, and high in cost.
If you’re having a difficult time lining up on target, finding your sights for a follow up shot, or seeing your sights against typical shooting backgrounds, dropping in a new match barrel probably won’t do much for you. In fact, this sight change yielded the biggest improvement in my shooting of any change I have ever made, short of fixing something that was broken.
So now I can look at improved handloads and maybe a trigger refinement, knowing my sight situation is squared away. Or, I may even look for a compact adjustable sight so I can adjust for the difference in point of impact between the .357 and the .40 S & W. I just got in a box of Speer Gold Dot .357 SIG bullets and a pound of Alliant Power Pistol and some APS strip of small pistol primers, and….
Thanks
Joe

Email Notification