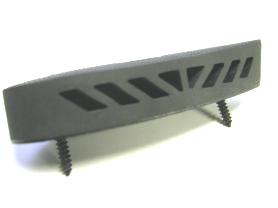
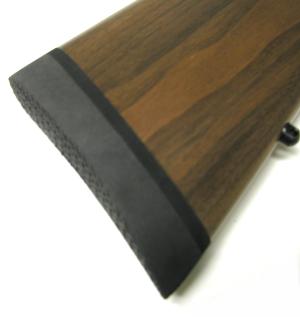
 This is a picture of a brick, not a great picture but, none the less, a picture. Someone might suggest this looks a lot like a Marlin 1895G factory recoil pad, but it can’t be, because it doesn’t flex, twist, compress, or even bounce very high when tossed to the ground.
Hiding within those dark recesses is a .600″ vertical stiffening rib. It runs right down the middle of the pad, no doubt to insure those side compression voids never flatten in use and lose their original shape. The pad’s not made of Sorbothane, it could be recycled off- the-road radial tire rubber, but I don’t believe tires are made from compound this hard.
 I like the Marlin 1895G and, after some first hand experience, I’ve developed a great deal of respect for the .45-70 cartridge and it’s potential with modern handloads. The combination is exceptionally accurate, the gun is compact and very light and, when used with heavy loads, there is enough punch to put down just about anything in North America.
With light loads the gun has low recoil and low report, but when the loads are pushed, recoil becomes pretty harsh. Most factory 300 grain loads produce 19 ft/lbs of recoil, about the same as an 8 lb rifle chambered for the .308. On the other hand, the .45-70 Marlin loaded with 405 grain bullets, coupled with a MV near 2,000 fps, produces 66 ft/lbs of recoil. Placing this last statement in context, a moderate weight .375 H&H magnum with 300 grain loads produces approximately the same, but the Marlin has much greater felt recoil.
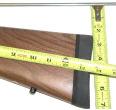 I spent some time, with very specialized lab equipment, in an attempt to ascertain exactly why this little gun persisted in kicking the crap out of me while my Weatherbys, with their reputation for abusive recoil, seem mild enough for informal plinking – no, I don’t know what constitutes formal plinking. The hard kickers have short pull dimensions, little drop at the heel, poor support at the comb, but more importantly – fossilized recoil pads. I thought I could take a run at a couple of these problems.
 I know how to install a recoil pad. I take it out of the package, notice it is the size of a large snowshoe, then I take it and the rifle down to the gunsmith for installation. It makes sense; pad fitting fixtures are three times the cost of a typical pad, and I hate repairing stock finishes, so better to have it done right by someone with the equipment.
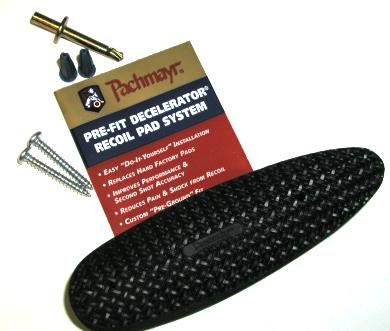
Then I ran across the Pachmayr Pre-Fit Decelerator model for the 1895G in the new BrownellsCatalog, figured even a lazy guy like me could remove and reinstall a couple of screws, so I went ahead and placed an order. The blister pack arrived with the pad, instructions (actually application notes), a shoulder bit to make holes where none might exist, some screw inserts, and a couple of screws. The feature list on the package confirmed my understanding: easy do-it-yourself install, replaces hard factory pads, reduced pain and shock of recoil and, most important of all – “Custom Pre-Ground Fit”. Well all right !….but not really.

The new pad (above center) has solid sides, hollow center, with a very flexible egg crate interior. The crate makes the pad stable and acts like a shock absorber dampening outward expansion. I believe the pad is made of Sorbothane, which has exception shock absorbing ability, making it about the consistency of a Gummi Bear at room temperature.
The old pad came off easily with the removal of two wood screws. Fortunately, walnut is some pretty tough stuff so the threaded holes hadn’t worn loose, and the alignment of the original holes centered perfectly with the new pad. Unfortunately, was promoted as “pre trimmed to fit within .050 of factory stock dimensions” was off by approximately three times that amount at the toe of the stock, and about .050″ on both sides. I thought this might be just the match up on my particular Marlin, but another pad I ordered had the same degree of mismatch problem with my M700 Remington BDL. Not a big deal to fix, but I hadn’t anticipated doing much of an installation.
 I centered and screwed the new pad to the butt through the original holes in the stock, then I outlined the butt against the pad spacer with a sharp scribe. Recoil pads are sanded to fit, typically rough work done with the aid of a belt or disk power sander. Most of the sanding is done perpendicular to the spacer so, because the only flat surface is the spacer, sanding takes place with the scribe marks facing down on the sanding table and hidden from view. If you’re one of those people who quickly makes nubs out of pencils in a power pencil sharpener, this isn’t a good process to attempt, but if you can conjure up a little patience, are willing to make some periodic progress checks to the scribe line, this is a pretty easy job.
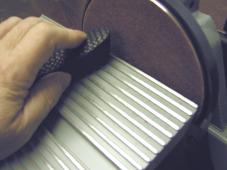 There are, of course, always some exceptional steps. The portion of the pad extending from the toe of the stock projects out at an angle. To follow this shape, I tipped the sanding table to make this surface of the pad parallel to the sanding disk. I took off this excess in one shot, leaving a flat surface at the toe, that was eventually tapered into a correct “V” when I narrowed the sides to follow the scribe lines into the toe.
I used only 150 grit paper. The disk rotates at approximately 3200 feet per minute, and the fine paper left no marks on the pad through burning or scuffing..
 When I got close to the lines, and I needed to make a final blend into the toe, I switched to a hard sanding block with 80 grit, followed by 100 for finish work.
Like most things sanded, take off material conservatively because you can’t put it back on. A recoil pad of this type runs about $32, not that costly, but clearly too much to waste. Incidentally, if you haven’t invested in a small bench top belt/disk sander, Delta has an all metal Model 31-460 with a 4″ belt and 6″ disk that goes for about $90. They are really handy to have around.
 I did finish the job, and I think it came out pretty good. I went back and temporarily reinstalled the original pad for comparison, and I realized the factory pad was a pretty sloppy fit. The Pachmayr wasn’t perfect and required a little work, but it was certainly worth the effort. It looks good, but more importantly is feels really good when shooting.
I think the pad resolved most of the short pull problem, the new pad is approximately 3/8″ longer than the factory piece, but it really dampens recoil to the point I don’t mind shooting heavy loads out of the gun at all. Now all I have to do is install these on three more rifles and I’ll be all set.
One closing note, I’m working with a new camera that seems to be out of control when it comes to placing light on the subject. Eventually, if I continued to work diligently to become familiar with this gem’s little idiosyncrasies, it should eventually take pictures on par with my old camera which is sitting on the shelf with a disk drive filled with Diet Pepsi.
More “The Model 1895G”:
The Model 1895G Part I
The Model 1895G Part II
The Model 1895G Part III
The Marlin 1895G – reducing felt recoil
Handload Data 45-70 Gov’t
Thanks
Joe

Email Notification