Stock Refinishing
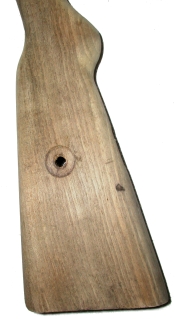
The nicest thing about wood is that it usually gets better with age. The trick is finding what will improve the appearance of a stock without causing damage in the process. As an example, there is a common Internet reference to using Easy Off Oven Cleaner to clean a gunstock and remove impregnated oil. Easy Off will remove some amount of oil, however, it will also permeate the wood with caustic chemicals and continue to damage the wood fiber and attack metal parts long after the wood has been flushed with water and air dried. Biodegradable detergents like Krud Kutter seem to work well and don’t leave a problem residue, they just require several applications over a period of a few days, thorough rinsing in warm water and thorough drying.
There isn’t really a need to overkill on oil removal, particularly if the intention is to refinish with oil based products. Removing just enough oil to get to a relatively uniform wood color and texture should be enough to ensure a new finish can be absorbed uniformly into the wood. I made it a point to clean the outside surfaces of this stock, but also to clean up the inletted portions including the barrel channel in the firearm. Lots of synthetic bristle brushes of various shapes and sizes were used to get into the smallest recesses. Some of the best sources of information regarding wood cleaning, treatment and preparation are websites and product support services offered by wood product manufacturers.
Preparing the surface for a new finish
My Mauser is not a collector’s piece, nor is it a valuable piece, nor do I feel a particular degree of reverence for firearms shouldered by enemy armies. The gun is one sample from a five year flood of old Mausers bastardized by Turkey in the late 1930’s, and currently sold through importers on the US market routinely for under $100. Found to be in good mechanical condition, with a good bore and acceptable headspace dimensions, the gun is slated to be a shooter and a platform for 8mm Mauser handload development. From a perspective of improved aesthetics, I wanted to remove the modern inflicted damage, while generally retaining the historical character and markings, so care was exercised in sanding and finishing. I have seen examples of military refurbish stock work on the Internet that looks more like an attack with a belt sander and a dunk in polyurethane; that was not the direction taken.
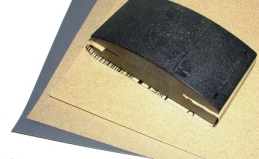 I sanded using paper in the range of 120 – 320 grit, removing only very superficial nicks and dents, and not attempting to fill any real imperfections. When I got close to completion, rather than running the risk of embedding pieces of steel wool in the bare wood, I lightly water sprayed the wood and whisker sanded with 400 grit paper. As I worked the wood, some oil was drawn to the surface by friction heat. This was left in place as the basis for retaining the appearance of age; darkening near edges and around hardware. A sanding block of appropriate size was used at all times and caution was used not to sand the wood undersize and cause loose or raised hardware.
Wood Treatment as a System
Internet searching uncovered many recommendations for a final finish for a military stock, some useful, some not. Unfortunately, there were few pieces of information addressing treatment that should be accomplished before the final finish. The starting point is deciding if you will use water or oil based products then it is pretty easy to move on from there following good technical advice from manufacturers.
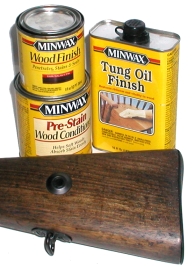
My feeling was, with a stock full of oil and no desire to seal under the finish I wanted the most compatible products, so I elected to use oil base. Everything I would use in preparation, coloring and finishing would be the same type of product. Because most suppliers make complimentary products, and because of previous experience, I decided to use the Minwax for everything, everything including a pre-stain conditioner, a penetrating stain and sealer and a Tung oil top coat. I wanted a dry to the touch satin finish that would be water resistant, easy to apply and easy to touch up. Linseed oil, even boiled linseed oil offers a nice appearance, but it requires a lot of handwork and maintenance to look good and not develop a sticky feel.
 Pre-stain conditioner, when properly applied, ensures uniform stain coloration without masking grain in soft or porous wood The Minwax wood finish in an oil base combination stain and sealer dries dead flat and also does not mask wood grain. The original Turkish stock was very dark, so I selected a dark walnut wood finish for consistency in appearance. The stain is applied within two hours of the conditioner application, excess wiped within 15 minutes, then both air dried for 24 hours before the final finish is applied. Only one coat of conditioner and stain was required.
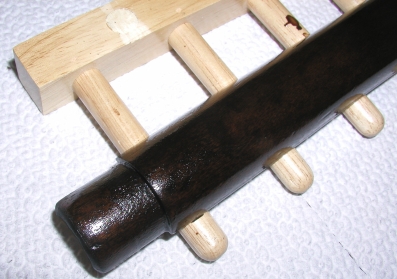
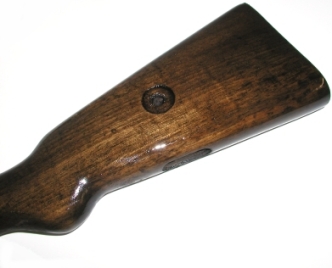 Minwax Tung Oil is not pure Tung oil like the products available through Brownells or Woodcraft. I believe the Minwax brand contains some petroleum products used as drying and thinning agents to simplify and enhance application. The picture on the right shows a coat that had just been applied. I know it has that 60’s Weatherby look of a flashy finish, but it dries flat or satin in appearance. It goes on easy, soaks into the wood, and excess is wiped off within 15 minutes of application. 24 hours is required between coats and it took 2 coats for complete coverage. When dried, I buffed the finish with 0000 steel wool for surface uniformity.
I believe I invested about 6 days into the wood working effort, most of that time spent waiting for wood or products to dry. A sign of the times – I went to Home Depot to pick up a 12″ mill file to take out some rough areas I didn’t want to heavily sand. They didn’t carry mill files, but they offered me a fine combination rasp/body filler file as an alternative. Orchard Hardware, a local home and garden chain, had them in four sizes with the correct handles. Whew! Had me worried.
Metal Part Refinishing
 Jerry Kuhnhausen’s book “The Mauser Bolt Actions – M91 through M98” and the very helpful assembly disassembly instructions that appear on the SurplusRifle.Com web site made good guides for detail disassembly of all metal. I photographed the firearm as I went along so I would be able to reassemble to the exact configuration; barrel bands rotated in the right direction, sling hardware facing as original, etc. I’m sure most of us who have disassembled a number of firearms could get through the experience without a manual, but we wouldn’t know the inspection criteria and critical parts and assembly dimensions necessary to qualify the hardware and to correct problems. Besides, I’m too old to want to sit for hours, shooting firing pin shaped holes in the wall while trying to remember how to reassemble a bolt.
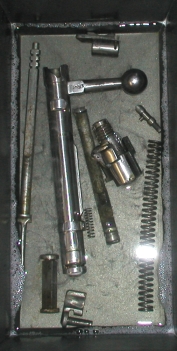 I spent a lot of time stripping assemblies, scrubbing away grease and surface rust, and looking at everything though 7x magnifying glasses under a very bright halogen lamp. Inexpensive tools but, a great way to find cracks and areas of abnormal wear. The gun was in good shape, just really loaded with grease, oil and assorted crud. I always try to stay away from petroleum based solvents, I have so few brain cells left to lose, so I use Greased Lightning, an alkali based cleaner that is very strong and will cut through any grease. GL does need to be thoroughly rinsed away when cleaning is complete. While there aren’t a lot of screw thread locations, I always run a tap through bolt holes while cleaning, and a natural bristle shotgun brush makes a heck of a chamber cleaner. A tough spot to clean is the lug area forward of the action, just aft of the barrel. I know Brownells makes a tool designed to specifically clean this area, but I just pluck all but an inch of a 12 gage cleaning brush and that is about perfect to gets right in there and clean things out.
Detail inspection brings firearm insight. These old timers are interesting in design and operation, from that small third lug lock up to the sliding elevation control assembly on the rear sight. There are also individual rifle differences to discover, like the small crack stop wedge just forward of the front guard screw on my gun and aft of the cleaning rod retaining nut. Parts are not superfluous; only what was necessary to produce a reliable weapon designed to serve in life or death circumstances. This old Mauser was made when production of this type of weapon was near an end, the forged steel and all wood stock era. Stampings and laminates were on the way.
Now that it’s clean, what do I do with it?
Generally, the other 1938 type Mausers I’ve seen had blued stock hardware, a blued barrel and action and a white bolt assembly. Other Mausers I’ve seen, from initial production through WWII pieces have been all blue, or all blue except for a white bolt body, or white action and bolt assembly with the balance of metal parts blued. I’ve seen blue the color or Prussian blue, shiny black bluing, matte black bluing… There are so many variations from so many countries, probably every possible combination has been represented at one time or another. I decided I would have the parts refinished to my personal taste, again, not a restoration, just a clean appearing shooter.
Typically I have bluing done in conjunction with other work, so I let the gunsmith handle the bluing. This time I had to deal directly with a refinishing service. I spent quite a bit of time researching, but wasn’t successful getting a solid reference online or though associates, so I started contacting companies directly. Based on scope of services offered and responsiveness to questions and general communication, I elected to send the parts to Hot Flash Gun Finishing Service. I am a retail customer just like everyone else, I do not get breaks or discounts from services appearing in articles on the site, so this is not a paid endorsement. I liked the fact that I didn’t have to chase them around in follow up, material was into and out of their shop in 7 days and returned exactly as requested. I sent a bucket of parts, I needed to take picture before refinishing, and I included a pretty good list of instructions along with a parts inventory. Everything was done exactly as requested, the parts were returned carefully wrapped and protected, and some of the more pain in the butt reassembly work was done for me. Nice job and good folks to work with. They do offer wholesale and retail services, they do substantially discount prices for parts prepped by the customer. By the same token, you can send a complete firearm and they will disassemble, blue and reassemble. They do bluing in grades from basic matte to master, plus several levels of Parkerizing and multi color KGI Gunkote
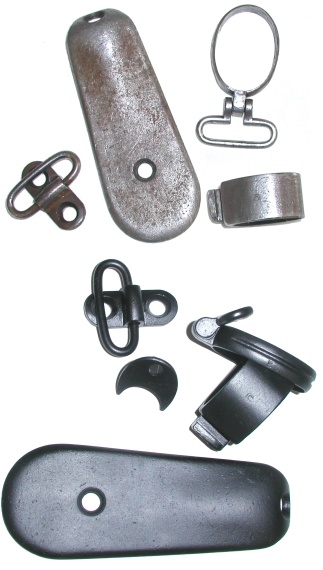
I elected to go with a basic matte finish; it seemed the most correct for this application. Hot Flash cleaned and bead blasted all parts, imperfections were sanded out without removing historical markings or rounding off clean edges, then everything was polished to the grade of finish I requested. The parts were then chemically cleaned, tank blued at 300°F, rinsed, coated in curing oil, and returned.
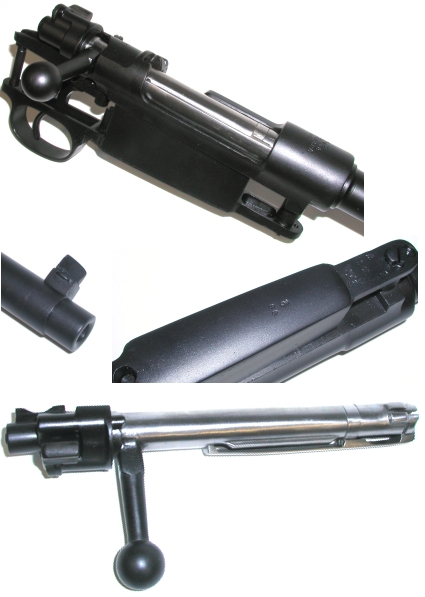
I asked to have all stock hardware including the trigger guard and cleaning rod blued, the barrel and action blued, the bolt shroud and safety blued, the bolt body in white, the extractor in white and the bolt handle masked and blued. That’s exactly what I got and it looks like the GEW 98 cover gun on “Mauser Military Rifles of the World – 3rd Edition”.
I went through every detail photo that I have and compared them to the refinished parts, looking for changes. I honestly think the markings on each part are more clear after refinishing. If you look closely you’ll see the small crescent moon on the upper barrel band and a star on the cleaning rod guide. In fact, no marks disappeared on me and the new clarity will help me better document the gun’s origins. The finish is a lot more matte than the pictures suggest. The reflection is mostly curing oil under electronic flash.
The only thing I needed to do, and I think this is always the case with newly blued parts, was to thoroughly clean the gun before final reassembly. Curing oil and small bits of polishing gunk end up in tight spots, but it is easy to remove, really minor.
I do not know why it took so long to put back together…
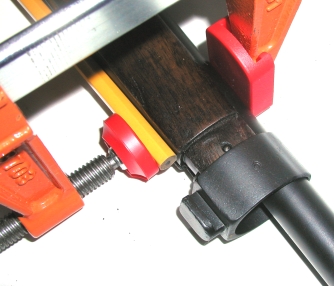 I am not going to write an assembly guide, there are lots out there and better than any I could put together, but I can offer a couple of suggestions about reassembly. Drop the cross bolt in before placing the action or find a large mallet for later. I bought a cross bolt tool from Brownells so I couldn’t scratch up new bluing by using a pair of needle nose pliers. I use gunsmith screw drivers, flat blades that fill screw heads. I used plastic covers on clamps when reinstalling the band hardware and, yes, that is a magic number 2 pencil I use to depress the lock. I re-drilled all small stock holes before reassembling to clear away all debris and finish that may have reduced hole size and I went over most edges of inletting with an X-acto knife to clear away wood whiskers and imperfections under the finish. In any event, I am calling this one done and moving on to handload development.
The full length picture bottom-below is a good match for the real thing, the picture was taken in natural light. The others were taken close up with electronic flash and tend to have a hot spot and make the finish look more reflective than it actually is.
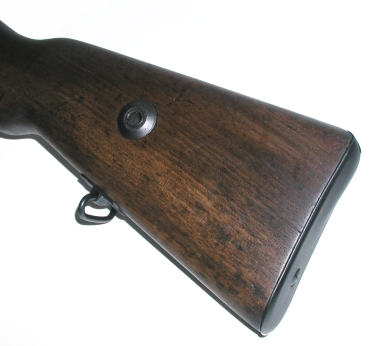
As you can see, I made no attempt to remove age scaring. I did bring out some of the dents, however, I did not attempt to remove the dark marks that remained. I did go back up to Big 5 and looked at more Turkish Mausers, this stock is the same shade and coloring as the original.
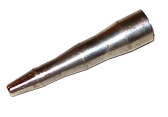
I reused the tube from the bolt disassembly tool in the stock. I removed it by weakening it with a shallow countersink and driving it out with a punch, then I had the tube blued and swaged it back into place with a swaging punch from Orchard Supply, pictured above, and a half inch ball bearing backing the other side. I covered all metal parts with tape to prevent scratching, a few taps and the hardware became very secure.
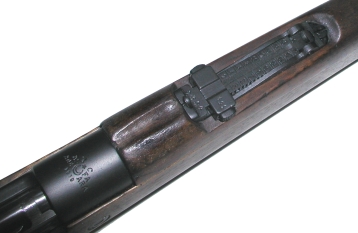 This is a better picture of metal markings, all pretty clear. The rear sight was a lot of fun to reassemble; easy in retrospect, but not so much with a hand full of little grooved parts and 1/8″ long springs. I know military sights are often ridiculed, but I kind of like them. The narrow blade and low dovetail make it easier to put the sights on target without obstructing.
I assume the long distance markings were intended to demoralize the other side and not so much for actual use. It’s amazing how well the flat springs and other parts held up over time.

I was surprised Hot Flash was able to blue the hardened trigger. Usually the result is a little weird. I like the trigger pull, it’s nice to have that level of feedback.
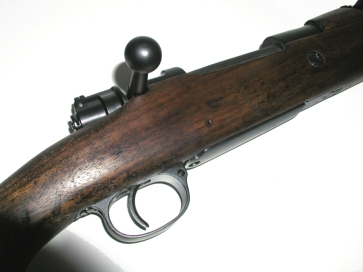
A couple of areas I grappled with before making a decision. I left the bolt the way I found it, sticking out. I decided I would not have it bent, nor would I attempt to mount a scope. I have lots of modern rifles with scopes that will shoot sub MOA all day long, this one may be more fun just the way it is.
I have extended floor plate release parts, but I left the original parts in place. I will probably install these after the first shooting outing, or realize they are a waste of time and leave them in the tool box. The finish is about the same so they won’t be a glaring change. I also didn’t install quick removal locking screw sets.
The Finished Project

This is the finished gun. It draws a lot of attention and even people who don’t know much about firearms seem to like it because of its age and character. I’m pretty happy with the way it turned out; it looks decent and smells like an old machine shop. I like firearms and I like to shoot them, I am not a military or history buff, and I don’t share the same level of sentiment for these particular guns as some folks might. I like mechanical parts that are precise, wood parts that fit well and look good, and pretty much fit the metallic parts they are wrapped around.
If I can offer a word of advice to anyone undertaking this type of project for the first time – remember the historically independent nature of gun owners. Don’t let others limit your opportunity or creativity by constructing a set of rules they arbitrarily and capriciously authored. There are so many clichés surrounding military firearms, some notions that are advanced are almost comical. My rule of thumb for message boards and similar forms of communication is take what makes sense, contribute where you can and leave the rest behind. Don’t compromise your personal objectives. I think a guy as creative and innovative as Paul Mauser would break out in a rash if someone tried to explain why everything must be in its proper place according to the rules of strangers, never to vary for all perpetuity.
I need to get my shop set up more permanently, get things out of storage and I need to get some formal training on some metal working areas. Learning how to weld correctly and accomplish more complex tasks on a lathe would be great, it would open new opportunities and reduce my dependency on outside services. Guns tend to drive owners to their limits and hopefully on to learn more. The next phase of a project for me will be to develop handloads for the 8x57mm IS round. The gun has piqued my interest in millimeter European cartridges and this may be the basis for a complete rifle build project. At the very least I want to see how close to 30-06 Springfield performance the round can come and how consistently this old rifle will perform.
I have two more military firearms, both Mosin Nagants of differing model designation. Those have been cleaned and checked out, but will only be used for handload development as I have no specific plan for them. The carbine holds the most interest, it is like an old saddle gun, compact and light, but with substantial power. The Russian cartridge seems to offer a good deal of potential does that bolt face if I want to rebarrel to a new chamber. We’ll see, there is plenty of time to decide.
Oh, RealGuns.Com made a mention in the May issue of “Men’s Edge”. The article is “Barrels of Fun”, Men’s Edge Salute to the Second Amendment. Thanks Rogow, great article and we greatly appreciate being noted under Essential Internet Resources and in such very good company.
You know, I really liked the way this project came out, and I don’t say that very often. Again, thanks for the tips Clark and for sharing information so freely.
More “Turkish Mausers and the Big 5 Way Back Machine Part I”:
Turkish Mausers and the Big 5 Way Back Machine Part I
Turkish Mausers and the Big 5 Way Back Machine Part II – Conclusion
Handload data 8x57mm JS
Thanks,
Joe

Email Notification