 ‘ve owned some of my firearms for so long, they have become a part of my personal history. I try to use them as frequently as possible, and I hate when they fall into a state of disrepair. One such rifle is a 42 year old Mohawk Brown Remington Nylon 66.
I’ve lost track of how many rounds of ammo have passed through it, but I’m quite certain the number clicked over the 100,000 mark some time ago. It remains accurate enough for recreational shooting, it never seems to jam and has withstood a beating in use. It is the demonstrated utility of this firearm that serves as the foundation for my appreciation of Remington rifles. Yes, I know I poke fun of most of their recent cartridge introductions, but that in no way reflects a lack of confidence in Remington’s ability to manufacturer firearms of exceptional quality.
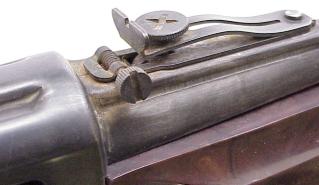
This particular Nylon 66 has a good bore that is free of rust, pits and leading. The action is still tight, it has always been kept sparsely oiled and free of powder debris and gunk. The outside finish is well worn, so every few years it had been stripped and cold blued to protect the metal parts from the elements. Unfortunately, the last pass at this process had left some trace of the corrosive chemical stripper on the rear sight, which caused surface rust to form and freeze the adjustment screws in place – Nasty. I thought I would try to clean it up and attempt overall refinishing with something more substantial than cold blue, while trying to avoiding the high cost of professional refinishing. Professional finishing is expensive, and becomes very expensive the minute the job include repair, removal of surface defects and/or any type of metal finish that is finer than bead blasting.
What are the low cost alternatives?
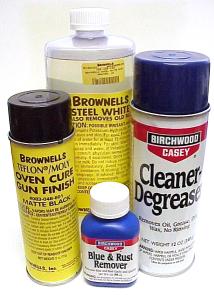 Here’s a news flash, there are no cheap durable finishes, nor are there cheap preparation/application processes. Behind every $27, 6 ounce spray can of oven cure finish is a half of a truck load of degreasers, rust and bluing remover, sheets of wet or dry paper, cleaning or soaking tanks, rubber gloves, buffers, sanders, polishing material….. Other than a can of black spray paint over a rusted surface, I don’t believe there is a sub $100 home refinishing effort.
Of course you knew this all along, but it takes me a while to catch on. After all, I still shoot and reload for rifles chambered for Weatherby cartridges, and it took me almost a full minute to realize Midway USA wasn’t really taking away free shipping, raising prices and adding extra small order fees to be fair to its loyal customers. I think it was the August Midway USA catalogue, with the picture of a bush jacketed, sunglass wearing President Potterfield, waving to us all from his two month long African safari, that tipped me off and caused me to suspect his motives might have been less than honorable, and his presentation less than honest. I’m waving also Larry, a little differently than you perhaps, but certainly with the same intent. In a world with many options, why spend money where it isn’t appreciated?
 Home workshop hot chemical bluing is out of the question; strictly a high dollar/high volume process. There is a lot of associated specialized equipment, a need for good deal of critical process control and a lot of ongoing process maintenance. There are also numerous substances that require respectful, careful handling, specialized methods of chemical disposal and a demand for real metal working skills. Most Parkerizing is right up there with hot chemical blue in complexity and equipment cost and, in addition, all rifles end up looking like military surplus. Complete cost of process and equipment setup to do a competent job can only be expressed in multiple thousands of dollars. No doubt this set up would make you very popular with your gun owning buddies, but hey, what’s that really worth?
DICROPAN hot water bluing and similar, represent much simpler processes than hot chemical blue, but does not result in a substantial final appearance, and there is still an entry cost above $500. Rust blue requires much less support equipment or sub-processes, but the required craft skill factor appears very high, and I have to find out what “carding” means outside of a 7-11 beer or cigarette transaction. Rust blue is a many multi-stepped process and may not be excessively challenging for those of us with a short span of attention. Amer-Lene Gray looks as though it might make a nice alternative, but Parkerized gray was not an appearance objective, and the process requires critical solution temperature control. Brownells does offer baking lacquer and Gun-Kote in spray on form, however these appear more difficult to apply, typically requiring temp control of application.
 I decided none of the these finishes would for me, then I visualized what it would be like to ask a gunsmith to put a $200 professional bluing job on a $50 rifle, and immediately decided to go back again and pick two selections from the list of potential home shop processes. I decided I would go with the Teflon/Moly spray and rust blue combination, mostly because I am not at all familiar with either product or process and would not be able to accurately predict doom and failure as the only possible outcome.
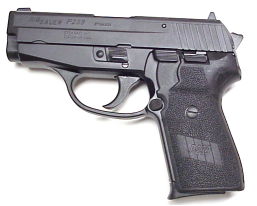 I own a couple of SIG handguns that are Teflon finished. I like the way they look, and I like the way the finish holds up in use, so I thought Brownells’ Teflon/Moly Gun Finish might be a good choice. My only reservation regarding the Teflon finish in a can, was that in application it might have as little in common with commercial Teflon finishing, as touchup cold blue has to do with commercial hot blue. Cold bluing is about as durable as touch up with a felt tipped pen.
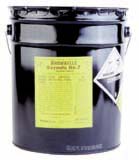
 I apologize for the catalog shot of Pilkington American Rust Blue. The shipment is in transit, so I didn’t have the opportunity take one of my full colored, slightly out of focus pictures that are an integral component of most of my articles. Traditional bluing is a product of oxidation, and the rust blue process makes this a bit more obvious. American Rust Blue is applied, the parts are left to rust for a few hours, then the parts are boiled in water, and then the parts are carded. The process is repeated until the desired finish is achieved. $24 for 4 ounces of solution seems a bit steep, but this amount is enough to blue many firearms. My biggest problem is logistical, how to get the resources of the work area together with an adequate heat source, together with a pan that is long enough to hold a barrel, and not have my wife toss me out of the kitchen.
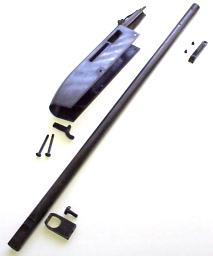 It’s All in the Preparation
Preparation builds character; sometimes it isn’t easy, but it is always necessary. As an example, both of the selected finishes require complete disassembly, as any two parts left in contact will tend to corrode where joined, and small parts will bond together when coated with spray on finish.
I know most people don’t mind removing fasteners and/or punching out roll pins, but sometimes parts are bound together with rivets. Rivets can be taken out by drilling through the center of the rolled or staked end, or they an be very carefully ground off from the expanded end, as long as the pass though hole and surface material isn’t damaged in the process. The greater problem might be finding a source for replacement rivets, particularly for older firearms that are prime for refinishing.

This is a pretty good representation of what resides within assemblies that is not so obvious during a refinishing project. The part on the left is the original, the part on the right is post rust/bluing removal soak and mechanical clean, which was a soft and very fine miniature wire wheel. The final results looks decent, particularly since it will have new finish applied and the corrosion is apparently gone.
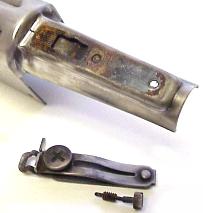 To the left is a look at the area under the rear sight, just moments after I cut through and pulled the securing rivets. These would be the same rivets I have not been able to locate anywhere, and are no longer listed in any Remington replacement part sources.
he point is, I may have to struggle to locate a replacement fastener, but there was no other way to approach the project. The point is that bluing can’t be applied over destructive corrosion and no liquid or wire wheel will find it’s way into place clamed together with screws, bolts and rivets. If I has skipped this disassembly step, the rust would have spread to the refinished parts in a very short period of time. The sight turned out to be an interesting study in piece part reduction engineering, with the female threads for horizontal adjustment nothing more than a few stamped lines on the receiver cover. I’m sure I’ll be able to locate or fabricate a couple of small replacement rivets.
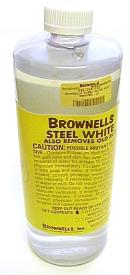 Bluing will not fill pits or mask corroded areas, so the rule of thumb is that the finish should look exactly as you want the final finish to look, with the exception of color, so surfaces have to be restored to like new condition. In the process of competing this task, parts should not be rounded, or worn thin or surfaces made irregular, which means mechanical methods of stripping material need to be kept to a minimum. Brownells Steel White is a good way to begin clean up without the use of abrasive materials.
Steel White instructions suggests a 1:5 mix solution for removal of heavy rust and scale, 1:20 for removal of light rust and scale. That’s a pretty subjective criteria, after all, one man’s heavy scale is another man’s “Maybe I ought to run a patch through that bore” condition. I went with a 1:10 mix for starters, immersing the receiver cover in the 2 quart jug. The max solution temp is 120°F, so hot tap water worked well. Within the first 10 minutes of a 45 minute soak, the stuff went from clear to crud brown.
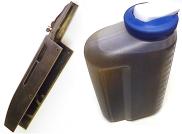 Unfortunately, a full 30 minutes later, when I pulled the receiver from the jug, other than light surface rust that was now gone, the rest of the blued finish was intact. I ran a Scotch Brite pad over the inside surface of the part, and it was obvious a light swipe would remove the bluing, but what remained was the surface rust within the pitted surface. I mixed another batch of Steel White to the stronger 1:5 solution and put all of the parts in for a full hour.
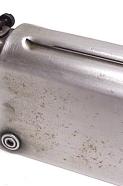 This time there weren’t any remains of bluing or rust, but within a minute or two of removal, a new coating of black and rust colored oxidation formed on just about everything. If I were to do this over again, I would have just started at 1:5 mix, or 1:10 with an extended treatment time, perhaps several hours.
At this point I assumed I’d gone just about as far as I was going to go with chemical stripping. I sprayed the parts with a light inexpensive machine oil, and began working on the balance of the small parts disassembly.
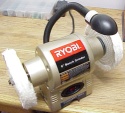 Most of my shop is packed away in boxes, I’ll save that story for another time, so I found myself without a number of bench tools. Buffers are a little expensive, I’m not sure why. A half inch arbor, half HP 6″ wheel buffer is typically twice the price of a grinder with the same specs, even though they both turn at approximately 3,600 RPMs. For $65 I was able to pick up a new Ryobi grinder, double up on both sides with Muslin polishing wheels. Plus, I believe I own the only buffer with a lamp.
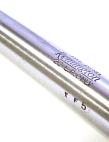 The barrel bore had been plugged prior to getting dunked in the stripping tank. The stripping tank was a $5 Hyde 33″ wide heavy plastic joint compound paint tray from Home Depot. The barrel cleaned up really well with a couple of light passes over the wheel, loaded with 400 grit Formax Satin Glow polishing compound.
I think what is important is to not let the wheel sit on one spot too long and to try to run the length of the barrel with each pass rather than a series of short choppy steps that would make for an uneven finish. A positive sign is the rolled lettering remained intact and the muzzle didn’t round over at the crown.
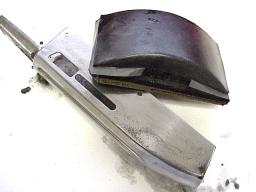 Just when you thought things were getting boring – something I learned very quickly, if a polishing wheel is passed over a large flat pitted surface, the result will be polished pits, very unattractive in the world of firearms. If individual pits are tracked down and attacked with the abrasive edge of a polishing wheel, the result will be wobbly a surface that will look like gunk after bluing. Flat surfaces should be restored with some progressive wet sanding, and a firm sanding block should be used whenever possible. I started with 400 grit and worked my way to 1500.
Safety
A word about safety instructions – I’ve noticed, after watching a few professional gunsmith training videos, the stars of these little epics tend to not wear safety glasses or protective clothing. A couple, in particular, were cause for concern; pistol disassembly, including heavily compressed springs, and barrel fitting and chambering, including thread cutting and chambering on a lathe. Anyway, I’m a wimp, so I read the instructions for all products and follow them. Loss of hearing, loss of sight, loss of life all can put a damper on the pursuit of firearm related activities.
I’m going to take a break so I can concentrate on material preparation and wait for a few more packages to arrive. I also need to see if I can figure out where to find a tank to water boil barrel length parts for under $5, and a supplier of rivets. In the mean time, the following list represents a few of the refinishing shops from the RealGuns Links page. I think these will provide a pretty good overview of typical refinishing direct and associated costs.
Accurate Plating & Weaponry
Gunrock Blue
Hot Flash Finishing
Thanks
Joe

Email Notification