When I raced cars, I’d spend endless hours building and refining the motion parts, but spent not a minute improving the aesthetics of the package. Consequently, my cars were fast, but they looked like flying refuse. Refining, refurbishing and refinishing are games of patience and skill, in fact, there may even be a little artistry in the process. When I began this refinishing project it felt like “body work”; all about looks and not about improving real performance. Researching, gathering material and setting up was tedious and seemed to take forever, but once the real work began, the process was enjoyable. More so, I began to learn something more about firearms, and I was maybe on the verge of finding one more task I could accomplish on my own.
 Brownells publishes a free 32 page pamphlet titled, “Bluing Instructions & Supplies”. While the booklet is mostly information regarding Brownells’ bluing products (Oxynate, Dycropan, etc), it does summarize various types of products and methods, it also describes related equipment and defines supporting processes. As examples, polishing, metal prep and cleaning are covered as generic procedures. I used a lot of this information during this project. Unfortunately the process I selected, rust bluing, wasn’t covered in the Brownells pamphlet. I was able to purchase the instructions for $25, surprisingly enough, they came wrapped around a 4 fluid ounce bottle of “Classic American Rust Bluing Solution” from Pilkington Gun Company.
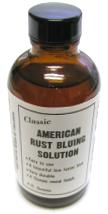 I was breezing through Phil Pilkington’s 8 page booklet, thinking how nice it was of him to explain how to accomplish the same task by home brewing the solution and not even buying his product. Of course if I hadn’t purchased his product, I wouldn’t have had the information to make the cost free solution, without buying his product. There might be a little Zen in here someplace.
Rust bluing is made from nitric acid and nitrosyl chloride. The solution, when applied to steel, causes accelerated oxidation, red oxide, which converts to black oxide when treated parts are boiled in deionized water. The parts are then carded, buffed out on a fine wire wheel, several hours after each coat is applied. The coating is progressive, so the process of coat, boil and card is repeated until the parts have the depth and luster sought. Finished quality is very much dependent upon surface prep, quality of water and uniform application of the solution.
Rust bluing solution is mostly an agent that causes rapid development of red rust, the actual conversion of red oxide Fe2O4 to black oxide Fe2O3 red oxide occurs when red oxide gives up one oxygen atom. A similar process is used in pottery making when clay with high red oxide content is processed in a reduced temperature kiln, in a low oxygen environment; the red oxide converts to black oxide. This may help to put in context the need to submerge parts in boiling deionized water after treatment with rust blue.
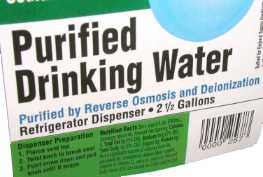 Water used in the rust bluing process must be deionized to insure complete conversion of red to black oxide. During this process, atoms lose electrons and form positively charged ions, called cations; other atoms gain an electron and form negatively charged ions, called an anions. Charged ions preexisting in tap water would interfere with this conversion, deionize water is charge neutral.
Rust Blue instructions suggest a deionizing filter at the water supply, however, I was unable to locate one that would be effective at a reasonable cost, or that didn’t drag along several particle filtration canisters. I picked up deionized purified drinking water at the supermarket for about $1 per gallon. The “Reverse Osmosis” notation on the label just means it was pressure forced through a membrane to remove suspended minerals. Won’t rest until you know more about ions ? Check the encyclopedia for “Michael Faraday”, or with my freshman year high school science teacher who has been redeemed by my need to actually use this information.
 Rust blue is not suppose to be high gloss. Gloss isn’t a reference to the metal surface it’s which it is applied, but rather the byproduct of the process. While the instruction booklet author calls it a “velvet” finish, I found it to be not mirror like as in a Weatherby bright finish, but certainly not as non-reflective as satin or matte. It’s actually quite Remington production like, and I mean that in a positive sense. So there is a good range of finish reflectivity you work toward, depending on your personal preferences. and willingness to spend time on surface prep.
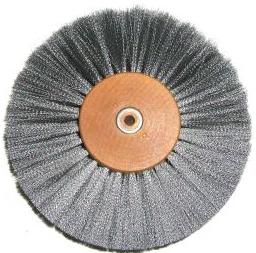
For a satin finish, the Rust Blue instructions indicate that there can be no surface scratches greater than those left by #320 abrasive, anything finer would be consistent with the intended finish. How can you tell if the surface meets this #320 grit criteria ? Run a .006″ strand scratch wire wheel over the part to blend surface texture, and any scratches greater than #320 will be highlighted for removal against the pattern made by the wheel. I elected to finish up a little finer, so after arriving at a very smooth 600 grit wet sanded finish, I buffed the parts with a 6″ diameter fine wire scratch wheel. The wheel pictured above is listed as a 4 row 6″ wood center brush or scratch wheel. The brand is DiXCEL, it has .0025″ strands and it cost about $18.00. Course carding wheels consistent with a satin finish, .005″-.006″ strand diameter, run about $65.
 The fine wheel comes with a drill to fit center, but since the wheel is designed to work correctly at 900 RPM, I decided I would leave the center hole intact, mount it on a fabricated bolt spindle and chuck the wheel into a variable speed drill press. I recently picked up a Ryobi 10″ bench top drill press that fit the requirement nicely; a machined cast iron framed drill press, 5″ stroke, 1/2″ chuck, and 5 speeds 540-3600 RPM. At $92 from Home Depot, it cost less than many yellow/orange rechargeable drills.
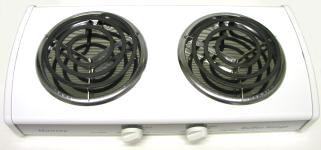 A heat source was needed to boil parts. I came up with the Munsey Buffet Range, a gem of a two burner hot plate, with ample power to hard boil any amount of water I would reasonable require. At another time, in another life, if I had the Munsey and perhaps some macaroni and cheese, I could have been king
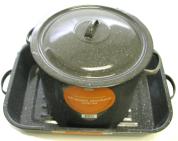 I needed containers to accommodate boiling parts of varying size and shape. I picked up an inexpensive large pan and pot set for $11. The raised ribs on the pan supported parts while promoting water circulation. Unfortunately, the gun barrel wouldn’t fit in either container, so I broke down and spent $40 on a 6″x6″x40″ black iron bluing tank from Brownells. The tank will serve in many future bluing and parts cleaning projects, but at the moment it joins the growing list of tools and supplies that threaten to turn this project into a financial black hole.
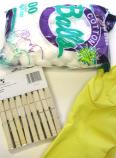 There have been lots of minor miscellaneous purchases that are easy to overlook, items that are small in item cost but clearly not free. Just a pack of wooden clothes pins, a bag of cotton balls and a pair of inexpensive latex gloves, all used for caustic material handling, added a quick $15 to the overall cost. In skimming over the list of items purchased, a list I will itemize at the conclusion of the project, I guess I’m about $200 into this effort, with most all of the expenditures completed. This seems like a substantial amount for refinishing an old rifle, but if things go well I will be able to complete three guns that currently need refinishing, and still have enough material left to do several more guns.
The part where I begin to actually do something
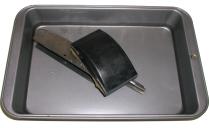 The critical part of this project is the preparation of the surfaces that will receive the bluing and there are some specific areas that require a degree of care. Don’t over polish and don’t over power metal surfaces. Unless your going for that handgun “melt” look (which I’m convinced was a name fabricated by a bluing shop that screwed up a customer’s gun and still wanted to be paid) I’d spend a lot more time with a hard rubber sanding block, a tray full of water and some moderate grit wet or dry paper. Attempting to accomplish the same with a felt or muslin wheeled buffer will only result in worn looking edges and engraving, wavy surfaces, high gloss pits (the gun, not yours), and grease lapped into the surface if you’ve used the wrong buffing compound. The last problem is not minor, abrasives with oil content, steel wool with rust preventative, wire wheels contaminated with oil from other jobs can absolutely screw up a bluing project.
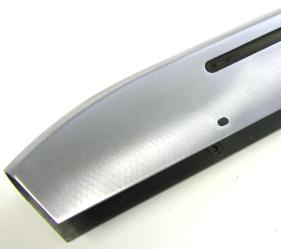 This is a part after final preparation. I worked down to 400 grit paper, buffed with 400 grit Satin-Glo on a muslin wheel and blended tith a .0025″ scratch wheel. There were a couple of minor pits that were too deep to go after. Poking at a pit with a finger through a piece of sandpaper makes for a wavy surface that would look worse than the pit.
I also learned some things about buffing and polishing, like don’t stand in front of a muslin polishing wheel while loading it with abrasive compound or you’ll end up with a centrifugally distributed dark vertical stripe running from crotch to the forehead; not nearly as much fun as it sounds.
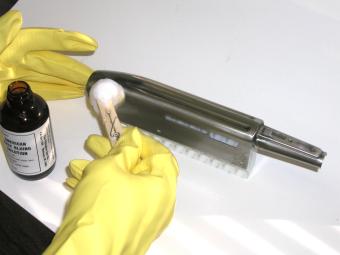 From this step on, parts were handled only with gloved hands. Since I was careful to use abrasive material that was oil free, I needed only to wipe the parts down with Acetone prior to beginning Rust Blue treatment.
The recommended steps for rust blue are; shake the solution, wet a 1″ piece of cotton held in a wooden clothespin and coat the part in long even strokes. I supported the receiver with an empty ammo box egg crate to make the part easier to handle, and to keep the newly coated edges off of the bench.
Rust Blue will cause red oxide to form, and will also remove red oxide from where it has formed, therefore, application should be done in continuous even strokes. It’s tough to avoid the temptation of dealing with “You missed a spot” situations, but rust blue is built up in many steps and the surface should even out over these multiple applications. It is also important to keep the cotton applicator wet, but not so much that it causes Rust Blue to pool on the surface and spot.
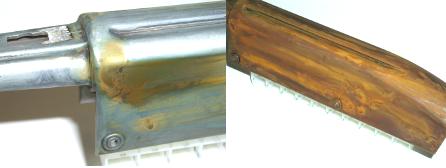 This is a pretty good illustration of what happens between the time rust bluing is first applied and later, just prior to placing the parts in boiling water. The photo on the left is the type of oxidation that occurs within the first couple of minutes, the picture on the right is what the part looks like after three hours of sitting in the bench. I think the image on the right also approximates how the gun looked after being retrieved from a basement/swimming pool. I’d be lying if I said I wasn’t a little concerned with the looks of the process at this stage, but this concern didn’t deter me from developing several theories on my own, and experimenting in support of those theories. I can probably save someone a little aggravation by noting my independent departures from the little instruction book and the subsequent results.
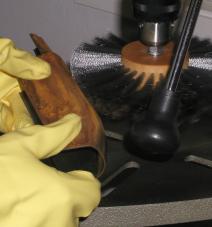 Carding before boiling. Here you can see the scratch wheel whipping around, removing most of the rust in its red state, and prior to boiling. I set myself back 3 hours, and had to repeat the first solution application step.
At least I wore my gloves and degreased the wheel prior to use; it’s easy to contaminate something in the process and then drag oil onto everything else. Incidentally, Iris Professional Heavy Duty Cleaner and Degreaser is a great inexpensive degreaser and it’s available from most places where household cleaners are sold. It is sprayed on and water flushed off. I used it on my wire wheels, my motorcycle wheels, as well on 0000 steel wool used in the carding process.
 The deal about using deionized water, err…that appears to be for real also. My Munsey Mauler hot plate really got a work out, first a little linguini before lunch, then for boiling blued parts later in the afternoon. As you can see, even incorrectly carded and with tap water, the part is clearing making a transformation from red to black oxide. But you can also see the remaining red oxide trace and lack of uniformity. After carding a second time, the overall appearance was a gray/black finish that was relatively uniform, and I will use this as the basis for subsequent bluing buildup. I’m going to take a writing break here while I fix my process to match the instructions, and go on for the next week or so building up additional layers of bluing. The next installment should be a wrap up on the project.
Thanks
Joe

Email Notification