Barrel selection for any firearm can be very subjective and application driven with lots of conflicting theory. As a personal firearm build, a JP Supermatch™ barrel was selected. It is made of Teflon finished 416 stainless steel and is: lead lapped, air-gauged and cryogenically treated for thermal stability. Prior experience with this product suggests long lived and excellent accuracy.
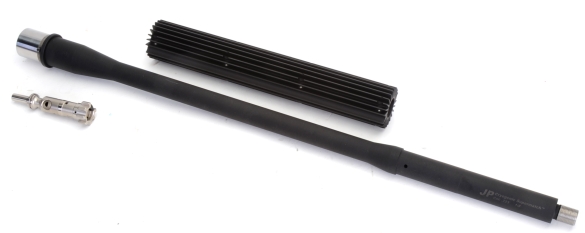
This barrel is 18″ long with a button rifled 1:8″ twist. It has a lightweight profile and weighs 31 ounces. The gas block position is rifle length, 0.650″ diameter under the hand guard, 0.750″ diameter at the gas block and 0.740 forward of the gas block. Muzzle threads are 1/2″x28 TPI. The barrel is supplied with a headspaced JP Enhanced Bolt. JP Enterprises # JPSM223-18L8 $479.00.
In deference to the slender barrel, an aluminum heat sink was added in the form of a JP Thermal Dissipator™. With a barrel weight of 31 ounces and a heat sink weight of 6.8 ounces the combination approaches the weight of a medium profile barrel; the weight saved with the lightweight profile was reinvested into a huge increase in cooling surface and heat dissipation. The intention is to quantifiably measure heat dissipation with plain, heat sink installed and heat sink with thermal compound configurations and to measure 200 yard 5 shot group accuracy for the same.
Better and more consistent than guessing
Installing the barrel and barrel nut requires a torque wrench, or at least I install them with a torque wrench. The range is listed as 30 ft lbs to 80 ft lbs depending on the parts selected and recommendation of the manufacturer, however, torquing to the lower end of the spectrum usually makes for a more accurate firearm. A remnant of race cars past, this one is a Craftsman click wrench I purchased 42 years ago to torque head bolts on a 428 Cobra Jet. They don’t go bad, they just need an occasional calibration check.

A 5 pin Precision Reflex compact barrel nut wrench will work with the JP Enterprises barrel nut wrench, but the fine teeth of an armorer’s combination wrench will work just fine. Regardless the wrench used, it is important to calculate the difference between torque wrench settings and applied torque when the wrench extends beyond the wrenches drive. In this case, with 16″ from center of grip to center of drive, then a 2″ extension from the center of the drive to the center of the grasping portion of the combo tool meant a torque setting of 44.4 ft lbs to get to JP Enterprises’ recommended minimum 50 ft lbs. I torque to 50 ft lbs with the barrel nut threads coated with anti-seize compound.
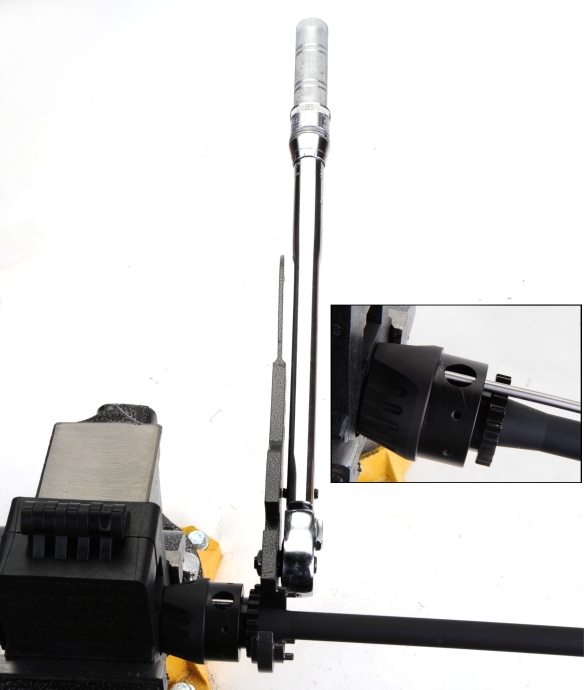
A rarity… Torqued to 50 ft lbs, and without further adjustment, the barrel nut, outer receiver ring and receiver were in perfect alignment, allowing both the alignment tool and gas tube to pass through with out binding or rubbing. High five! With the barrel and modular hand guard support installed, the gas tube, gas block and hand guard tube were next up.
The changing of the guard… or a port in any storm
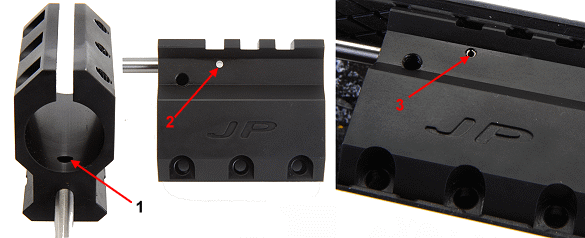
With the gas block inverted – the gas block port that transfers gas 1) must align with the orifice on the bottom of the gas tube. The gas block is cross drilled, as is the gas tube at the corresponding location. When the holes in the gas tube align with the gas port and roll pin holes in the gas block, the tube is anchored with a roll pin 3).
An 8-32×3/8″, stainless steel, Allen head set screw serves as the block’s gas adjustment screw; all the way in, gas is blocked from the entering the gas tube. Turned out, it progressively allow a higher volume of gas to flow. Initially, the screw is turned all the way in, then backed out two full turns. When the rifle is fully assembled, if on discharge of one round the bolt remains open, the valve is properly set. If not, the set screw is adjusted until it does.
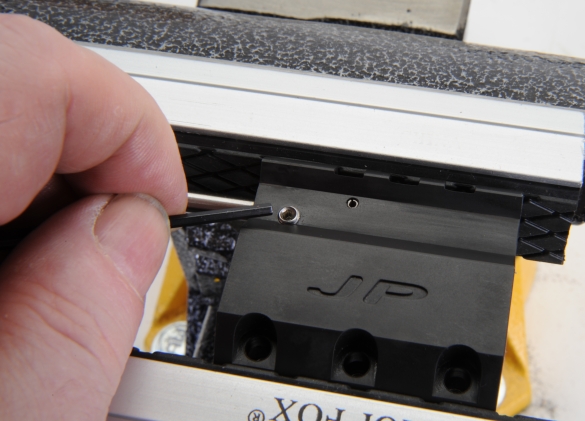
The gas tube is a tight fit, so a soft mallet was used to tap on the tube’s end to seat all holes to alignment depth. The block needs to be stood up on a very solid surface or the spring in the tube and the flex in a workbench top will have you tapping away for a week without progress. Because the Adjustment screw is loose enough to be turned with fingers, a coat of Loctite Blue was used to keep the adjustment from moving around under fire, while allowing it to be turned for adjustment.
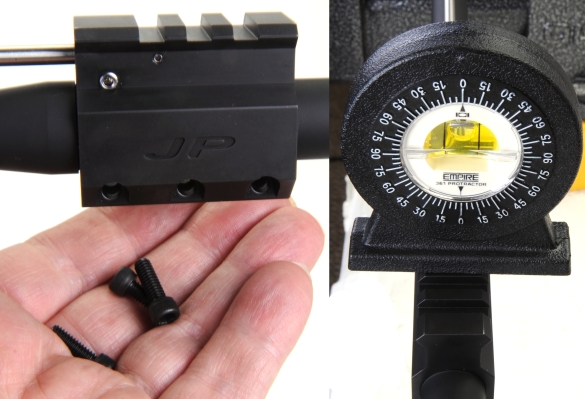
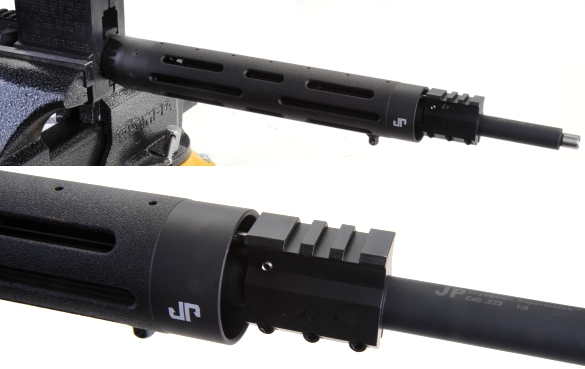
If there is an intention of using the gas block’s Picatinny rail as a base for a front sight, leveling the gas block to the receiver’s top rail is probably a good idea. It is easiest to install the three clamping fasteners, tighten until the block is moderately friction tight, then level the gas block to the receiver and tighten the fasteners. Turn without pushing or the block will be nudged out of level.
If you don’t get your tie caught, it should look like this…
Heat sink cool down…
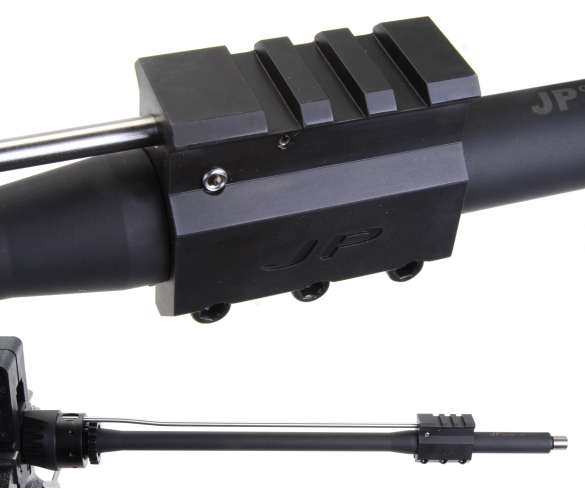
For folks with too much time and too much ammunition, JP Enterprises offer their Thermal Dissipator™, a barrel heat sink that will accelerate heat dissipation. The heat sink is split longitudinally, clamshell clamps to the barrel with 8 Torx head fasteners and is easiest to install after the gas block and gas tube. As you can see in the lower image, the tube runs down a space between the fins in the Dissipator.

I selected the color black as a more efficient radiator, but they are also available in red, blue or silver and in short and long versions for 0.650″ and 0.750″ diameter barrels. Thermal paste is not required or even a part of the assembly instructions. JP Enterprises tells me use of a thermal conductor may provide a benefit, but they do not have objective data to conclusively make that statement.
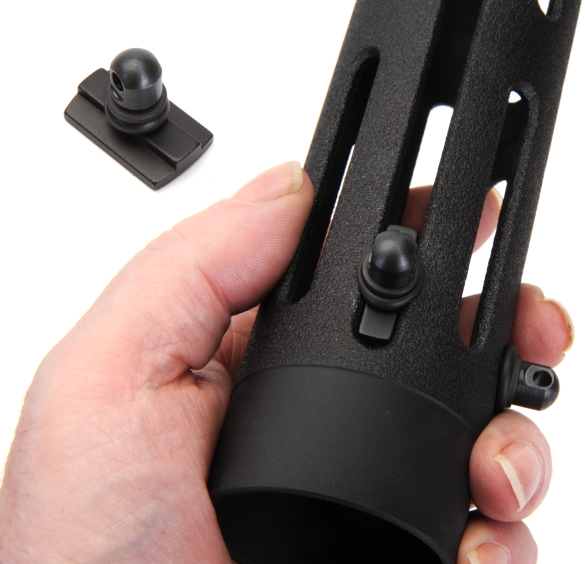
 The J P Enterprises modular hand guard is supplied with two swivels. They can be placed in the vent slots or fastened directly to one of the holes in the top and bottom longitudinal rows. In this example, swivels were installed at 6 and 9 o’clock positions.
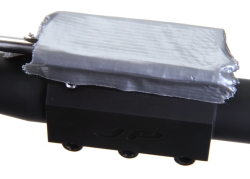
What would life be without a little duct tape? The hand guard tube can be slipped on with this gas block in place, however, putting a layer of duct tape on the top of the Picatinny rail will prevent the finish from being scuffed up when the hand guard tube is installed.
With everything tucked in…
I think the look is pretty clean and the configuration very practical for the application. JP Enterprises material is of very high quality and coordinated to work well together as an assembly.
Probably a good place to take a break. There are a few decisions to make before moving ahead and a few other projects that need to be wrapped up. We’ll be back on this shortly.
Your Perfect Rifle… Some Assembly Required Part 1
Your Perfect Rifle… Some Assembly Required Part 2
Your Perfect Rifle… Some Assembly Required Part 3
Your Perfect Rifle… Some Assembly Required Part 4
Your Perfect Rifle… Some Assembly Required Part 5
Your Perfect Rifle… Some Assembly Required Part 6
Your Perfect Rifle… Some Assembly Required Part 7
Your Perfect Rifle… Some Assembly Required Part 8

Email Notification