
Rehabilitation work was started on the High Standard’s upper by taking an inventory of what had been changed in the past and what would need to come off for reconfiguration. The upper has a VTAC handguard with proprietary mounting systems, a good looking and good functioning system. Unfortunately, the outer receiver nut by manufacturer’s instructions is secured with Loctite Red 271 and Loctite Blue 242 secures the small hand guard tube fasteners. The set up definitely stays in place, but perhaps to a greater degree than desirable.
Loctite Red is removed by elevating the temperature of the fastened assembly to 482ºF and disassembling while still hot. Not a casual or easy process to control when it comes to nicely finished aluminum pieces. Blue Loctite 242 is often misunderstood. Yes, it will shear with heavy force applied and if the assembly has not been together for an extended period of time. Otherwise, Loctite Blue is also removed by elevating the temperature of the fastened assembly to 482ºF and disassembling while still hot. Also not a casual or easy process.
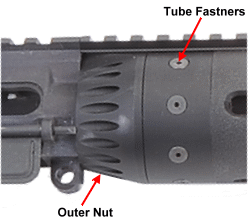
What complicates handguard removal on this particular firearm is the manufacturer’s combination of small socket head 5/64″ fasteners and installation instructions that dictate the use of Blue Loctite. It is not possible to apply enough removal torque to the fasteners to shear the Loctite Blue grip without stripping the hex socket or shearing the fastener shank. Trying to attain and hold 482ºF on any of the assemblies while attempting removal is as futile as trying to find a liberal with a rational thought process.
Hammer and tongs, torch and strap wrench and a box full of APEX bits with nothing but a drill press, easy out and tapping session ahead of me, a thought began to crystallize that only a carrier assembly and charging handle would be useful salvage. A search through boxes in the loft yielded an Aero Precision forged mil-spec 7075-T6 upper assembly.
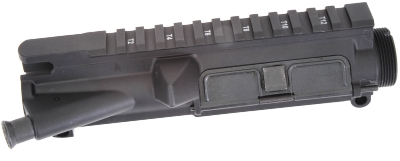
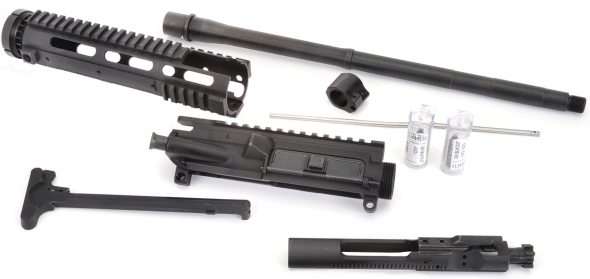
Less than $100 at Brownells, #953-000-017WB includes an AR-15 upper receiver, pictured above, supplied with port door and forward assist installed. The receiver is precision machined to M16/M4 specifications, including M4 feed ramps, 0.250″ takedown pin holes and laser engraved T marks. While in scrounge mode, other items needed for upper completion were also rounded up. Again, there all came from an accumulation of shop project leftovers, but the items sources and associated costs are noted.
-
Yankee Hill Machine carbine length, smooth, free float handguard with top rail with mounting hardware – Brownells# 100-004-309WB $129.
-
16″, 1:7″ twist CMMG 300 AAC Blackout barrel. Carbine gas port – MidwayUSA #680713 $159 at time of purchase.
-
Precision Reflex low profile, 0.750″, adjustable gas block – Brownells #714-000-019WB $69.99
-
CMMG stainless, carbine length gas tube – Brownells #100-019-249WB $15.95.
-
Clymer 300 Blackout go/no go gauges, respectively Brownells #100-011-283WB $29 and #100011311 $29.
-
High Standard charging handle assembly Brownells #430-000-522WB $26.68
-
High Standard carrier assembly #430-000-527WB $169.99
The carrier assembly and charging handle were cannibalized from the original upper. The bolt and barrel needed to be checked for proper headspace, a task that is easier if conducted before the barrel is assembled to the upper receiver.
Seems a little small for a carrier group…
The only components and tools required to check headspace resulting from the marriage of a specific bolt and a specific barrel are both of those parts and a set of Go/No Go gauges. The bolt comes out of the carrier assembly because it is easier to manage when gauge checking. The ejector is removed from the bolt to allow the gauge to seat flush in the bolt face without forcing the ejector flush with the bolt face.
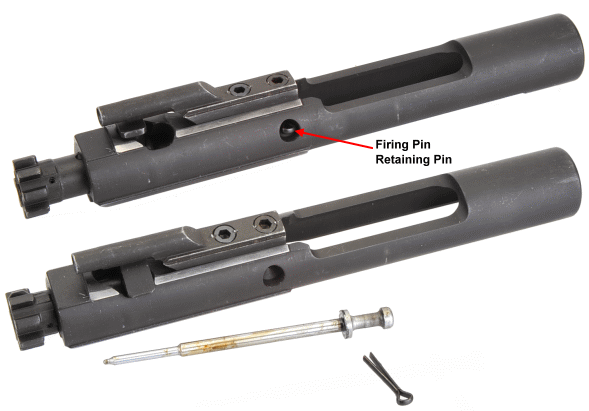
The Firing Pin Retaining Pin is pulled from the side of the bolt carrier, the carrier is tipped up at the front and the firing pin will drop out or, if coated with storage rust preventative, it can be pulled out.
The bolt head is pushed back and the cam pin is rotated 90º to unlock and clear the bolt carrier key.
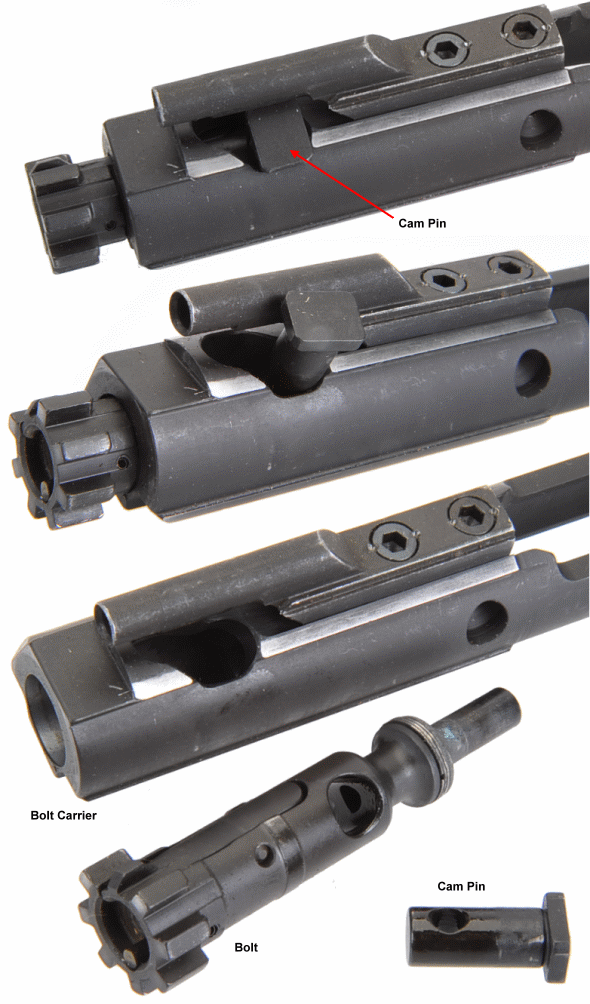
Once the cam pin is removed, the bolt can be pulled out of the bolt carrier. All that remains in the way of disassembly is to remove the ejector from the bolt.
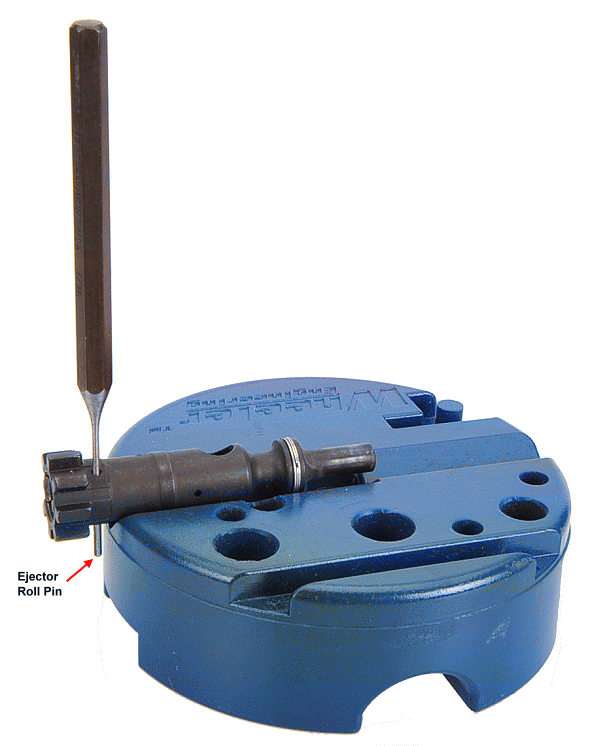
Not so much on disassembly, but probably on reassembly, the ejector must be compressed so that the retention slot in the side of the ejector is positioned in and away from the ejector roll pin, or tappy tapping with a 4 oz. hammer may not be fruitful.
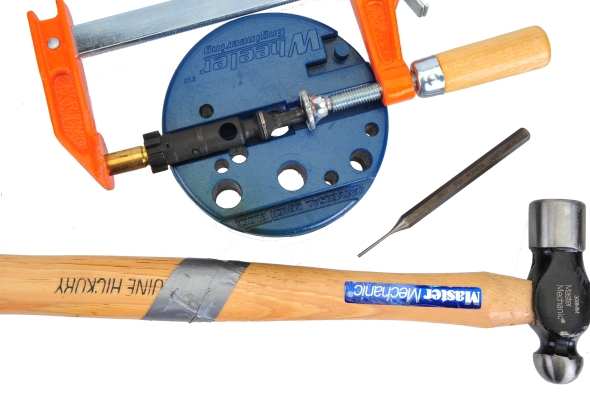
I could not find my ejector removal tool, which no doubt is buried under a multitude of other tools, so I improvised and compressed the ejector with a wood clamp and a 380 Auto empty. Once clamped, I parked the bolt and clamp on a bench block and tapped the pin through… see below.
When the dust settles and all of the pins and springs dropped on the floor, there should be a small pile of firearm related parts as seem below.

Before proceeding, the bolt and barrel should be scrubbed so that accumulated gunk does not interfere with gauge checking… not that the assembly wasn’t already spotless… it wasn’t and, at this juncture, obviously still isn’t.
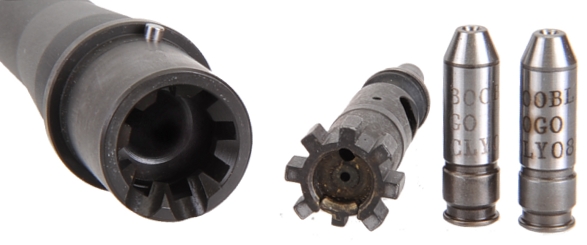
All firearms have headspace, with specs determined by a standards organization and firearms and ammunition manufacturers’ design submissions. Too little chamber headspace and the chances are a cartridge manufactured toward the maximum range of specification will not fully chamber. Excessive headspace and the brass casing will stretch too far to be fully supported by the firearm’s chamber and possibly fail. 50,000+ psi of hot gas pressure left uncontrolled to wander around in a firearms is never a good circumstance.
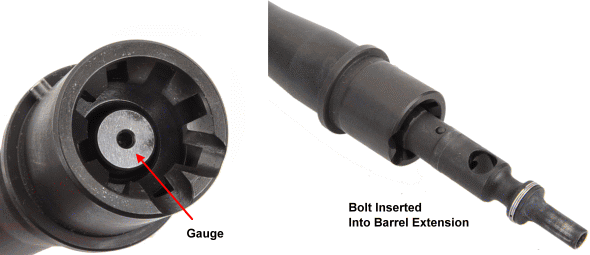
A gauge is inserted into the barrel’s chamber, the bolt is inserted making sure the extractor clears the rim of the gauge and the bolt face is flush with the back of the gauge and then the bolt is rotated. The bolt should rotate closed with the Go gauge in place, it should not rotate with the No Go gauge in place if headspace is optimal. Headspace gauges are odd little characters and often misunderstood.
If the bolt will close on the Go gauge, the chamber should accept a maximum spec cartridge. I say should, however, the Go gauge is supposed to replicate a minimum chamber, but a SAAMI spec minimum chamber is smaller than a SAAMI spec maximum cartridge. In a world where no ammo maker manufacturers a spec maximum cartridge, the check should be close enough.
If the bolt will not close on the No Go gauge it would have less than maximum headspace as a No Go gauge is shorter than a SAAMI maximum length chamber. Its intended use is a check when a gunsmith is reaming a chamber to keep headspace significantly tighter than SAAMI maximum.
The deal breaker is actually the Field gauge. A bolt closing on a field gauge indicates excessive headspace and a chamber that exceeds SAAMI maximum chamber length. I don’t use a Field gauge because I believe that if a bolt closes on a No Go gauge, headspace is more than I would accept.
In the case of this AR rehabilitation project, the bolt closed on Go, did not close on No Go so I’m a happy guy. I need to take a break and get some other work done, but we will see if we can get back shortly and wrap this project up.

Email Notification