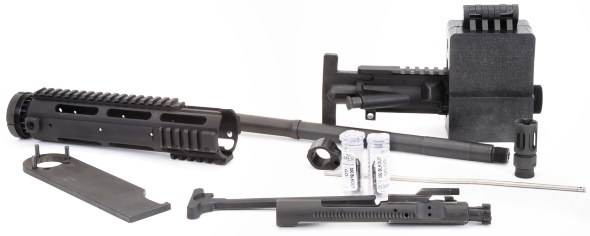
After completing headspace checking in Part 3, it was time to final assemble the upper receiver. A Brownells #080-000-661WB Upper Receiver Action Block $79.99 held the upper in place during barrel and related parts installation. The rest of the pieces are –
-
Yankee Hill Machine carbine length, smooth, free float handguard with top rail with mounting hardware – Brownells# 100-004-309WB $129.
-
16″, 1:7″ twist CMMG 300 AAC Blackout barrel. Carbine gas port – MidwayUSA #680713 $159 at time of purchase.
-
Precision Reflex low profile, 0.750″, adjustable gas block – Brownells #714-000-019WB $69.99
-
CMMG stainless, carbine length gas tube – Brownells #100-019-249WB $15.95.
-
Clymer 300 Blackout go/no go gauges, respectively Brownells #100-011-283WB $29 and #100011311 $29.
-
High Standard charging handle assembly Brownells #430-000-522WB $26.68
-
High Standard carrier assembly #430-000-527WB $169.99
The handguard is what I had in the shop. At this point I am ambivalent regarding this piece. I do like the mounting system and the smooth undersurface. I like the absence of red or blue Loctite’s use and handguard mounts permanently affixed to an upper. The barrel is multi purpose contoured which will serve future projects. I do like the barrel diameter reliefs to allow the use of a traditional gas block front sight… which I also have on hand. So before I am done, I may set aside the low profile adjustable gas block and install a standard gas block front sight set up. I guess we will all be surprised.
A little finesse…
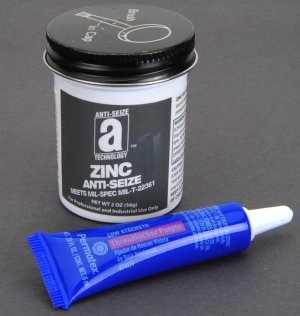
Photographed against a gray background because I hate photographing white on white… Anti seize compound should be applied to steel on aluminum threads. Copper, graphite and moly based products contribute to galvanic corrosion that is destructive to steel and aluminum. Zinc based anti seize is properly used on steel / aluminum unions.
To solve the problem of small fasteners and Loctite Blue that won’t let go before causing damage, there is both Loctite and Permatex Purple thread locker. It is made for light duty applications for fasteners up to 1/4″. It will eliminate vibration loosening, but even small fasteners can be removed with hand tools.
I do not use my firearms as though I am in the midst of a firefight, I do not live at the range shooting barrels of bulk Russian made ammo. I do not mind going over my rifles to retorque, recheck and inspect every few hundred rounds. So I will use thread locker sparingly and always something with less commitment than never coming off again.
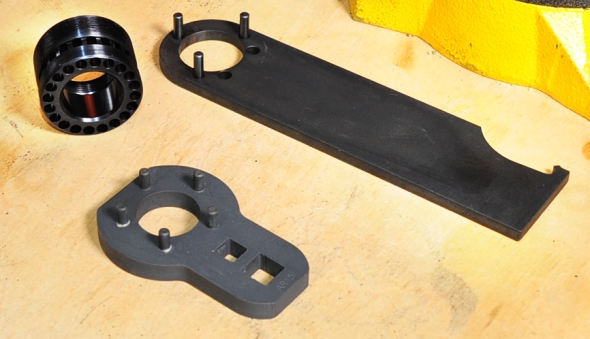
A Precision Reflex Inc. barrel nut wrench, Brownells #714-000-007WB AR-15 $25 and a Yankee Hill Machine wrench, Brownells #100-002-090WB $28.30, on hand. YHM touts their wrench as “Heavy, steel, spanner wrench makes it easy to tighten handguard barrel nuts to the correct torque” which is a bit of a puzzler since it has no provision for using a torque wrench. I went with the Precision Reflex wrench which fits the YHM barrel nut perfectly and accommodates a torque wrench. In regard for the need to use the YHM spanner end to tighten the jam nut? No better than any other spanner wrench.
Barrel and handguard install…

The upper is locked into the vise block… in a vise. The barrel is inserted so that the little alignment pin locks into the upper’s threads. Anti seize goop, identified earlier, is lightly blopped onto the upper’s threads, uniformly distributed by the Yankee Hill barrel nut. The nut was torqued to 40 ft-lbs where eyeball and checking gauge indicated hole alignment for proper gas tube alignment.
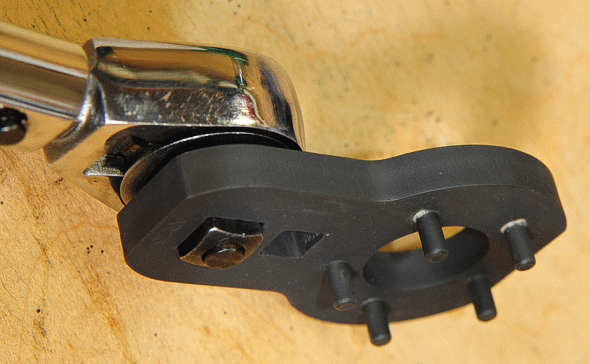
The barrel nut wrench extends the torque wrenches leverage length by 2″, which means the scale on the wrench understates actual torque. The correction formula is…
True Torque = (Effective Wrench Length + Extension Length) / Effective Wrench Length
Effective Wrench Length, Center of grip location to center of drive
Extension Length, Center of drive to center of extension drive
True Torque is now much wrench indicated torque is multiplied
In this case the Effective Wrench Length was 15.5″, the Extension Length was 2″ which made the True Torque 1.13 times greater than indicated. Barrel nut alignment came at 40 ft-lbs wrench indicated torque which was 45.2 ft-lbs actual torque.
With the barrel secured with the barrel nut, the handguard jam nut was preliminarily screwed into position on the barrel nut and the gas block/gas tube was assembled. That is not crud on the set screws, it is sealer that had been pre-applied by the manufacturer. The gas flow set screw was backed out to allow the gas pipe to fully insert into the gas block. A roll pin starter and a roll pin punch were used to install the roll pin with the gas block supported on a bench block.
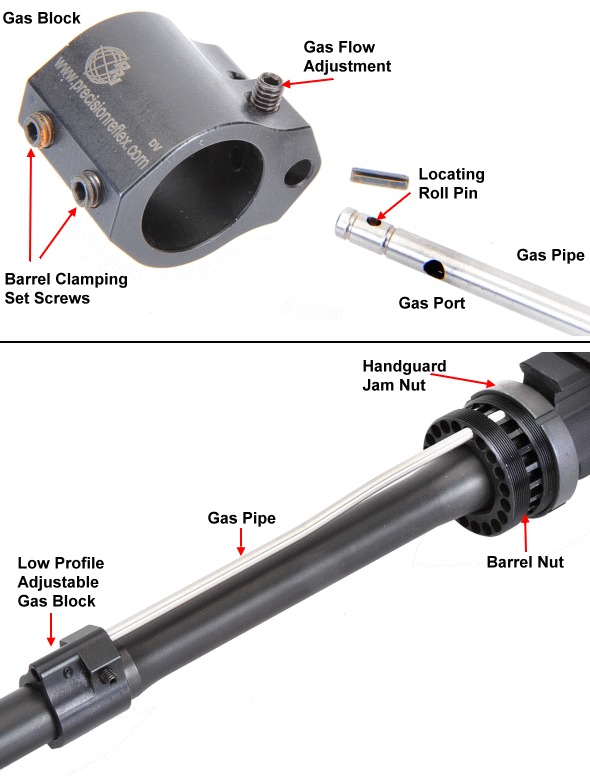
The gas block is slipped over the barrel until the gas tube passes through the barrel nut and opening in the receiver and the gas block is flush against locating shoulder on the barrel. In position, the set screws on the bottom of the gas block are tightened while wigging into the set screw dimples on the barrel to assure they are centered and fully seated.
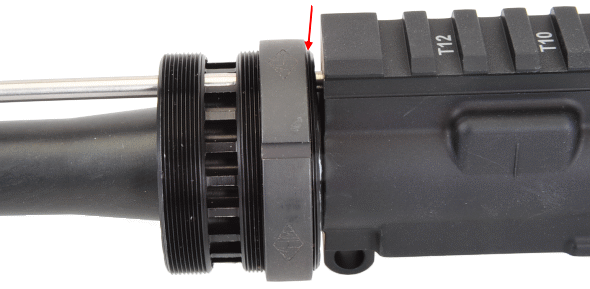
The jam nut is screwed onto the barrel nut until it is flush with the backside (Arrow above), then it is backed out one and one half turns to set the preliminary position for the handguard.
The handguard is slipped over the barrel and screwed onto the barrel nut and up against the jam nut, but not tightened. The gas block adjustment cannot be reached through the vent holed in the handguard, so the handguard jam nut must be backed off to allow the handguard to over rotate and allow access to the adjustment.
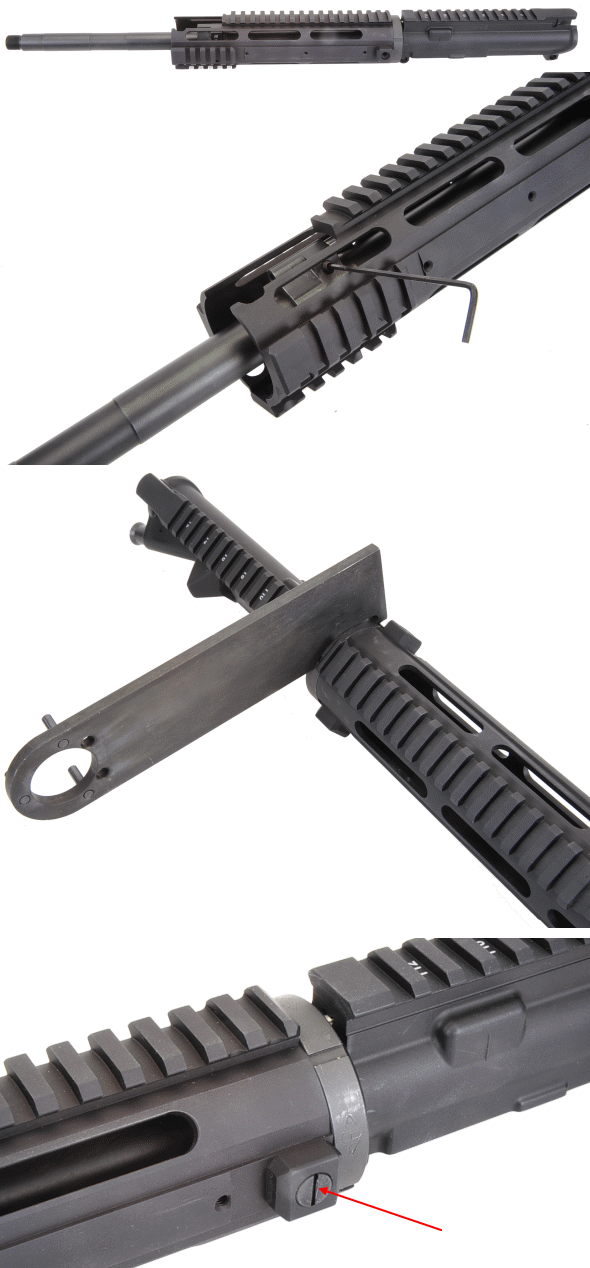
Once the prelim gas adjustment is made, the handguard is rotated so that the Picatinny rail on the receiver aligns with the rail on the handguard. A spanner wrench is used to tighten the jam nut against the handguard once the rails are aligned. Finally, two set screws, one on each side of the handguard are tightened, pinning the handguard to the barrel nut and preventing rotation. Purple Loctite can be used on these set screws.

You’ve probably already noticed the handguard above the gas block is cut away. This will allow us to change between low profile gas blocks and standard tower front sights as necessary.

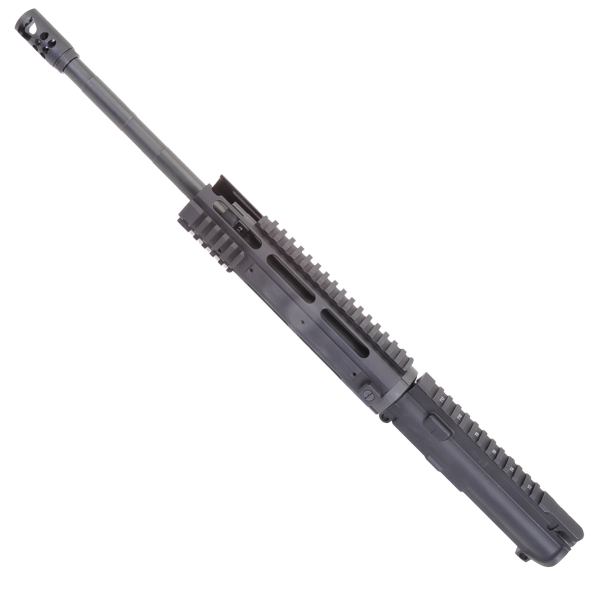
Original 5.56 NATO upper and the newly… almost assembled 300 Blackout upper. The old has a 20″ barrel, the new has a 16″ barrel. The last piece add was a highly effective Ruger Hybrid Muzzle Brake that cuts recoil, just about kills flash and directs noise away from the shooter and the firing line, thanks to its unique design. This one has 5/8″-24 threads. It is available directly from Ruger as “Hybrid Muzzle Brake and Lock Nut 30 caliber muzbrake-ln-30” $99.95.
I need to stop and work on some other time sensitive shop projects. I hope to get this completed later this week.

Email Notification