It is very important, to prepare for writing a firearms piece, to cleanse the mental pallet. Prior to anyone else arriving for the day, I sometimes like to sing a little Elvis…. No, not a physically little Elvis, but rather a retrospective of the King’s most iconic songs. I was in the middle of…
“`We can’t go on together
With suspicious minds (suspicious minds)
And we can’t build our dreams
On suspicious minds”
..when my wife dropped by with coffee, very nice lady, who proceeded to jump right in with a vocal harmony and sang right down to the last…
I can’t walk out
Because I love you too much, baby”
…then she smiled at me, as only many years of less than effort free marriage allows a woman, and told me to go home and change out of my Thunderbird jumpsuit. So I am no longer in a mood for writing, my creative energy has been stifled, but I will try to go on. Hanging head, hound dog face.
The steadfast Ruger SR 1911
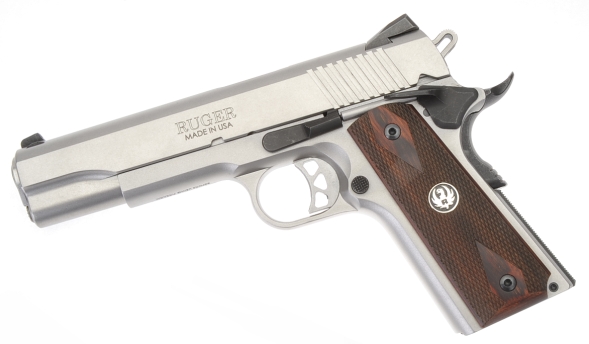 The Ruger, my Ruger AR1911 has been doing as intended, being shot along side a couple of firearms that are being endurance tested while I try to figure out the next step in its future. Improving performance in a firearm typically runs down a priority list of diminishing returns. The first can be beneficial for virtually any shooter, the tail end is more for those special folks who can use the finesse of a heavily reworked firearm to shoot cloverleaves at 25 yards.
Within “The Colt .45 Automatic – A Shop Manual” author Jerry Kuhnhausen offers a graphic illustration suggesting return on effort for modifications, breaking them into two general categories of features, those that improve a pistols mechanical accuracy and those that assist the shooter.
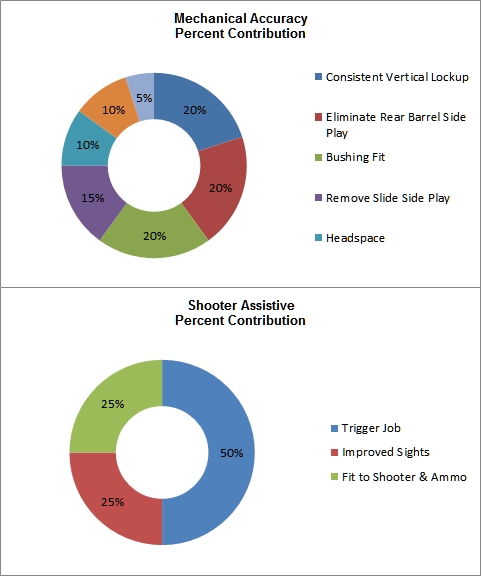
I know, everyone has a theory, but these are pretty much restated with minor nomenclature changes by many good pistolsmiths and competitors. I doubt there is highly refined quantitative data supporting Kuhnhausen’s assertions, but experience and observation go a long ways when an opinion is expressed. Yes, like all of those opinions offered on Facebook comments. The only thing missing is the notion of developing shooter proficiency, which may be the most expensive improvement to attain with a $5,000/Year ammo budget.
No, not the aftermath of a handloading session
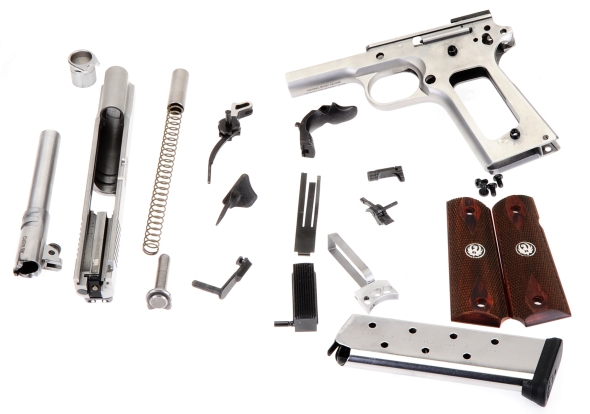
The truth of the matter is that getting in there and looking around can help identify corrections that need to be made and give a pass to areas that are clean as is in relationship to the preceding doughnut charts. At the same time, each component will be made available for inspection, a massage or for replacement as needed. Part of Browning’s genius was designing a pistol that did not assume its owner was a genius,so disassembly is relatively straight forward. Most articles go on the assumption that the reader already knows how to disassemble a model 1911 as in, “I won’t bore you with the details of disassembly”. Fortunately, I strive to be boring so I will drag you though the minutia with me. This applies to a Series 70 pistol. Series 80 has a few additional trigger bits that are not addressed in the following.
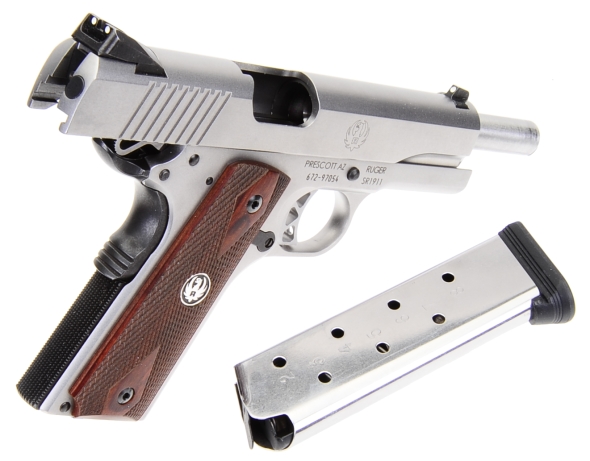
Always make sure the magazine is removed and chamber has been checked for empty before doing anything else. Firearms are an inanimate object and will do no harm unless mishandled or engaged to do so. Release the slide and allow it to move forward to a closed breech position, leave the hammer cocked.
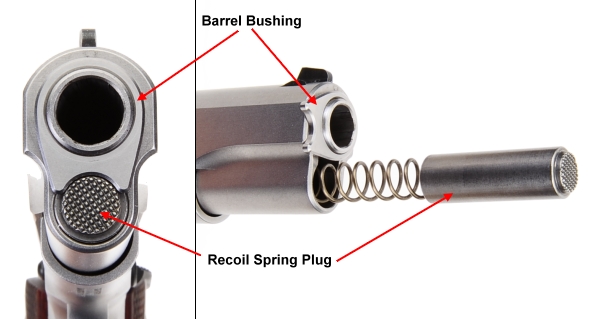
Flip, swipe or cajole the thumb safety into the “safe” position, which will lock the slide in position.Pointing the pistols muzzle away from self, depress and hold the recoil spring plug… tell it how your morning is going, while rotating the barrel bushing clockwise until it us clear of the plug. Ease, EASE, the plug forward and out, guiding it with your hand until it is no longer under pressure. Remove the plug, rotate counter clockwise while carefully pulling the recoil spring toward you and remove, set both aside. If the recoil spring is reluctant to come out and coil damage is becoming imminent, remove the plug, but wait until the slide is removed before removing the recoil spring.
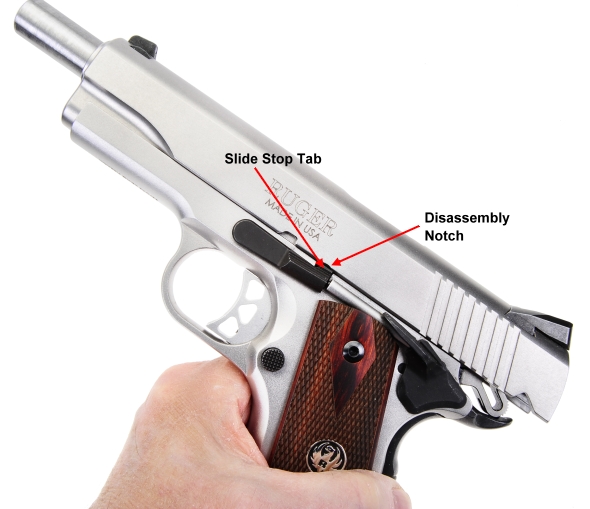
Move the thumb safety to the fire position and move the slide until the slide stop tab is positioned to align with the small disassembly notch.
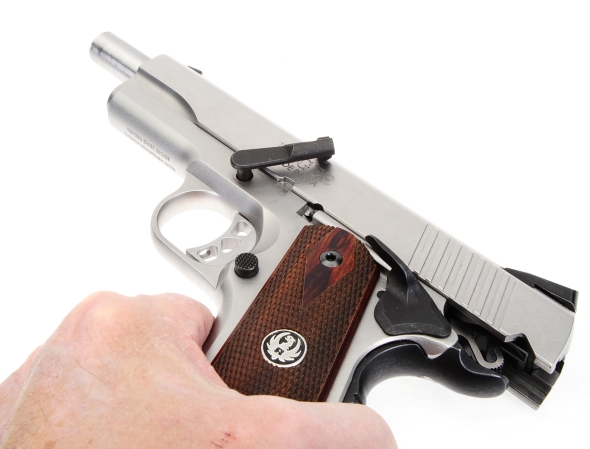
From the right side of the pistol, pressing on the slide stop pin should result in the slide stop popping out of the frame. In this case the stop was rotated up for a clearer view of the radiused disassembly notch. If the pin does not come out easily from a factory stock pistol, don’t go looking for a hammer, just work the slide fore and aft minuscule amounts while applying pressure to the stop pin and you’ll find a spot where the pin easily pushes out.
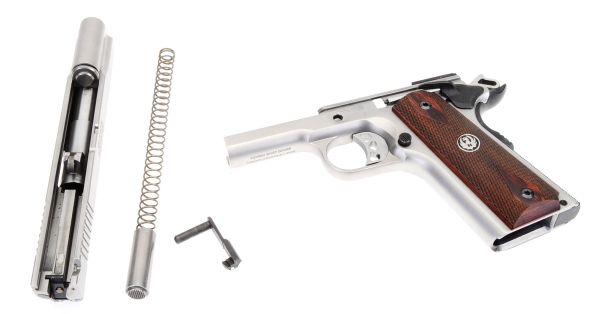 With the slide stop removed, the slide can be moved forward and off the frame. Because the frame assembly is of prime interest to me at the moment, the slide assembly was left intact for a bit, while frame disassembly continued.
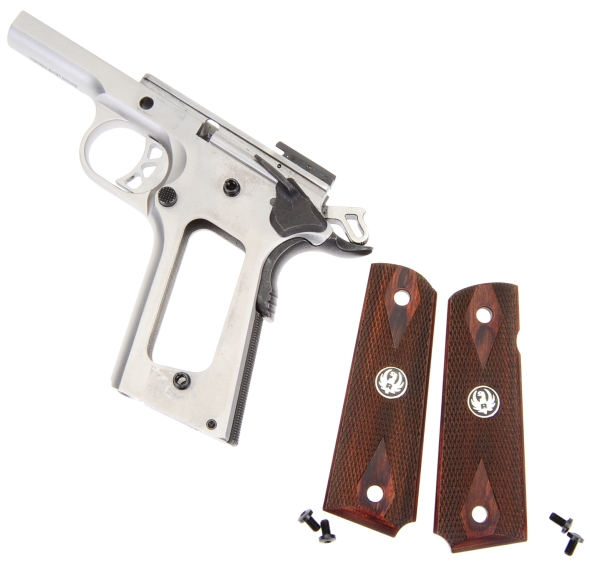
Grips could have been removed any time after empty chamber check and mag removal. They are removed so you can see… stuff inside the frame as the work progresses and so that you don’t kick yourself at a future date when you put the grips down on a protuberance and squash, mar, chip, or otherwise damage the checkering.
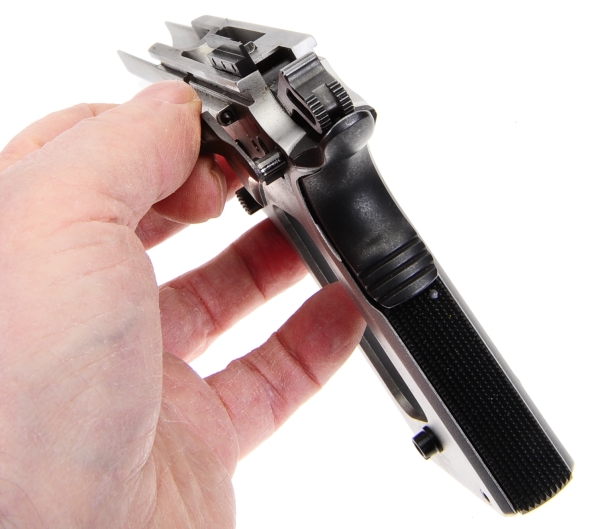
The thumb safety is easy to remove. Hammer back, you move the safety near the mid point of fire and safe position and wiggle it while pulling to the left until it pulls out as seen above.
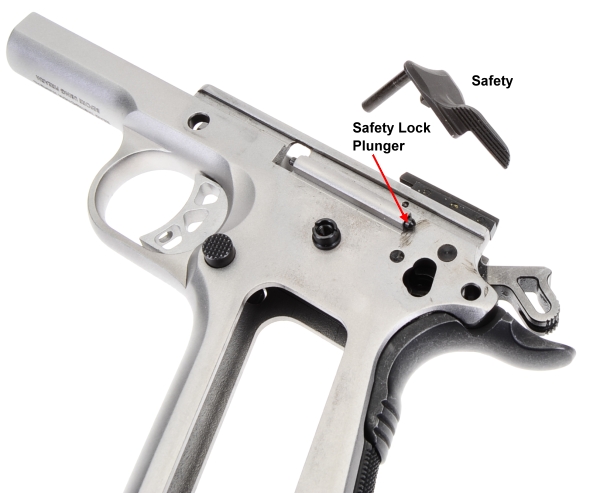
Some 1911 type pistols use thumb safety removal as an excuse to release their slide stop plunger, plunger spring and safety lock plunger like so much aircraft disbursed radar foiling chaff, to be later retrieved only with a floor crawl around the shop bench. Ruger uses the kinked spring coil method to prevent this from happening and, in fact, has made the plunger tube as a part of the frame.
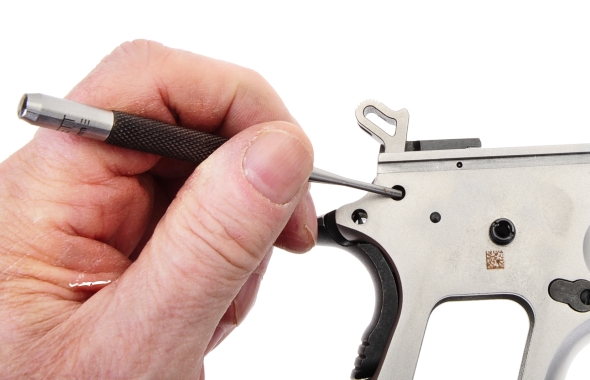
Next up is hammer removal. The hammer must be lowered in a controlled fashion so as not to damage the frame. The hammer pin is started out, right to left, with a punch. The right size would be one that is small enough to fit through hole in the frame but large enough to not scratch the finish off the pin.
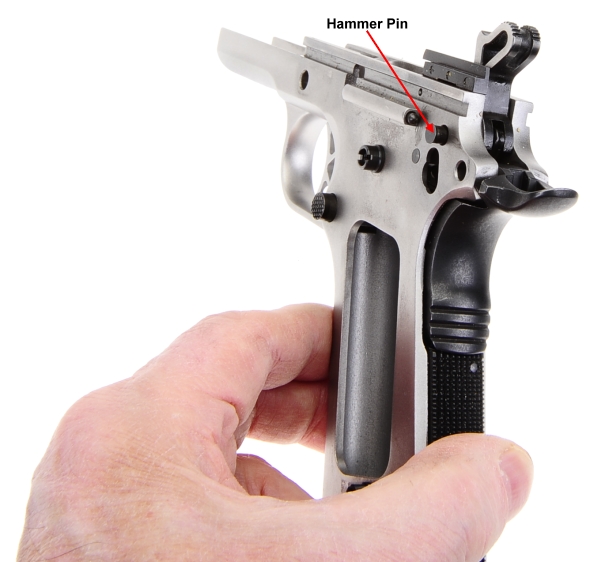
Once the pin is started out, it can be pulled free with finger pressure. The pin is flanged, removed right to left and installed left to right.
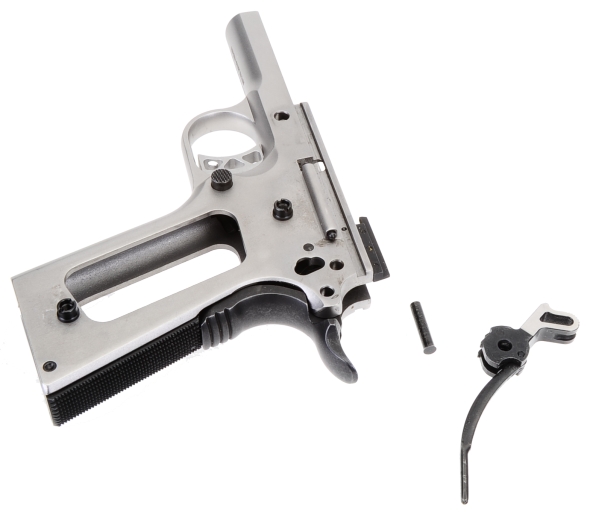
Pulling up and back frees the hammer and hammer strut. It pays to take care that the hammer strut pin that holds the two pieces together does not fall out and join the safety plunger parts on the floor.
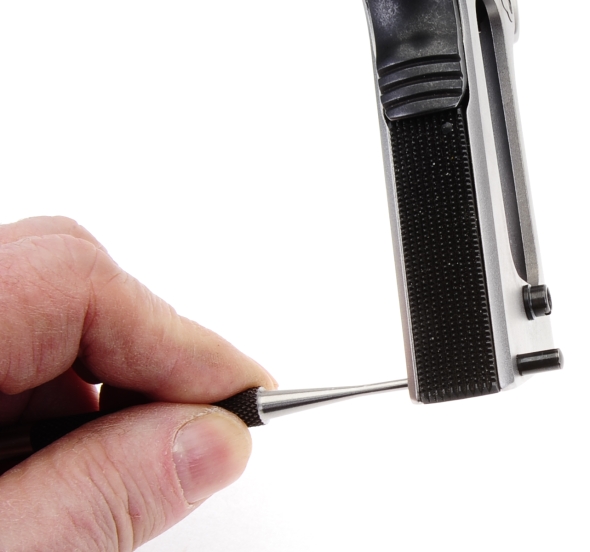
About now, the mainspring housing pin is pushed out, left to right, dimple side versus convex, and the mainspring housing is removed by sliding down and out of the holding grooves in the frame.
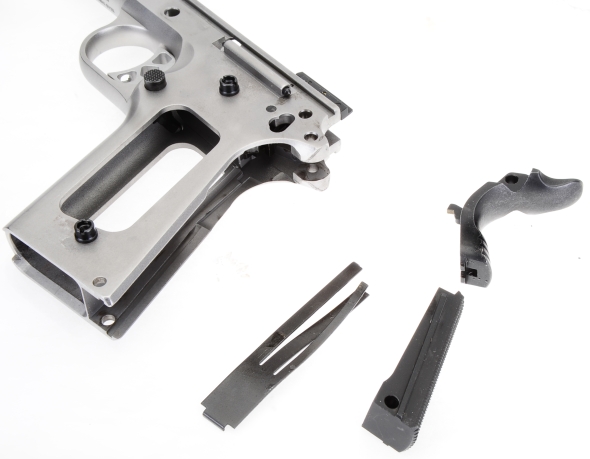
When the mainspring housing is removed the sear spring will probably pop out the grip safety. If not, remove the grip safety and sear spring. Be careful when removing the sear spring to not bend its fingers. The bottom of the spring has a tab that holds it in position in the frame and this is where the spring and frame are separated.
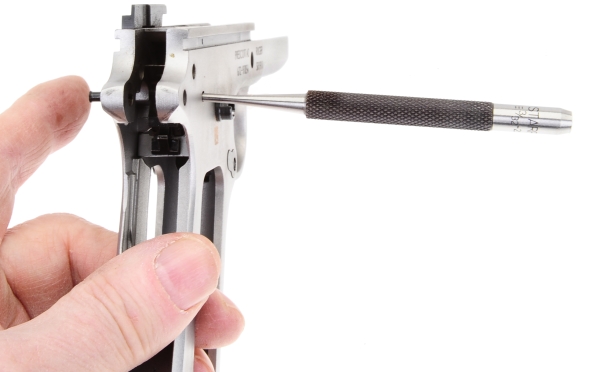
The sear pin, like other flanged pivot pins, is pushed out right to left. When the pin is out the sear and disconnector should fall free.
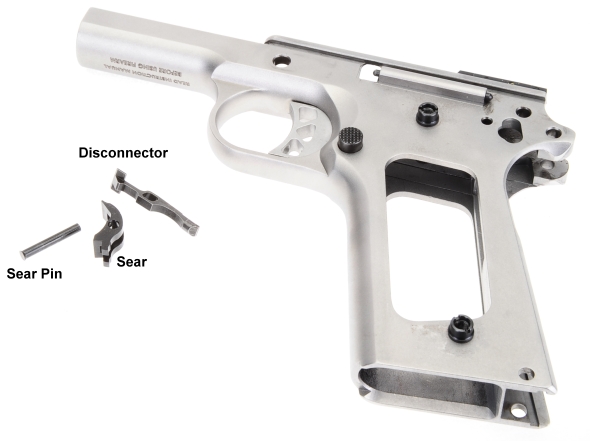
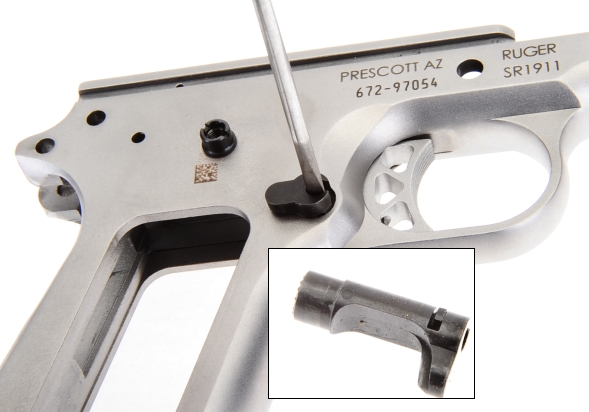
The magazine catch, below, is secured with a magazine catch lock with a slotted head. A screw driver that fits inside the lock diameter is necessary, so that the side of the screw driver does not engage the break in the wall of the catch, which would prevent the screwdriver from turning. Other than assuring the screw driver blade is clear, pressing in and turning counterclockwise a 1/8 turn should unlock the catch and free the magazine catch from the frame.
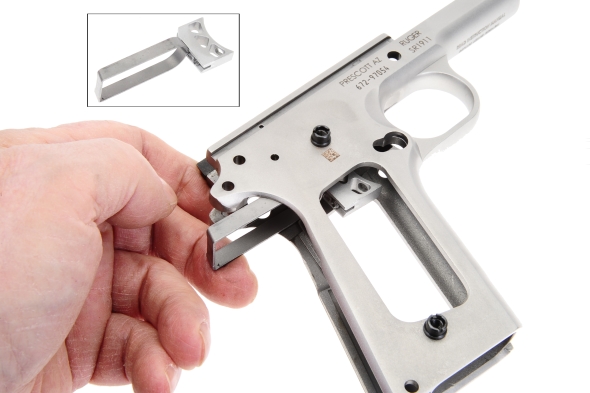
Finally, the trigger is depressed and pulled out by the bow from the rear of the frame.
And, finally, a little off the top…
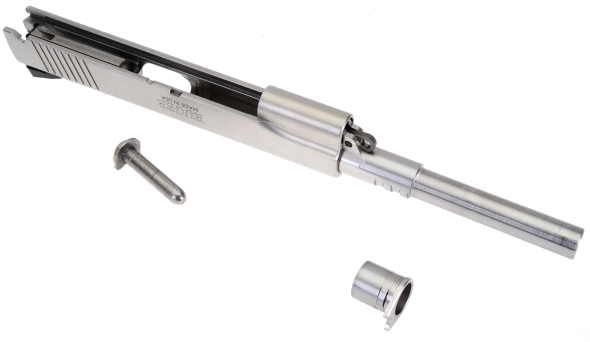
The stubby recoil spring guide is lifted out of the slide, the barrel bushing is rotated counter clockwise (facing) and removed, the barrel link is tipped forward, and the barrel is pulled through the front of the slide.
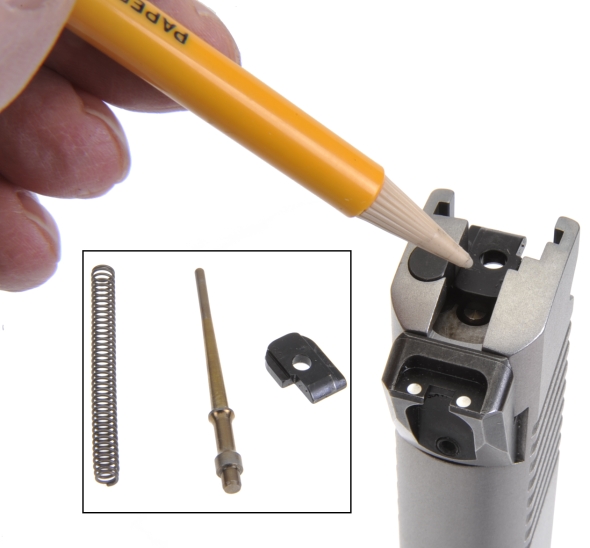
The firing pin and firing pin spring is removed, carefully, by using this very special tool to slide the firing pin stop clear of the firing pin, while keeping pressure on the pin and controlling its release from spring pressure. Then the slide is tipped on end and the parts will fall out. I did not remove the sights or ejector as… I did not want to and it was unnecessary.
I am going to pause and return with a dimensional and fit check out of parts and assemblies or as soon as my shutter release finger heals… sports injury.

Email Notification