 I was finishing my prep work for the range this weekend, and I was down to the last batch of handloads. Very conservative .243 loads for my wife, and a friend who will be making the trip with us. I had been loading .30/30 ammo for the Contender, so everything had to be changed over: shell plates, APS primers, powder, etc.
I use a small base die set for the .243, because the ammo sees use in both a lever action Browning and a Remington bolt action. All I had planned to do, initially, was to put a sizing die in the press, and decap and resize some brass. This sizing die always feels a little tight, but the required effort seemed a little higher than normal. I interpreted this as dry cases and tried to compensate by increasing case lube.
 The lube began to build up inside the die at the shoulder area, the pressure relief port in the die was blocked and hydraulic pressure started putting dimples in the cases. Compounding the problem, burned powder accumulation was getting transferred to the decapping rod assembly, the interior of the die was transferring the film to the lube on the cases, the cases passed the film to my fingers, and I transferred the stuff to the lube pad where it, of course, got on everything.
 With deadlines and schedules in mind, I convinced myself it was okay to press on with decapping and resizing, then clean up before I went on to priming. Unfortunately, the problem caught up with me when a rim let go, and a case stuck fast in the die.Fortunately, other than the loss of one really grimy case, nothing was broken.
So I looked around, realized what a mess I had on my hands, and decided to start from scratch. I took down the press, disassembled everything and started cleaning, something I should have done in the first place. I tossed the brass back in the tumbler while I was occupied in other areas, and made sure I washed out the lube pad along with everything else. Counter tops were vacuumed, and die sets were soaked in cleaning solvent and scrubbed clean.
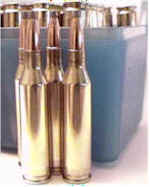 It was actually a pretty relaxing process. I carefully put everything back together, and finished decapping and sizing without a hitch. Then I set up the APS priming press, and the Ammo Master for auto progressive metering powder and seating bullets.
Handloading went along easily this time. Cartridge length never varied more than a couple of thousandths, powder checks were all within a tenth, and everything stayed neat and orderly. The finished product looked good.
I guess it’s easy to get caught up in priorities and forget the idea is to enjoy the handloading process, follow it correctly, and produce something to be proud of.
A Case for the Contender
 One of the best parts about owning a Contender is the number of barrels and accessories that are available. Unfortunately, after accumulating a few pieces, it becomes difficult to haul much of it around with you. So on a shooting day, I usually decide on a single barrel and leave the rest behind, which sort of defeats the purpose of having a Contender.
Doskocil has an inexpensive double layer case that will allow me to load up scoped barrels and grip sets on the lower level, and put the primary setup on top. I picked mine up for a little over $30, about one third the cost of a similar size Browning Vault, and about half the price of a good soft case.
The Doskocil measures 19.5″ X 13.5″ X 7.5″. Probably as compact as you can get and still fit an assembled Super 14″ barrels Contender with a scope installed. The lock work isn’t great, but I’m not sure what a great lock can do on a case that anyone could walk off with, if left unattended. Now I can spend the money I saved on things that shoot.
Stress and guns – Time for a rest
Ever notice how periods of high stress are great opportunities for getting things done ? That aggravation, frustration and general hostility can be channeled into energy that will allow you to finished projects in a single day, you would have normally blow off for weeks. On really special days, it’s possible to do heavy carpentry work without the aid of tools. I thought you might like to work along with me on one of my stress relieving project days.
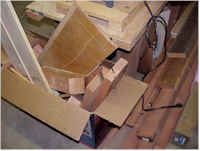 To the untrained eye, this is a box full of wood scraps, perhaps sprinkled with a small amount of trash, and something living and organic nesting in the bottom.
To the connoisseur of pointless busy work, this is a “yet to be structured masterpiece”, except for the white box in the back, that’s the table fan I couldn’t find all summer. Wonder what that plug connects to ? I’ll just go ahead and plug it in and see…
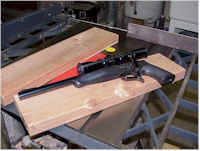 Well, the plug is connected to something that makes a low whirling sound, but it’s coming from under a bunch of stuff under the work bench, so I can’t pin point exactly what it might be. But I do have this hand canon, a bunch of scrap wood, and they seem to be about the same basic size. Clearly project synergism.
That yellow dot on the table saw is a Craftsman Exact-Eye saw cut indicator. I’ve owned that saw for 10 years, have never figured out how to use the yellow dot, and I still cut to the wrong side of the line. If anyone has a clue, or knows the whereabouts of a manual that explains the dot’s use, I’d appreciate a point in the right direction.
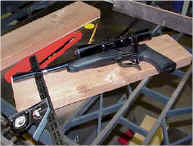 I didn’t have a measuring tape, but I figured if this device was to be used for the Contender, I could probably use the gun as a guideline for length. So I put down a pencil mark on the board just forward of the muzzle, used the square and made a cut off line – about 12 McDonalds French fries long, or 21.5″. I think it’s near lunch time
I don’t know why the other board is there. I only know I can’t have a project with one board, so I assume I’ll eventually need it. Am I good at this, or what ?
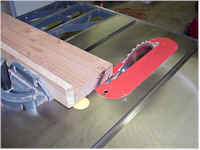 I’m using the 20 TPI Piranha blade which, as names go, is great. Unfortunately, it binds, burns and kicks back, just like all of the other sale priced carbide tipped blades I occasionally buy. But it worked well enough to true up the end of the board. Wonder if anyone ever named a blade the “Chompin’ Trout”. When it comes to naming products, I guess reputation in the animal kingdom means everything.
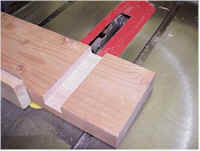 From the looks of that cut, the Piranha was working overtime. When I wasn’t looking, someone changed the table saw over to a dado blade and this was the unfortunate result – significant wood loss.
I made a 1.5″ wide cut, starting 3.75″ in from the short end, which could have been either end, until I made the cut. And yes, there actually is a reason for using these dimensions.
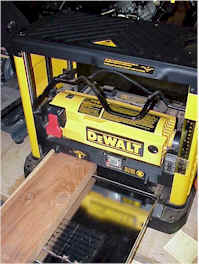 The purpose of this machine is to make lumber into saw dust and wood chips, and generate a lot of noise in the process. In this regard, it ranks only second to the joiner, although it’s close, almost a coin toss, but not like in the NFL.
If you use one of these gems, wear goggles and a filter mask, or you’ll end up spitting toothpicks. If not, at least pick a correct wood grain and texture that won’t clash with the interior color of your lungs.
Right about here I found a use for that extra board from about three pictures ago. I planed its thickness down to the dimension of the groove in the first board. I also took the opportunity to clean up all surfaces to avoid the possibility of a splinter.
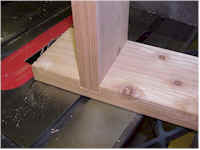 Oddly enough, when I stuck the first board sideways into the now clean second board, it fit and formed a…wait…let me look it up….here it is… a “through dado joint”. Neat, I’m impressed. This is a trial fit, so nothing was permanently attached. Norm can cut pieces of lumber and permanently fit them together without a trial run, but hey, we can’t all be Norm.
The board with the groove officially became the base and is designed to lay horizontally, groove side up. The second board became the rest, and is positioned in the groove, at a right angle to the base.
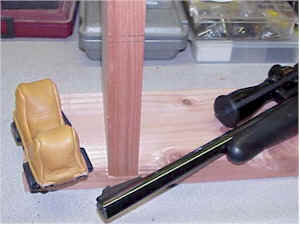 Shortly after receiving its name, I cut the rest down in size. Working from a table that is 30″ high, about the same height as the shooting bench at the range, I temporarily assembled the rest to the base.
I then put the Contender, butt down on the base board, barrel along side of and crossing the vertical rest. I put a small level on the top of the barrel, centered the bubble, and drew a pencil mark on the side of the rest, just under the barrel.
Then I measured the low point of a small rest bag, and further subtracted that distance (moving down) from the first line. After all of this motion, the board ended up being 7″ high.
Hey ! There’s my Dremel box. Every time I look at the background of these pictures I find another tool I thought had been lost or permanently misplaced. That Dremel’s been missing since 1978. There are many side benefits to these projects. There is a maroon box next to the Dremel. It’s my industrial stapler. It’s been broken and hasn’t worked since 1978. If I toss it out, I’ll have no place to stack my router bits.
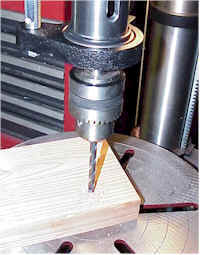 Wow, the perspective kind of makes me dizzy. I don’t think I mentioned I was using redwood. It could have been oak, pine, poplar, or anything else the saw would cut. I just happened to have finished a deck project that left me with some scrap pieces of heartwood, and that became my supply. Redwood is actually pretty soft, and isn’t good structural material. Used for this rest, it will be relatively light, and not mar the surface of a guns wood or metal parts.
Here I’m drilling a couple of holes in the rest. I used the small rest bag’s tie down eyelets as a guide to locating the hole positions prior to drilling. I made my marks 1″ below the eyelets and 1/2″ toward the outside. Locating the holes this way will make the bag pull down down tightly on the top of the rest.
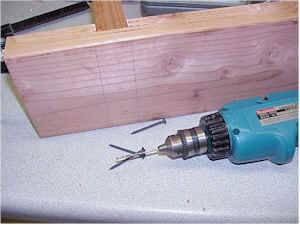 Since I was drilling holes, I went ahead and drilled several pilot holes through the bottom of the base, and on into the rest. When completed, the two pieces will be secured with 2″ deck screws and exterior wood glue.
So far I’ve covered the base and the barrel rest, but I haven’t provided elevation control for the gun, or any height or adjustment for irregular surfaces to the base. The next piece controls the angle of the bore relative to the base.
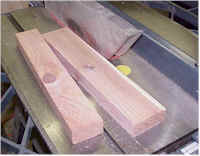 I cut a piece of the stock to around 13 1/2″ X 2″. We’ll call this the grip support. It is to be anchored to the base, just behind the vertical rest, with a hinge. It will be raised and lowered with a simple adjusting screw located at the rear of the support.
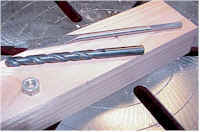 I measure in 1″ from one end of the board, centered side to side, and made a mark. On the bottom side of the board, I made a recess the thickness of a 1/4″X20 hex nut, using a 3/8″ boring bit. Then I used the 1/4″ bit to drill a through hole, and I scrounged up a 3″ long 1/4″ X 20 bolt.
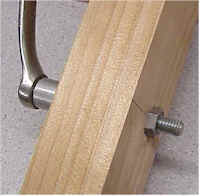 Because there will be an adjusting screw passing through it, the nut needs to be anchored in the board so it can’t easily turn on the board when light screw pressure is applied. What you see here is a process of inlaying the nut into the wood.
In the picture shows a box end wrench over the head of the 3″X1/4″X20 bolt. The bolt has been passed through a very heavy walled unthreaded bushing, through the board, and into the hex nut. The nut is on the bottom side of the wpe2C.jpg (1909 bytes)board where the 3/8″ diameter recess hole had been cut. By tightening down on the bolt, the hex nut is pulled into the softwood and locked in place.
I drew the bolt in slowly, stopping every now and then, giving a chance for the wood to adjust to the pressure cut. If I cranked the bolt down too quickly, the piece would have split. The bushing is from a Mercury Montego power steering pump, with a 460 CI engine. I have also had success with waterpump bracket spacers from Torino’s, and spacers from Hurst 4 speed shifters. A heavy 1″ flat washer, I suppose would work also.
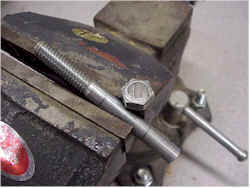 After the bolt served it’s purpose of pulling the nut into place, I whacked the top off so it could be used as the grip support’s adjusting screw.
The head was cut off because I wanted to keep the through hole in the top of the board as small as possible. Didn’t want it to catch on the gun’s grip. With the head cut off, the hole only needed to be 1/4″. Left on, it would require a 3/4″clearance hole. I also didn’t want the screw to protrude above the surface where it could get in the way of positioning the gun, or catch a hand on recoil.
I laid the grip support nut-side down on a flat surface and screwed the bolt in until it just bottomed out. I then made a narrow pencil mark on the bolt, just below the top surface of the board, and cut the bolt to that length.
 I used a bench grinder to touch up the end of the bolt and put a slight chamfer around the circumference. A couple of soft scrap boards protected the threads from the vice jaws.
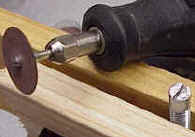
The adjusting screw now needed a cross slot, so it could be turned with a common screw driver. A Dremel with a small cutoff wheel was used to quickly make this cut.
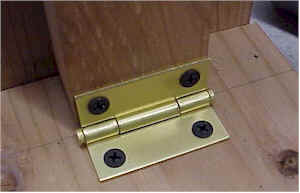 The brass flush hinge was placed 2″ back from the vertical rest to insure the grip support would not bind against the rest when lifted to various positions.Pilot holes were drilled, and 1″ deck screws were used to mount the hinge.
In the folded position, the grip support has about a 2″ clearance from the vertical rest, and about an inch from the end of the base. At the point where the adjustment screw on the grip support makes contact with base, I hammered in a roofing nail. The head will serve as a hard surface under the adjusting screw so it won’t gouge up the wood.
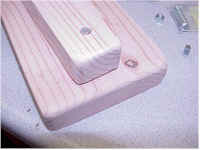 I used a disk and palm sander to round off all of the sharp corners at the front and rear of the rest. Rounding the edges help to prevent that “new equipment dork” appearance at the range, and reduce recoil damage when shooting that planned 50 BMG Contender from the rest.
All that remained was the placement height adjusting feet at each of the four corners of the base. I wanted a minimum of 7/8″ for the adjustment range.
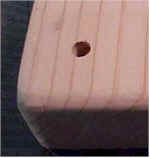
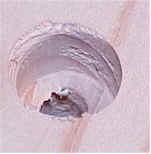 Measuring in and over 1″ at all four corners, I drilled 1/4″ through holes. I used a 5/8″ boring bit to to open the holes from the top surface, to a depth of 7/8″.
This set the adjusting range for lifting and lowering the front and/or back of the rest. It should provide up to 130″ of vertical travel at 100 yards, with the grip support adjusting screw doubling that range.
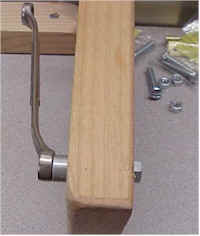 I flipped the base over and used the 3/8″ boring bit to recess the 1/4″ X 20 hex nuts so they could be made flush with the bottom. This time, as the nut was drawn into the wood, I added a little polyurethane waterproof glue around the sides of the nuts to hold them in place.
I light sanded everything so pencil marks were cleaned up and the wood didn’t look like a pile of scrap, even though that’s exactly what it is.
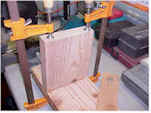 The parts were rounded up and clamp/glued together, screws were put in place, and the assembly was left to dry overnight. However, the base adjusting screws were turned after one hour to make sure glue didn’t find it’s way into the threads and permanently lock them in place.
 If you missed the part on making the actual pistol, please reference section C. The adjustments provide a vertical up/down range of over 10′ at 100 yards. Should pretty much cover every situation. Horizontal adjustment is unlimited, other than by the presence of someone at the benches to either side of you.
If I get a few more minutes of free time, I’ll probably add something to improve lateral stability of the grip support, and maybe a couple of spacer blocks for course adjustment to place under the grip support.
 Update – just as this story was being placed on the site, the pistol rest was modified to provide greater lateral stability to the grip support, and to place the pistol at a more typical neutral angle of inclination. The grip support retains an inch of fine adjustment, as well as the four corner course adjustment.
 The channeled spacer was made from a 3 1/2″ square 2″ thick block. The channel was cut with a dado blade, and the base was angle cut on the joiner to match the angle of the grip support.
The total project took a little over an hour of actual work, 3 diet Pepsi’s and a cup of coffee. Material cost was zero and I got to make a lot of sawdust and noise to make something related to guns. Now, wasn’t that relaxing ?
Thanks
Joe

Email Notification