As I’ve noted in all prior installments, this is not an attempt at instruction, only familiarization for folks who have not attempted to assemble an AR, but would like a basic overview of the process. None of the items assembled in this segment, with the exception of the pivot pin, can be installed without consideration for the other associated assemblies.
The pivot pin gets detention… High school all over again
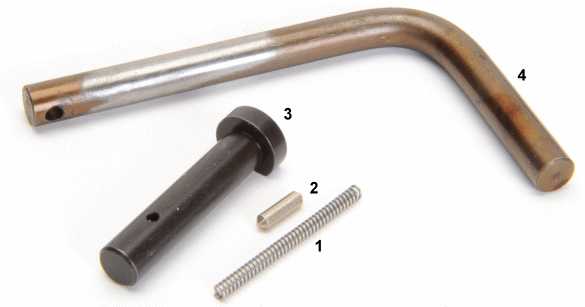
Included in the lower receiver small parts kit previously listed: 1. pivot pin detent spring, 2. pivot pin detent, 3. pivot pin. They are also available separately and in multi piece spring packs for those who elect not to buy the tool and like crawling around in the floor looking for small parts. 4. is a pivot pin installation tool Brownells # 080-216-011 $16.
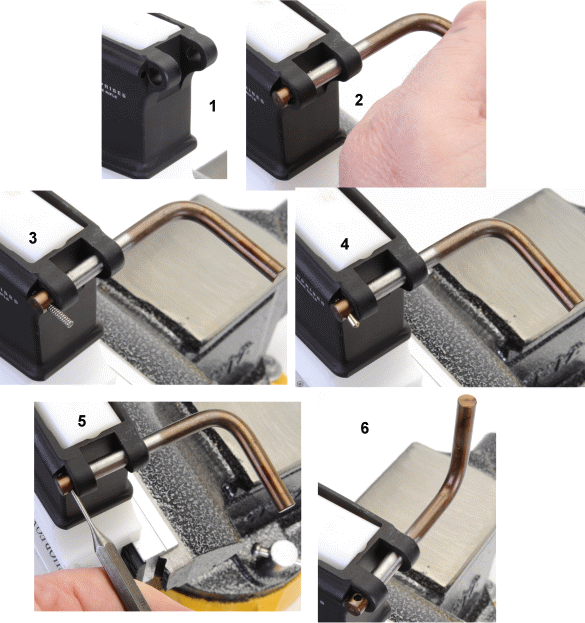
Installation of the pieces is pretty straight forward – 1. lower receiver upright in the vise block, 2. pivot pin installation tool is inserted, 3. pivot pin detent spring is inserted through tool and into the well in the lower receiver, 4. the pivot pin detent is installed the same way. Next, a punch is inserted into the tool and the detent is compressed just enough to clear the tool, then the tool is rotated upward with the punch in place, trapping the spring and detent behind the tool.
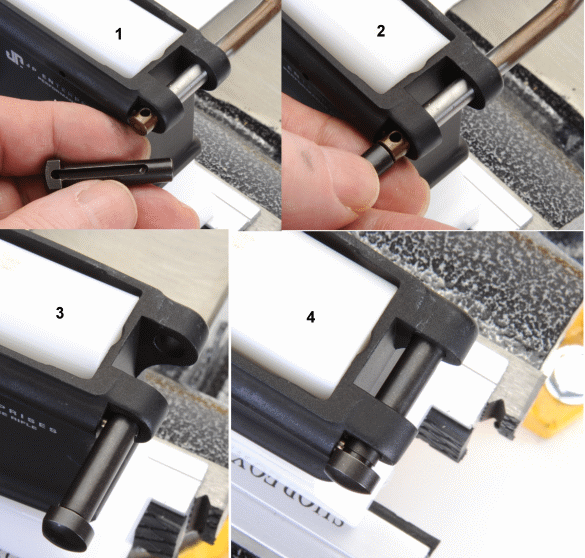
1. the flat on the head and the detent track on the pivot pin are visible. This is where the spring loaded detent rides, it’s job is to allow the pin to be pulled when separating upper receiver from lower, without the pin falling out and getting lost. 2. The pivot pin is pressed against the end of the tool, pushing the tool out from the receiver while the pin is pushed through. A little resistance has to be kept against the spring loaded detent or it will pop out as it clears the end of the tool. It’s sort of like one of those landmine movies where someone slips a rock over the mine to replace the weight of the guy who had been standing on it, sweating bullets. 3. and 4. The detent can be seen between the pin and the receiver, protruding into the pivot pin’s detent track.
Herr Trigger I presume?
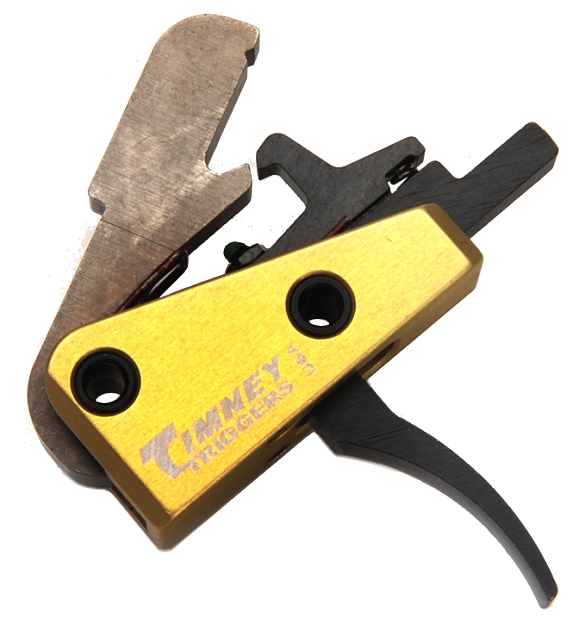
Something I’ve noticed with these AR type builds; eventually, there will be a need for a trigger. In this case, a Timney AR-15 667-S, Brownells # 883-000-024 $230. It is a single stage, small pin trigger Module, with a 3 lb pull and a solid shoe. While it appeared to be a very large trigger, on receipt, it proved to be appropriate in size and pretty much a drop in, but it must drop in, in coordination with the selector.
The astounding. The amazing… adjustable/reversible safety selector
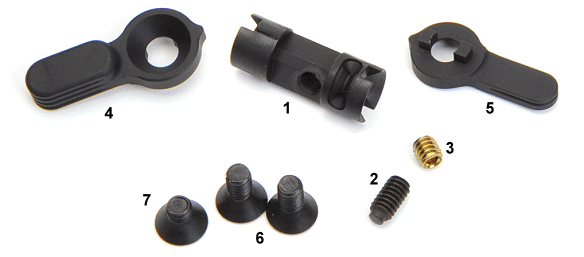
There were a few reasons for choosing the JP Adjustable Reversible Ambi Selector, Brownells # 452-000-043 $70. The drum to trigger clearance is adjustable and can be easily set to accommodate standard and aftermarket triggers. The selector can be operated from either side of the receiver and the full width safety lever can be placed left or right. Finally, it is a collection of very nicely finished pieces and very cool looking. 1. selector drum, 2. dog point set screw, 3. set screw, 4. full size safety lever, 5.minimized safety lever, 6. flat head cap screws, 7. cap screw plug.
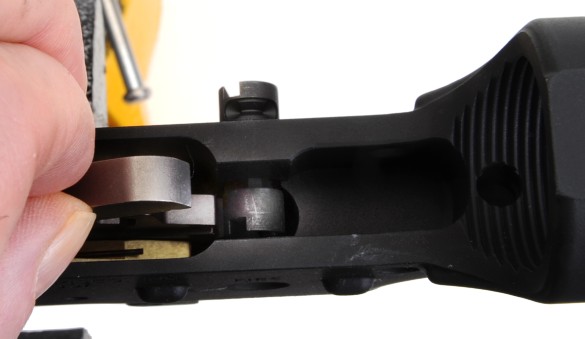
The selector drum is pushed into place, but rotated 180º out of installed orientation. This will provide the greatest clearance under the drum, enough room to slide the trigger under the selector and into place. At this point, the drum is rotated into proper orientation to align the detent track with the detent hole in the receiver and the trigger pins are slipped into place. They will be loose, so a bit of tape will prevent them from dropping out and into your coffee. No, Of course I never have food and or/drink on the active work bench
It is a grip, so ergo the grip goes, ergo… the ergo
In order to finish the trigger and selector installations, the selector detent, detent spring and grip need to be installed. This will keep the selector drum in place and in proper orientation to the trigger for final clean up assembly.
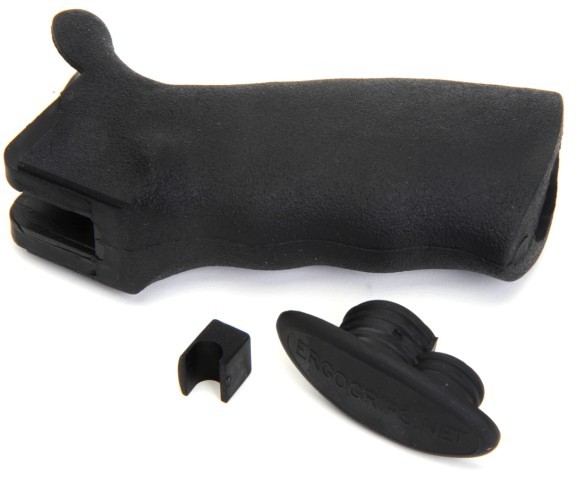
The grip selected is a Falcon Industries an Ergo Ambi Sure Grip, Black. Brownells # 573-000-025 $25. The grip has a hard poly inside frame, overmolded with a soft stippled textured finish. The bottom cap is removable to facilitate installation, however, instructions caution not to use the space for storage of cyanide capsules or decoder rings. The grip is supplied with a Ergo Gapper, a little fill piece to plug the gap between the grip and trigger guard, but that was already taken care of with our trigger guard selection.
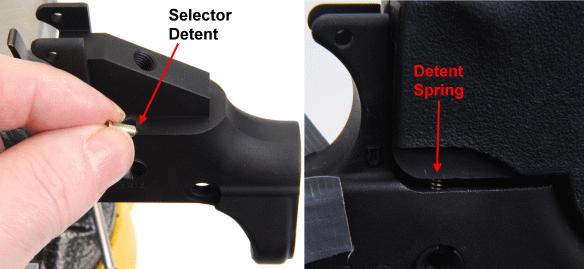
Mechanically, the detent plops in, point down, the detent spring fits into a recess in the grip and against the back of the detent to keep it loaded against the selector drum to hold its position.
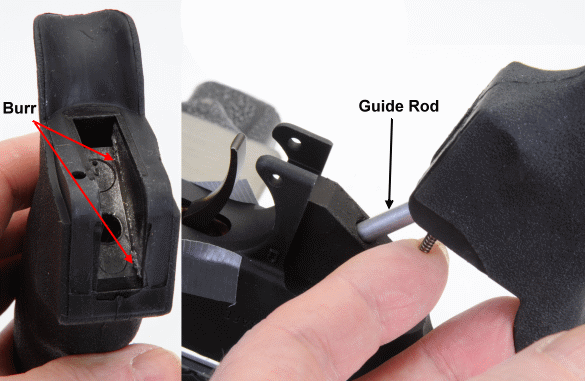
OK, most everyone has a need to invent a unique way to approach every mundane task. I use a section of aluminum .22 caliber cleaning rod to align the grip to the lower receiver when I install. The reason is that it keeps the grip in proper alignment with its fastener and it allows checking for a square fit and tight seams. It also makes it easy to push down on the initial fit to raise burrs and identify high or tight spots that need to be removed for a proper grip fit.
Finalizing
The trigger lock screws are tightened to stabilize the trigger and to secure the trigger pins. Always good to double check their position before cranking down on the lock screws.
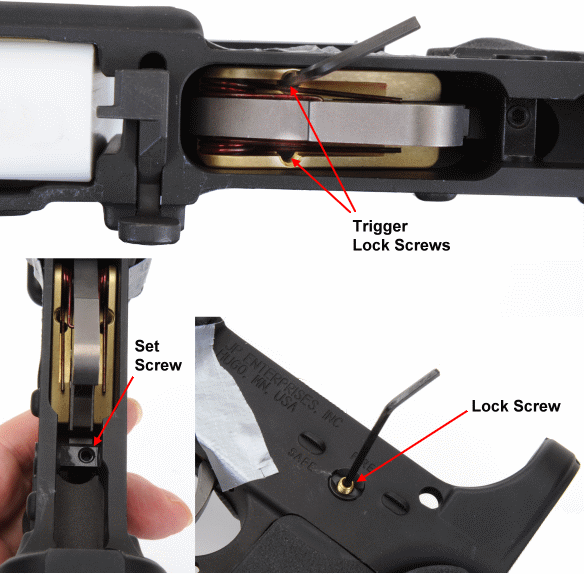
With the trigger and selector drum in their final location, the set screw is tightened until it contacts the trigger, then backed out 1/8th turn for proper clearance. The brass lock screw is fed into the left side of the drum where it locks the set screw in position. Loctite blue can be used on the selector set screw, but care is required. If you douse the threads of the set screw, when installed, the Loctite will find its way all over the selector drum and anchor it firmly to the receiver. Ask me how I know…
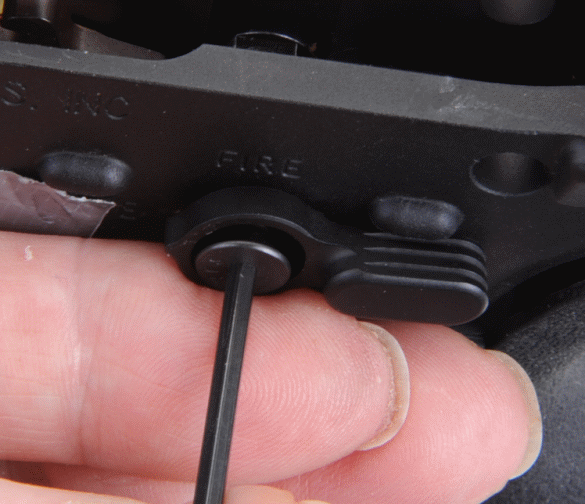
The selector levers are installed, full size to suit your righty-left-handed… ness. If desired, the minimized lever can be left off and the supplied 8-32×1/4″ flat head cap screw can be used to fill the exposed threaded hole. Then the selector and trigger are ops checked per their respective instructions. Any protective tape can come off or, if you really like the look, feel free to leave it on.
Guard Duty
The trigger guard is MagPul Enhanced Trigger Guard, with a laser engraved U.S. Flag. I bought it on Amazon for $26. An enhanced MagPul without engraving, carries Brownells # 100-002-198 $19. The bow allows for gloved hand shooting, which eliminates the need to lower a hinged guard and the guard fills the gap between the guard and the grip, so a secondary filler isn’t necessary.
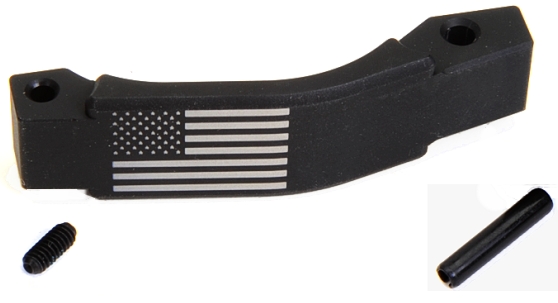
There are two worthwhile cautions regarding installation. The first is that it is a good idea to press some duct tape over the roll pin once it is started to protect the side of the receiver before you go to work on it with a punch and hammer. The second is to make sure the guard is in place within the tabs on the receiver and the tab is solidly supported by a bench block.
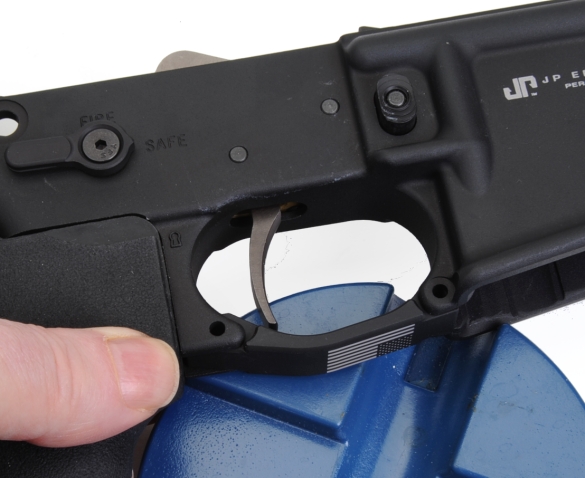
Without proper support it is very possible that the lower tab will snap off an make you a customer for another stripped lower. The guard is secured at the front hole location by a short set screw.
More to think about…
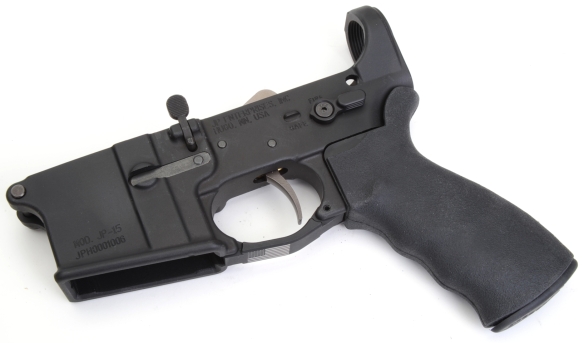
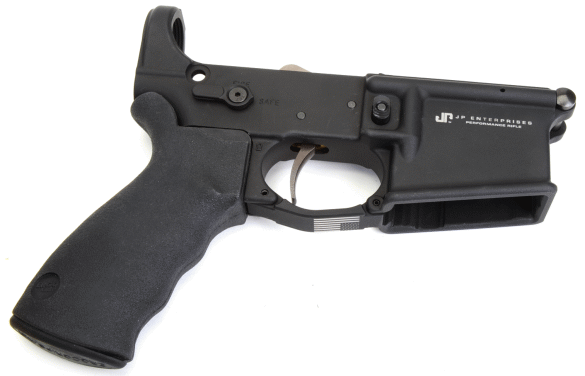
The upper is completed, the lower is completed with the exception of the buttstock and related buffer pieces. Not sure if we’re going to use a fixed or collapsible piece as yet. But we’ll get there shortly, after some work on a couple of other projects.
Your Perfect Rifle… Some Assembly Required Part 1
Your Perfect Rifle… Some Assembly Required Part 2
Your Perfect Rifle… Some Assembly Required Part 3
Your Perfect Rifle… Some Assembly Required Part 4
Your Perfect Rifle… Some Assembly Required Part 5
Your Perfect Rifle… Some Assembly Required Part 6
Your Perfect Rifle… Some Assembly Required Part 7
Your Perfect Rifle… Some Assembly Required Part 8

Email Notification